
S10/T10 Blazer 2WD V6-262 4.3L VIN Z (1994)
Dimmer Switch: Service and Repair
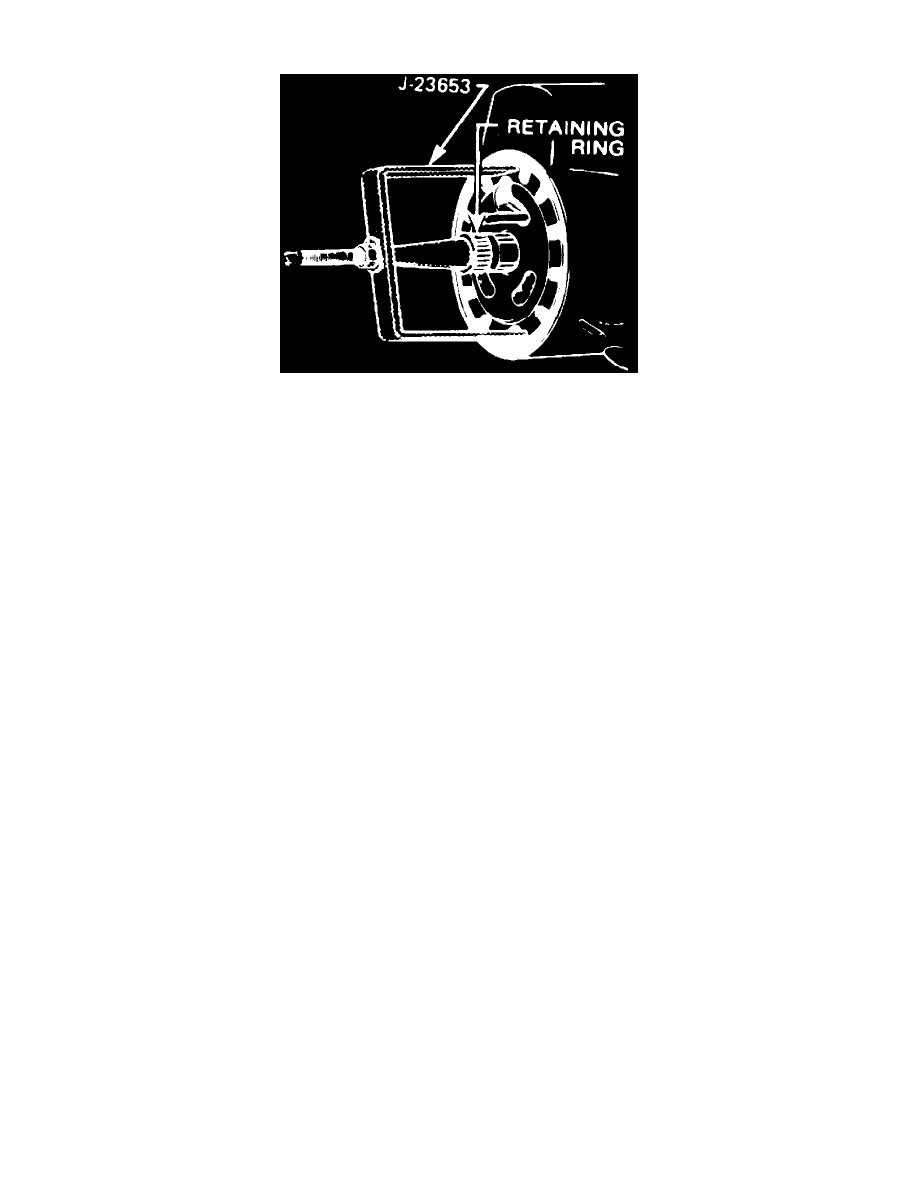
Fig. 5 Lock Plate Compression
1. Disconnect battery ground cable.
2. Remove steering wheel.
WARNING: Refer to Air Bags and Seat Belts/ Air Bags (Supplemental Restraint Systems)/ Service and Repair/ Air Bag System Disarming &
Arming.
3. Using a screwdriver, pry cover from lock plate.
4. Using lock plate compressing tool No. J-23653, or equivalent, remove lock plate as follows:
a. Compress lock plate and pry retaining ring from groove on shaft, Fig. 5.
b. Slowly release lock plate compressing tool, then remove tool and lock plate from shaft end.
5. Slide canceling cam and upper bearing preload spring from end of shaft.
6. Remove turn signal (multi-function) lever.
7. Remove hazard warning knob retaining screw, button, spring and knob.
8. Remove pivot arm.
9. Remove switch retaining screws and pull switch up from column, guiding wire harness through column.
10. Reverse procedure to install.