
S10/T10 Blazer 2WD V6-262 4.3L VIN Z (1994)
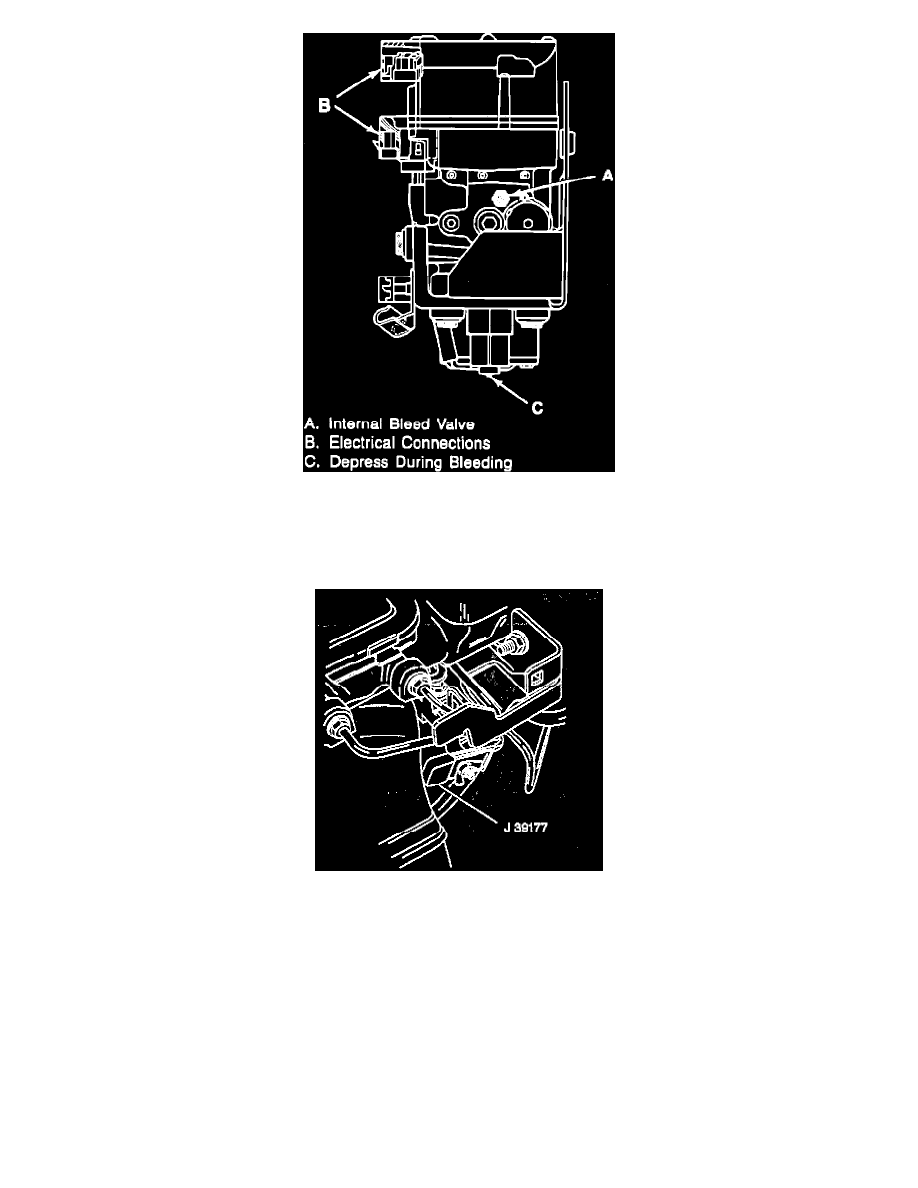
Fig. 59 EHCU/BPMV Module Bleeding
1. Open the internal bleed valves on the sides of the BPMV 1/4 to 1/2 turn each (A).
2. Install J 39177 on the left high pressure accumulator bleed stem (C) of the BPMV.
3. Install J 39177 on the right high pressure accumulator bleed stem (C) of the BPMV.
Combination Valve Pressure Bleeding Tool
4. Install J 39177 on the combination valve.
5. Check the master cylinder reservoir fluid level and fill if needed.
6. Bleed the brakes as described under Pressure Bleeding.
NOTICE: Always use the correct fastener in the proper location. When you replace a fastener, use ONLY the exact part number for that
application. General Motors will call out those fasteners that require a replacement after removal. General Motors will also call out the fasteners
that require thread lockers or thread sealant. UNLESS OTHERWISE SPECIFIED, do not use supplemental coatings (paints, greases, or other
corrosion inhibitors) on threaded fasteners or fastener joint interfaces. Generally, such coatings adversely affect the fastener torque and the joint
clamping force, and may damage the fastener. When you install fasteners, use the correct tightening sequence and specifications. Following these
instructions can help you avoid damage to parts and systems.
7. Close the internal bleed valves. Tighten Internal bleed valves (A) to 7 Nm (60 lbs. in.).
8. Remove the three J 39177 tools.