
S10/T10 Blazer 2WD V6-4.3L VIN X (2003)
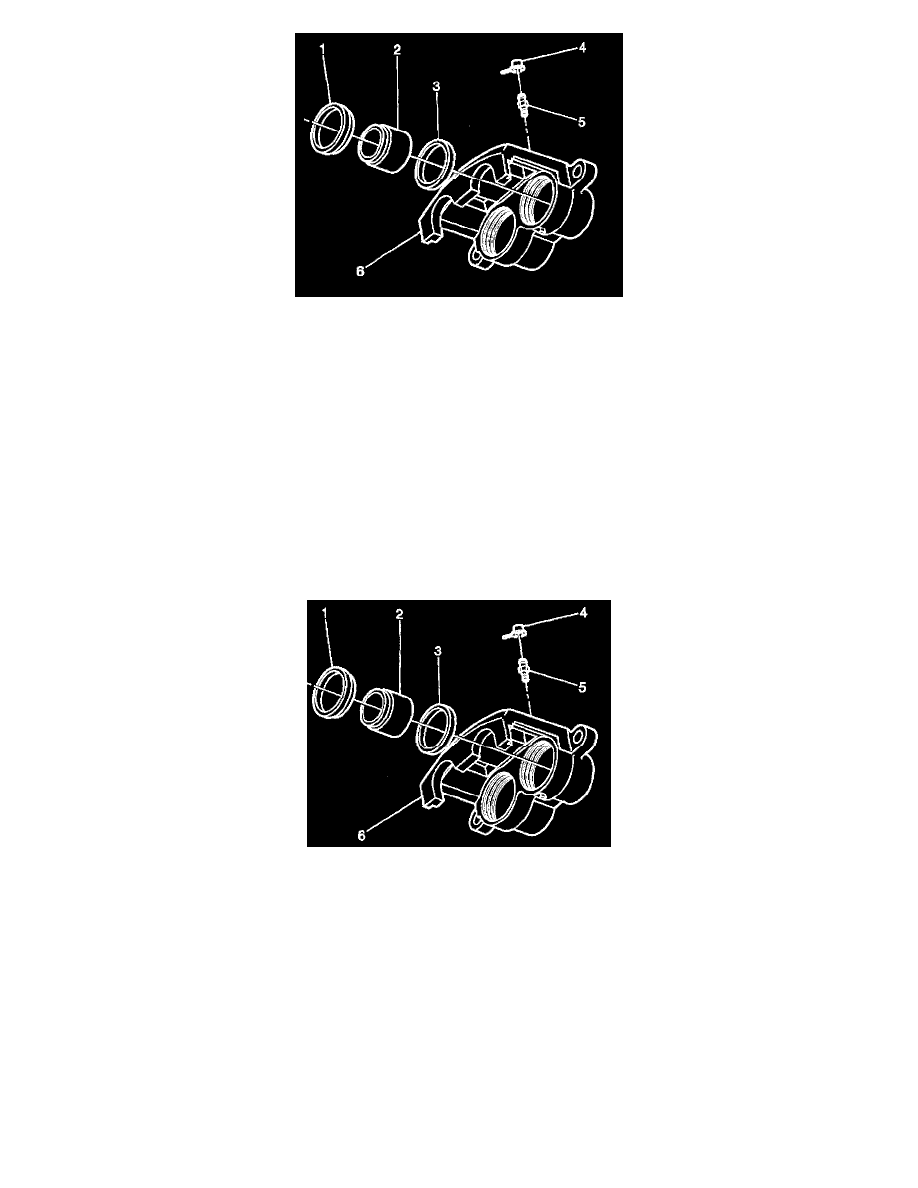
3. Remove the pistons (2) from the caliper bores.
4. Remove the boots (1) from the caliper bores. Do not scratch the caliper bores.
5. Remove the piston seals (3) from the caliper bores. Do not use a metal tool.
6. Remove the bleeder valve cap (4).
7. Remove the bleeder valve (5) from the caliper housing (6).
8. Clean the bleeder valve, the caliper bores, the caliper passages and the pistons with denatured alcohol. Dry the parts and blow out the brake fluid
passages. Use dry and filtered compressed air.
9. Replace the pistons or the caliper if any of the following conditions exist:
^
Scoring on the piston surface or in the caliper bore
^
Corrosion on the piston
^
Chrome plating damage on the piston
^
Corrosion in the caliper bore Use a crocus cloth in order to polish light corrosion from the caliper bore. Replace the caliper if the corrosion
cannot be removed.
^
Pitting in the caliper bore
Assembly Procedure
1. Lubricate the new piston seals (3), the caliper bores, and the pistons (2) using clean brake fluid.
2. Install the piston seals (3). Ensure that the piston seals are not twisted in the caliper bore grooves.
3. Install the boot seals (1) on the pistons (2).
4. Install the pistons in the caliper bores.
Notice: Refer to Fastener Notice in Service Precautions.
5. Install the bleeder valve (5) in the caliper housing (6).
Tighten the bleeder valve to 7 Nm (62 inch lbs.).
6. Install the bleeder valve cap (4).