
S10/T10 Blazer 2WD V6-4.3L VIN X (2003)
Control Arm Bushing: Service and Repair
Lower Control Arm Bushings Replacement
Lower Control Arm Bushings Replacement
^
Tools Required
-
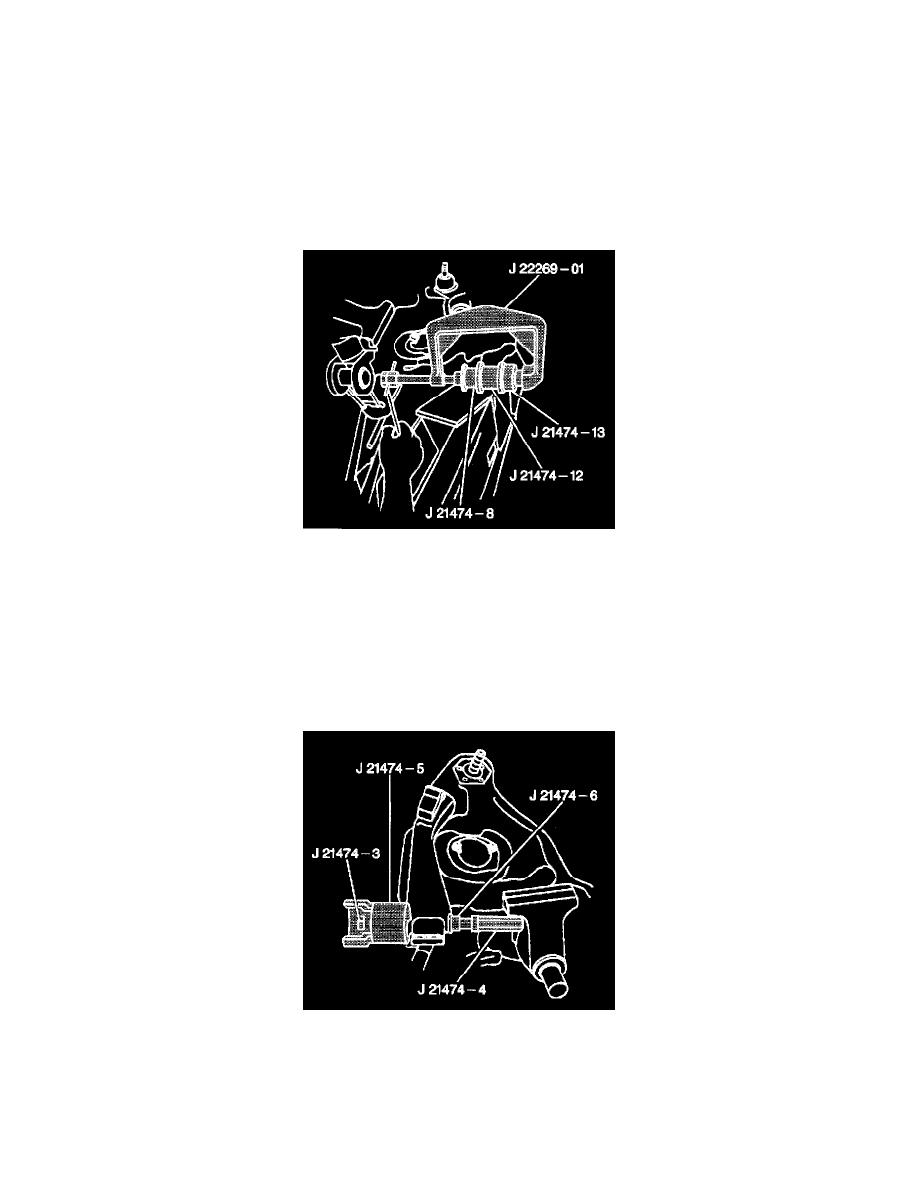
J 21474-01 Control Arm Bushing Service Set
-
J 22269-01 Accumulator and Servo Piston Remover
Removal Procedure
1. Remove the lower control arm from the vehicle.
2. Install the lower control arm in a vise.
3. Remove the rear bushing.
3.1. Install the following tools:
^ The J 22269-01
^ The J 21474-8
^ The J 21474-12
^ The J 21474-13
3.2. Tighten until the rear bushing becomes free.
4. Using a blunt chisel, drive the front bushing flare down flush with the rubber part of the bushing.
5. Prior to removing or installing the front bushing, place a wedge or spacer between the control arm bushing housing. This keeps the control arm
bushing housing from bending while removing or installing the bushing.
6. Remove the front bushing.
6.1. Install the following tools:
^ The J 21474-3
^ The J 21474-4
^ The J 21474-5
^ The J 21474-6
6.2. Tighten until the bushing is partially removed.