
S10/T10 Blazer 2WD V6-4.3L VIN X (2003)
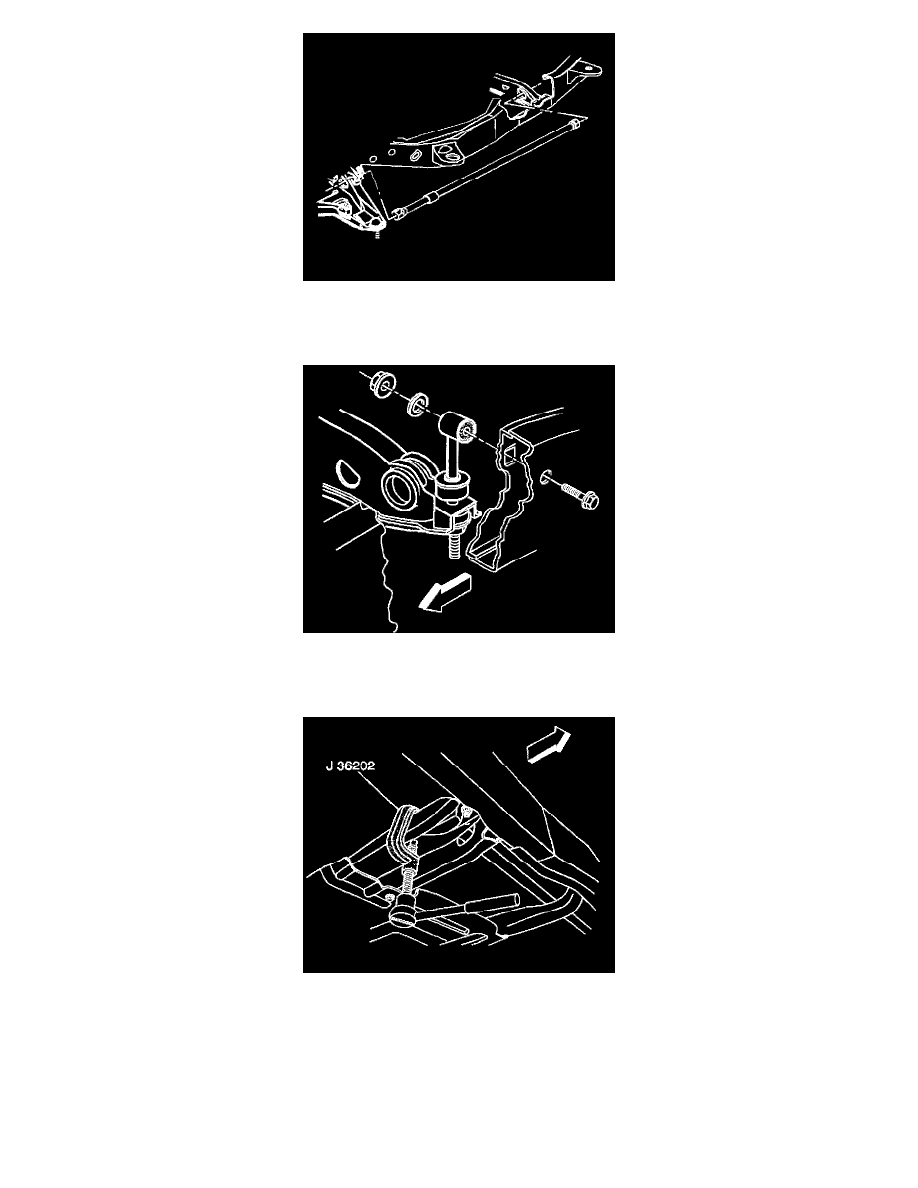
3. Install the torsion bars in relation to where the bars were removed.
4. Install the torsion bar support to the frame.
5. Install the torsion bar support link upper mounting bolts to the frame.
6. Install the torsion bar support link upper mounting nuts.
Tighten the torsion bar support link upper mounting nuts to 65 Nm (48 ft. lbs.).
7. Install the adjustment arm to the torsion bar support and slide the torsion bar rearward until the torsion bar fully engages the adjustment arm.
8. Install J 36202 to the adjustment arm and the crossmember.
9. Increase the tension on the adjustment arm in order to load the torsion bar.
Important: Tighten the adjuster bolt the same amount of turns that were required to remove the adjuster bolt during removal.
10. Install the adjuster bolt and adjuster nut
11. Remove J 36202 from the adjustment arm and crossmember.
12. Lower the vehicle.
13. Check the wheel alignment.