
S10/T10 P/U 2WD L4-151 2.5L (1988)
Fuel Pressure Regulator: Service and Repair
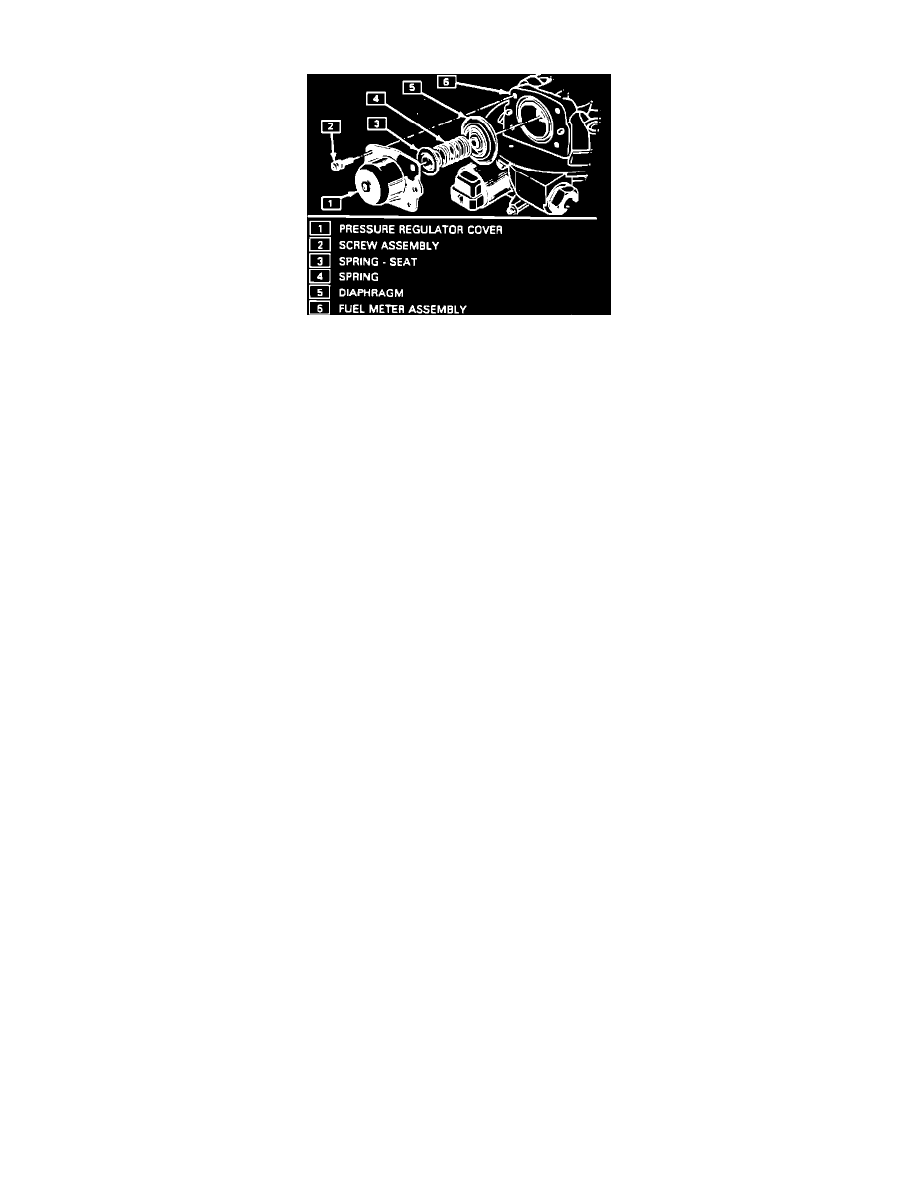
Pressure Regulator Assembly
NOTE: To prevent leaks, the pressure regulator diaphragm assembly must be replaced whenever the cover is removed.
WARNING: The pressure regulator contains a large spring under heavy compression. Use care when removing the screws to prevent personal
injury.
REMOVAL:
1.
Remove the four pressure regulator attaching screws, while keeping the pressure regulator compressed.
2.
Remove the pressure regulator cover assembly.
3.
Remove the pressure regulator spring.
4.
Remove the spring seat.
5.
Remove the pressure regulator diaphragm assembly.
INSPECTION:
Inspect the pressure regulator seat in the fuel meter body cavity for pitting, nicks, or irregularities. (Use a magnifying glass if necessary.) If any of the
above is present, the whole fuel body casting must be replaced.
INSTALLATION:
1.
Install a new pressure regulator diaphragm assembly, making sure it is seated in the groove of the fuel meter body.
2.
Install the regulator spring seat and spring into cover assembly.
3.
Install the cover assembly over the diaphragm, while aligning mounting holes.
NOTE: Use care while installing the pressure regulator to prevent misalignment of the diaphragm and possible leaks.
4.
Install the four screw assemblies that have been coated with the appropriate thread locking compound, while maintaining pressure on the regulator
spring. Tighten the screw assemblies to 2.5 Nm (22.0 lb-in).
5.
With the engine OFF and the ignition ON, check for fuel leaks.