
S10/T10 P/U 4WD V6-173 2.8L (1986)
Drive Belt: Service and Repair
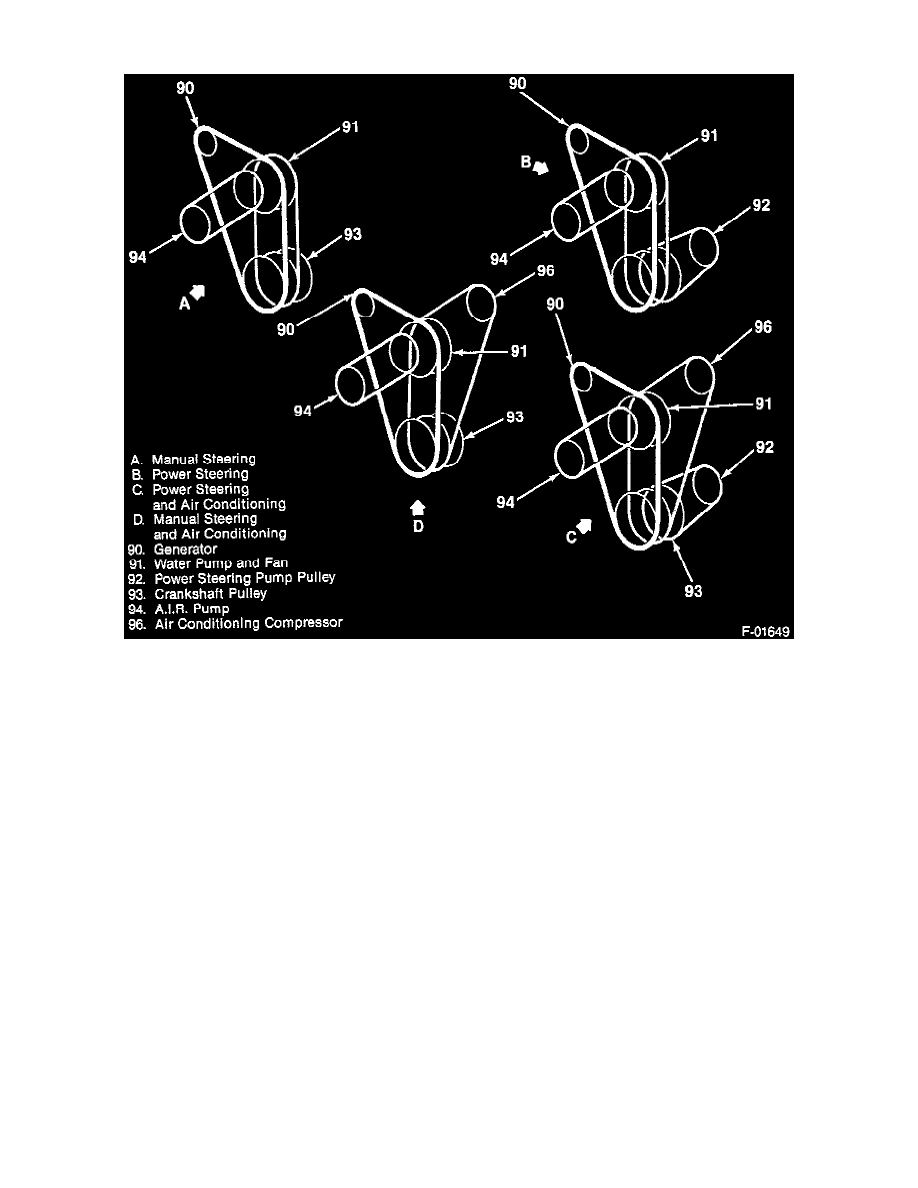
Belt Routing
REMOVE OR DISCONNECT
1. Remove the old belt.
2. Loosen the component driven by the belt.
INSTALL OR CONNECT
1. New belt.
CAUTION Place the belts into the pulley grooves by hand. Do not force a belt into a pulley groove by prying with a screwdriver, crowbar, or other
wedge type tool. Prying a belt into position can damage both the belt and the component.
2. Tension the new belt to Specifications. See: Specifications
^ Use BT-33-95 ACBN to measure v-belt tension, and BT-33-97M to measure poly v-belt tension.
^ Place the gage at the center of the greatest belt span.
CAUTION Avoid over or under-tightening a drive belt. A loose belt results in slippage which can lead to belt and pulley "glazing" and inefficient
component operation. Replace any belt which has become "glazed." A loose belt also places high impact load on driven component bearings due to the
whipping action of the belt. Over tight belts can lead to belt failure and component bearing damage.
Tighten
^ Component to mounting bracket fasteners.
3. Run the engine at idle speed for a minimum of 15 minutes.
^ This allows the belt to seat itself in the pulleys, causing the belt fibers to relax, or stretch.
4. Allow the drive belt to cool until warm to the touch. Not hot.
NOTE A used belt is one that has been rotated at least one complete revolution on the engine pulleys. This begins the "seating" of the belt and it must
never be tensioned to new belt specifications.