
S10/T10 P/U 4WD V6-4.3L VIN X (1996)
Lifter / Lash Adjuster: Service and Repair
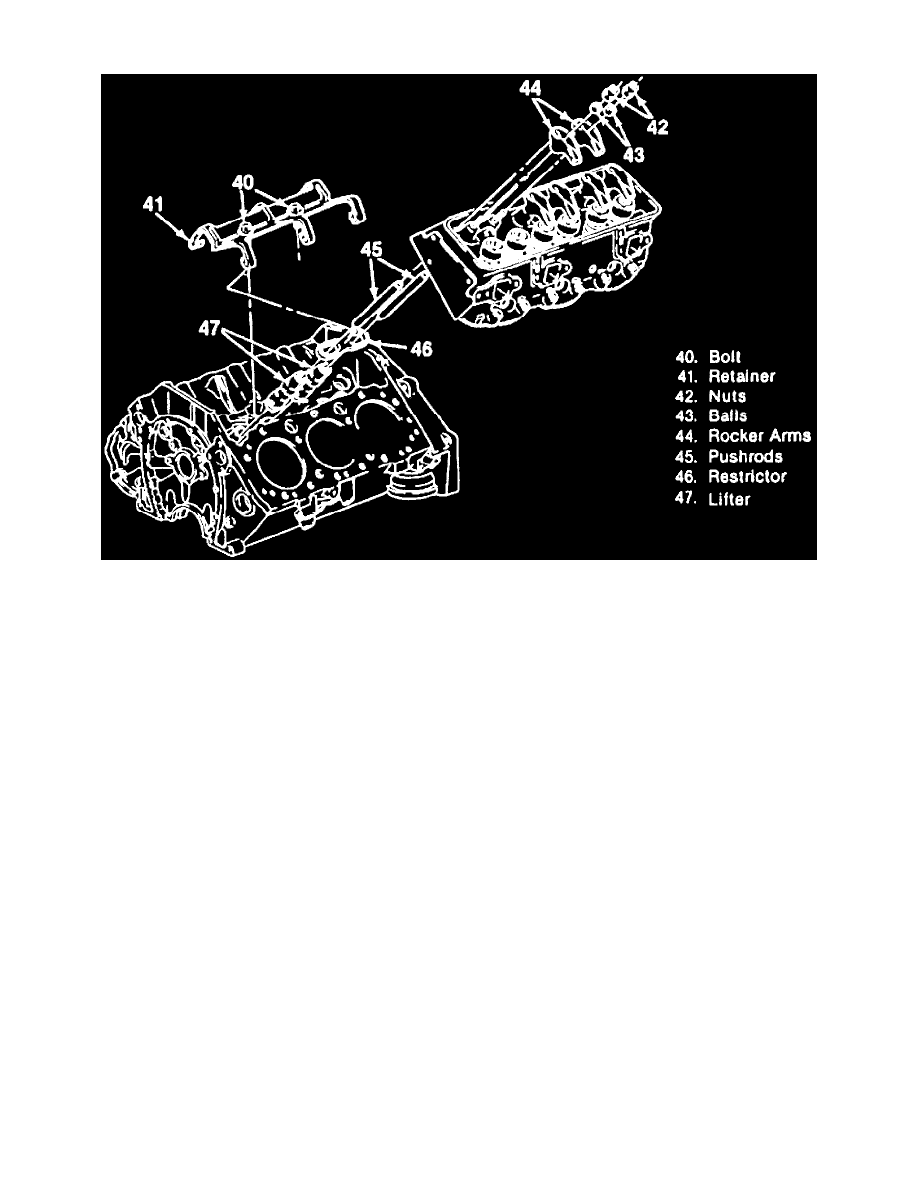
Fig. 10 Hydraulic Lifters And Retainer
REMOVAL/INSTALLATION
1. Remove rocker arm cover and pushrods.
2. Remove intake manifold.
3. Remove retainer-to-engine attaching bolts, retainer and restrictors, Fig. 10.
4. Remove lifters. Note lifter location when removing. Lifters must be installed in same bore.
DISASSEMBLY
1. Depress pushrod seat with pushrod, remove seat retainer, then slowly release spring tension.
2. Remove pushrod seat and metering valve.
3. Invert lifter and tap on flat surface to remove plunger and plunger spring.
4. Remove check ball retainer by prying from plunger with small screwdriver.
5. Remove check ball spring and check ball.
6. Clean lifter components in solvent, keeping components for each lifter separate
INSPECTION
1. Inspect lifter body for internal and external wear. Also inspect bottom for wear grooves and flat spots.
2. Inspect roller for free operation, flat spots and pitting. Replace lifter if roller is worn, pitted or cannot be freed up.
3. Inspect pushrod seat and replace lifter and pushrod if seat is scored or excessively worn.
4. Inspect check ball and replace lifter if ball is pitted or scored. Do not attempt to recondition lifter assembly by interchanging components
from other lifters. If components are damaged or worn, lifter assembly should be replaced.
ASSEMBLY
Ensure lifter components are kept clean during assembly, as small particles of dirt or lint can cause lifter to fail.
1. Install check ball to the small hole in bottom of plunger.
2. Install check ball spring and retainer, over check ball, then press retainer into position in plunger with small screwdriver.
3. Install plunger spring to check ball retainer.
4. Align oil feed holes in lifter body and plunger, then install plunger into lifter body.
5. Fill lifter with SAE 10.0 oil and proceed as follows:
a. Insert a 1/8 inch punch into plunger and press down solidly, then using a 1/16 inch punch, insert punch through oil holes to retain plunger
down against plunger spring tension.
b. Remove 1/8 inch punch and fill lifter with SAE 10.0 oil.