
S10/T10 P/U 4WD V6-4.3L VIN X (1996)
Blower Motor: Service and Repair
With A/C
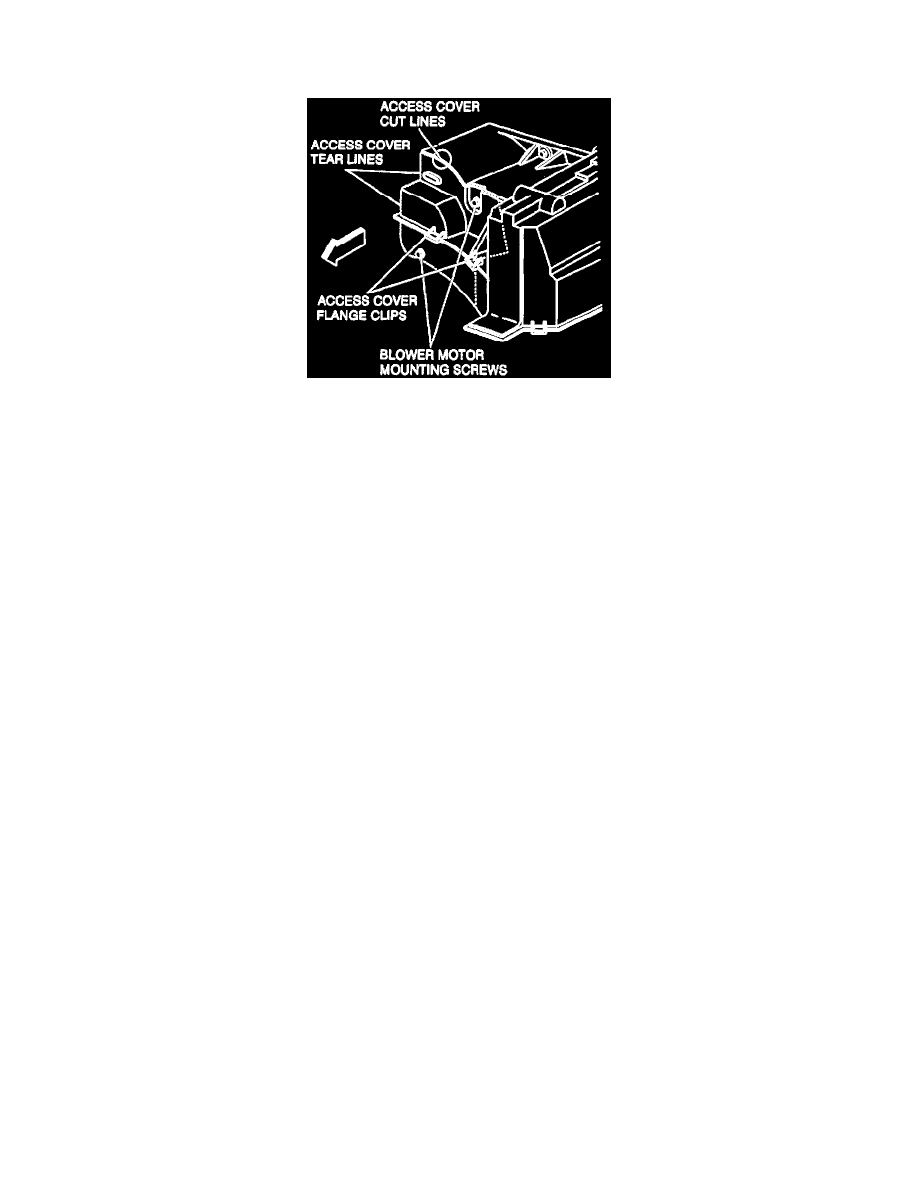
(Figure 1) Blower Motor Cover
REMOVE OR DISCONNECT
1. Negative battery cable.
2. Vehicle Control Module (VCM) or Powertrain Control Module (PCM), if equipped.
3. Coolant reservoir and cooling tube.
4. Electrical connectors as necessary.
5. Screws, Lower screw is on bottom front of cover, (Figure 1).
6. Harness from blower motor.
7. Using a razor blade or sharp utility knife cut through cover on the cut line, (Figure 1).
NOTE: It is important to make the cut as straight as possible as the access cover must be replaced and part of this repair is visible to the
customer.
8. Starting with upper half of cover tear the remaining part of the access cover from the remaining portion.
9. Lower access cover using the same procedure from the upper half.
10. Blower motor.
INSTALL OR CONNECT
1. Blower motor.
2. The upper and lower halves of the access covers together using the 3 flange clips.
3. Using black duct tape, place a piece of duct tape along the bottom lower edge of the lower half only. The tape must be the full width of the cover.
4. Access cover onto the case and screws.
5. Align cut line areas.
6. Seal cut line areas using black weatherstrip adhesive.
NOTES:
-
DO NOT USE RTV
-
Make the adhesive bead as straight as possible. Remember the customer will be able to see part of the repair. Allow adhesive to set for 15
minutes or until it skins over.
7. Electrical connectors as necessary.
8. Cooling Tube and coolant reservoir.
9. VCM or PCM, if equipped.
10. Negative battery cable.