
Silverado 1500 2WD V6-4.3L (2007)
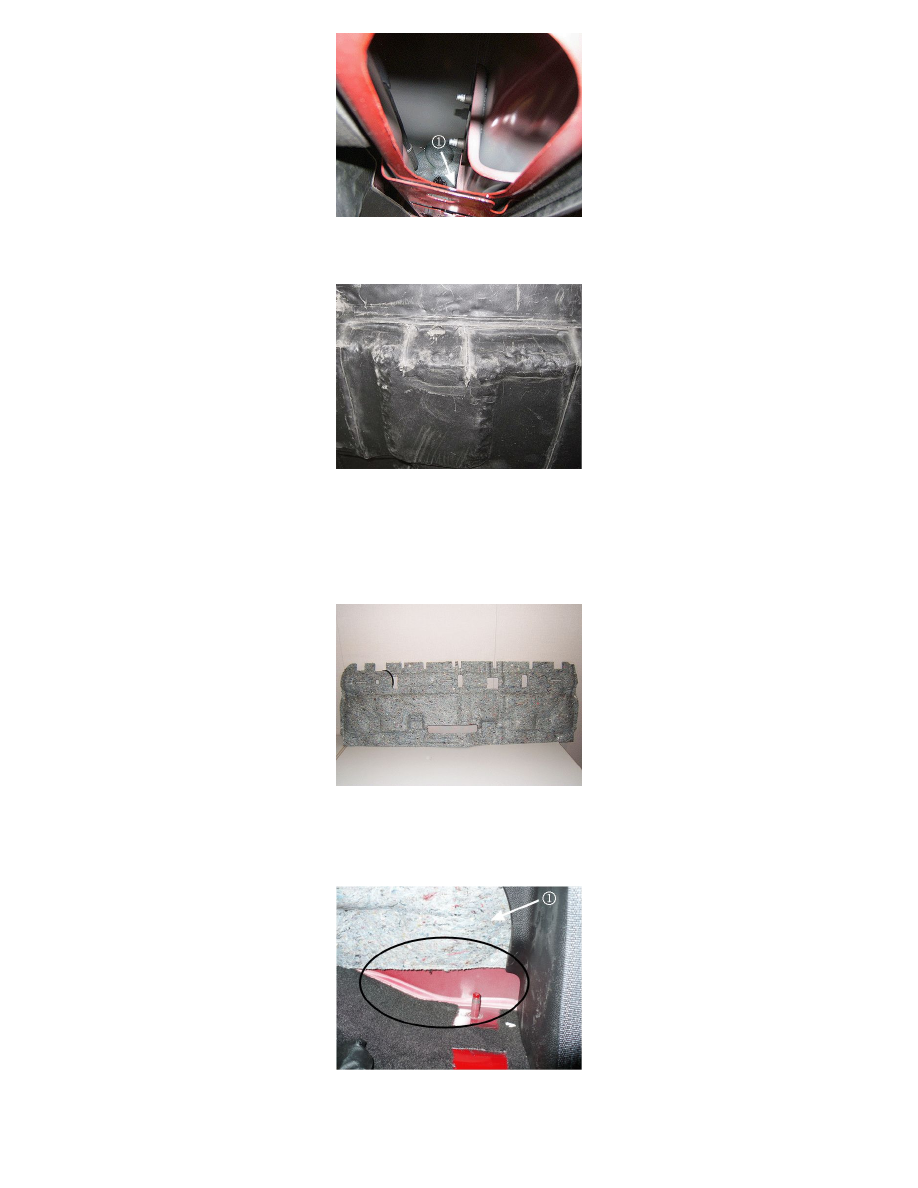
4. If a void is found (1), fill it with seam sealer Kent Automotive High-Tech(TM) Clear Sealer, P/N P10200 (5 oz. tube), or equivalent, to eliminate
the air flow escape concern.
5. Before reinstalling the trim, inspect the insulator mat that is mounted on the body rear inner panel to ensure the access flap is fully seated/closed as
shown above.
6. Reinstall the trim panels and rear seat. Refer to Body Lock Pillar Trim Replacement (Crew Cab) or Body Lock Pillar Trim Replacement
(Extended Cab) in SI.
Correction #2
Note
This repair is ONLY for 2010 models that have the original body rear panel insulator (pictured above) and exhibit a higher noise penetration into the
cab, when compared to a similarly equipped 2009, or earlier, model. Note that the insulator shape is flat across the bottom edge.
Tip
Before any repairs, you can visually verify which insulator the vehicle has by looking under the rear seat on the right or left side. If you can see the body