
Silverado 1500 2WD V6-4.3L (2007)
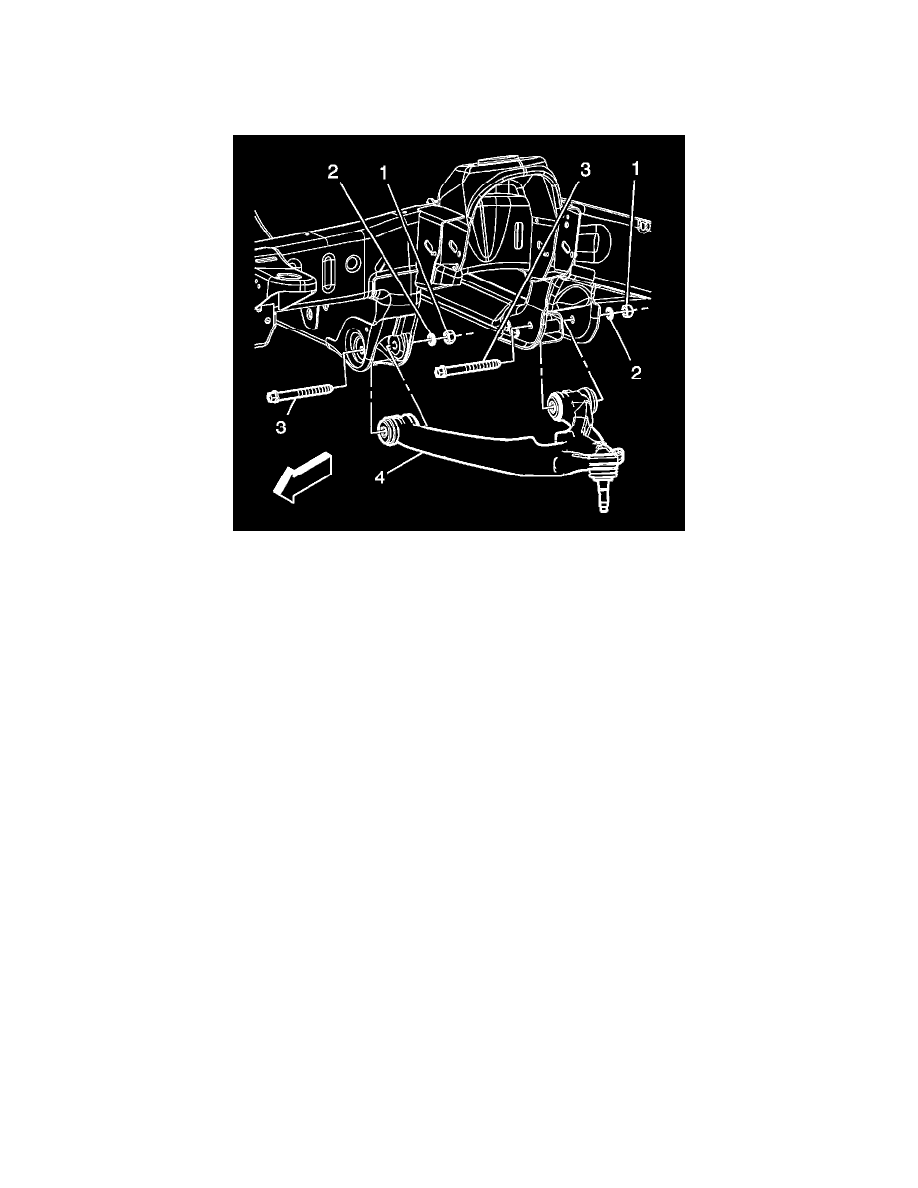
9. Remove the lower control arm nuts (1) and washers (2).
10. Remove the control arm bolts (3).
11. Remove the control arm (4).
Installation Procedure
1. Install the lower control arm (4).
2. Install the lower control arm bolts (3).
3. Install the washers (2).
Notice: Refer to Fastener Notice.
4. Install the lower control arm retaining nuts (1).
Tighten nuts to 175 N.m (129 lb ft).
5. Install the lower ball joint in the steering knuckle.