
Silverado 1500 2WD V8-4.8L VIN V (2006)
Impact Sensor: Service and Repair
Side
INFLATABLE RESTRAINT SIDE IMPACT SENSOR REPLACEMENT
REMOVAL PROCEDURE
1. Disable the SIR system. Refer to SIR Disabling and Enabling Zone 6.
CAUTION:
-
Refer to SIR Inflator Module Handling and Storage Caution in Service Precautions.
-
When carrying an undeployed inflatable restraint seat belt pretensioner:
-
Do not carry the seat belt pretensioner by the wires or connector.
-
Carry the seat belt pretensioner by the piston tube, keeping hands and fingers away from the cable.
-
Make sure the open end of the seat belt pretensioner piston tube points away from you and other people.
-
Do not cover the seat belt pretensioner piston tube opening with your hand.
Failure to observe these guidelines may result in personal injury.
2. Remove the front door trim panel.
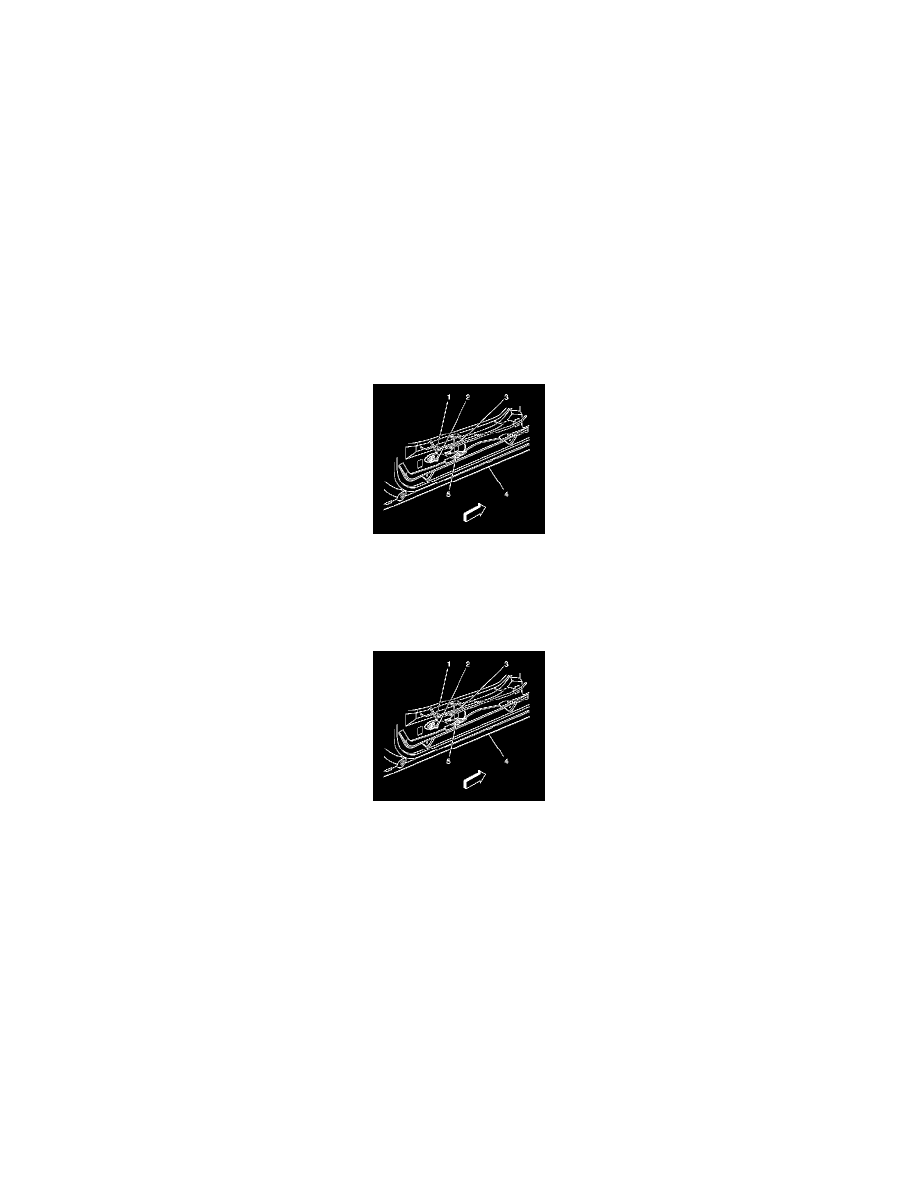
3. Loosen the 2 inflatable restraint side impact sensor fasteners (2).
4. Remove the inflatable restraint side impact sensor (1) from the door (4).
5. Remove the connector position assurance (CPA) (3), and disconnect the inflatable restraint side impact sensor yellow 2-way harness connector (5).
INSTALLATION PROCEDURE
1. Connect the inflatable restraint side impact sensor yellow 2-way harness connector (5) to the inflatable restraint side impact sensor (1).
2. Install the CPA (3) to the inflatable restraint side impact sensor yellow 2-way connector (5).
3. Install the inflatable restraint side impact sensor (1) to the door (4).
4. Install the fasteners (2) to the inflatable restraint side impact sensor (1) using only hand tools.
NOTE: Refer to Fastener Notice in Service Precautions.
Tighten the fasteners to 10 N.m (89 lb in).
5. Install the door trim panel.
6. Enable the SIR system. Refer to SIR Disabling and Enabling Zone 6.