
Silverado 1500 2WD V8-4.8L VIN V (2006)
Valve Body: Service and Repair
Allison - Automatic Transmission
Control Valve Body Replacement
Control Valve Body Replacement
^
Tools Required
-
J 44257 Main Wiring Harness Connector Remover
-
J 44247 Internal Wiring Harness Installer
Removal Procedure
1. Disconnect the external wiring harness from the transmission main connector. Use J 44257 if the connector is not easily accessible.
Caution: Refer to Battery Disconnect Caution in Service Precautions.
2. Remove the oil pan and transmission internal oil filter.
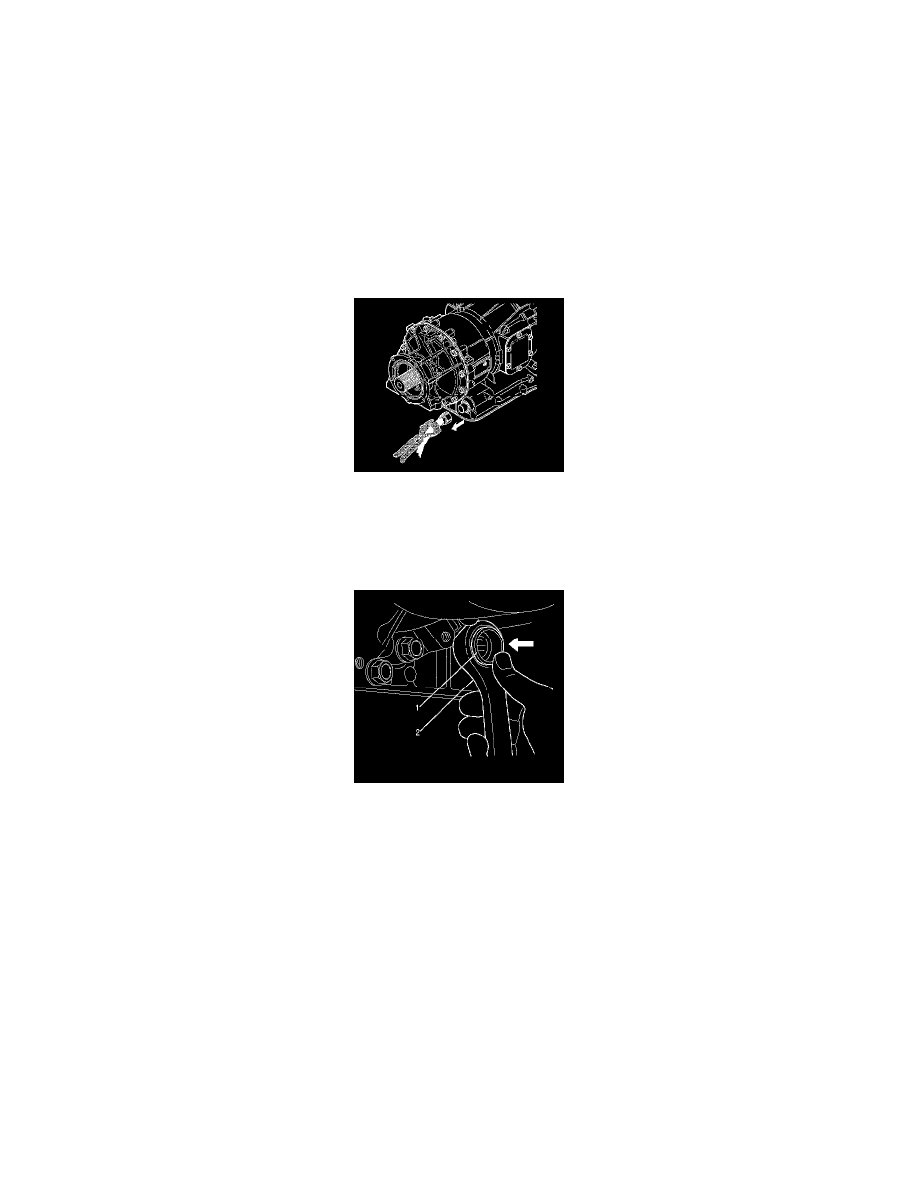
3. Place a 30 mm (1 3/16 inch) 12-point deep socket or box-end (2) over the connector (1).
Important: The transmission main connector is actually one end of the internal harness that protrudes through the transmission case.
4. Push inward on the socket or wrench to release the retainer feet that attach the connector (1) to the transmission case.
5. Remove the wrench. Push inward on the electrical connector to separate it from the transmission case. This allows the internal wiring harness to
remain with the control valve assembly when removed.