
Silverado 1500 2WD V8-5.3L Hybrid (2004)
6. Ensure that the solenoid screens (1, 2) are in place on the spacer plate.
7. Place the checkball (3) on the spacer plate in the location shown.
8. Place the 3-4 accumulator spring (4) on the spacer plate.
9. Install the spacer plate and related components to the transmission.
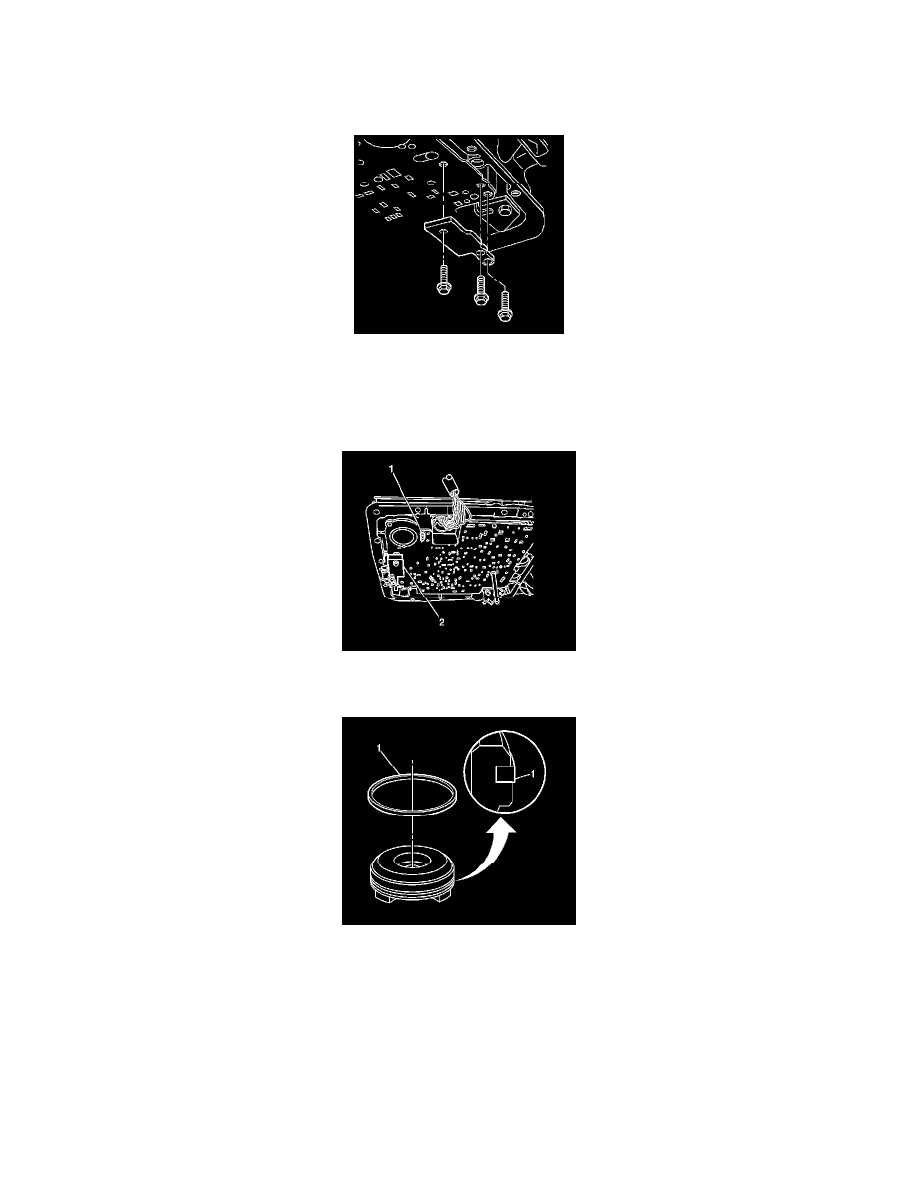
10. Notice:
Refer to Fastener Notice in Service Precautions.
Install the spacer plate support and the spacer plate support bolts.
^
Tighten the bolts to 11 Nm (97 inch lbs.).
11. After installing the spacer plate support (2), look through the hole in the spacer plate to ensure that the checkball (1) has remained in the proper
location.
12. Install a new 1-2 accumulator piston seal (1) to the 1-2 accumulator piston.