
Silverado 1500 2WD V8-6.0L (2010)
Parking Brake Lever: Service and Repair
Parking Brake Lever Pedal Assembly Replacement
Removal Procedure
Note: The following service procedure includes the removal of the front park brake cable. The front park brake cable is NOT serviced separately, but
serviced with the park brake pedal assembly.
1. Remove the left side hinge pillar trim panel. Refer to Body Hinge Pillar Trim Panel Replacement (See: Body and Frame/Interior Moulding /
Trim/Trim Panel/Service and Repair/Body Hinge Pillar Trim Panel Replacement).
2. Disconnect the park brake warning lamp electrical connector.
3. Disable the park brake cable automatic adjuster. Refer to Parking Brake Cable Adjuster Disabling (See: Parking Brake Cable/Service and
Repair/Procedures/Parking Brake Cable Adjuster Disabling).
4. Remove the bolt and disconnect the park brake pedal release handle from the instrument panel.
5. Without disconnecting the electrical connectors, remove the left side instrument panel electrical center/junction block and position aside. Refer to
Instrument Panel Electrical Center or Junction Block Replacement - Left Side (See: Maintenance/Fuses and Circuit Breakers/Fuse Block/Service
and Repair/Removal and Replacement/Instrument Panel Electrical Center or Junction Block Replacement - Left Side).
6. Raise and support the vehicle. Refer to Lifting and Jacking the Vehicle (See: Maintenance/Vehicle Lifting/Service and Repair).
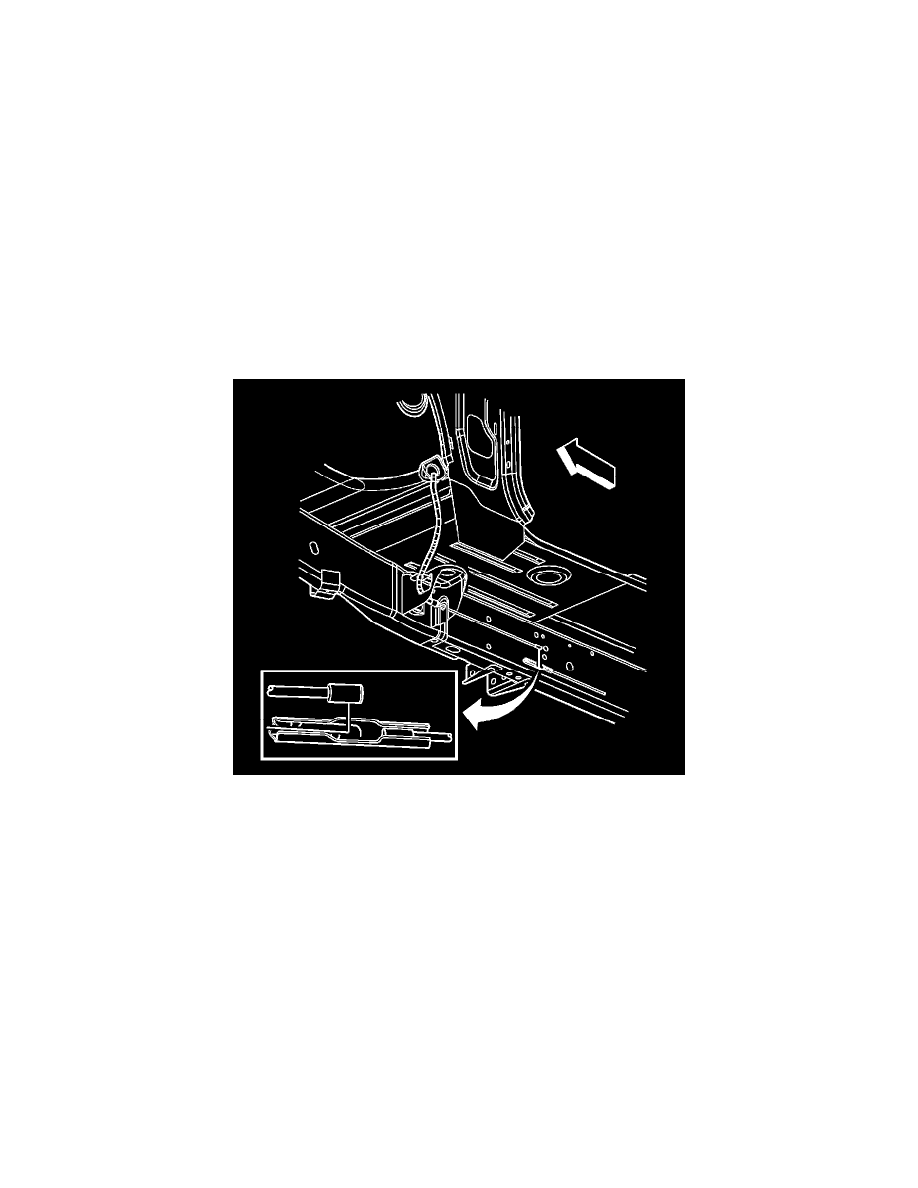
7. Disconnect the front park brake cable from the intermediate cable connector by drilling a 3 mm (1/8 in) hole through the dimple in the front to
intermediate park brake cable connector.
8. Release the front park brake cable from the frame by depressing the locking tabs.
9. Lower the vehicle.