
Silverado 1500 2WD V8-6.0L (2010)
Cabin Ventilation Grille: Service and Repair
Pressure Relief Valve Replacement
Removal Procedure
1. Remove the rear window lower garnish molding. Refer to Rear Window Lower Garnish Molding Replacement (Ext Cab/Crew Cab w/A48) (See:
Body and Frame/Interior Moulding / Trim/Trim Panel/Service and Repair/Rear Window Lower Garnish Molding Replacement (Ext Cab/Crew
Cab w/A48))Rear Window Lower Garnish Molding Replacement (Ext Cab/Crew Cab w/o A48) (See: Body and Frame/Interior Moulding /
Trim/Trim Panel/Service and Repair/Rear Window Lower Garnish Molding Replacement (Ext Cab/Crew Cab w/o A48))Rear Window Lower
Garnish Molding Replacement (Regular Cab) (See: Body and Frame/Interior Moulding / Trim/Trim Panel/Service and Repair/Rear Window
Lower Garnish Molding Replacement (Regular Cab))
2. Remove the body lock pillar trim. Refer to Body Lock Pillar Trim Replacement (Crew Cab) (See: Body and Frame/Interior Moulding /
Trim/Trim Panel/Service and Repair/Body Lock Pillar Trim Replacement (Crew Cab))Body Lock Pillar Trim Replacement (Extended Cab) (See:
Body and Frame/Interior Moulding / Trim/Trim Panel/Service and Repair/Body Lock Pillar Trim Replacement (Extended Cab))Body Lock Pillar
Trim Replacement (Regular Cab) (See: Body and Frame/Interior Moulding / Trim/Trim Panel/Service and Repair/Body Lock Pillar Trim
Replacement (Regular Cab))
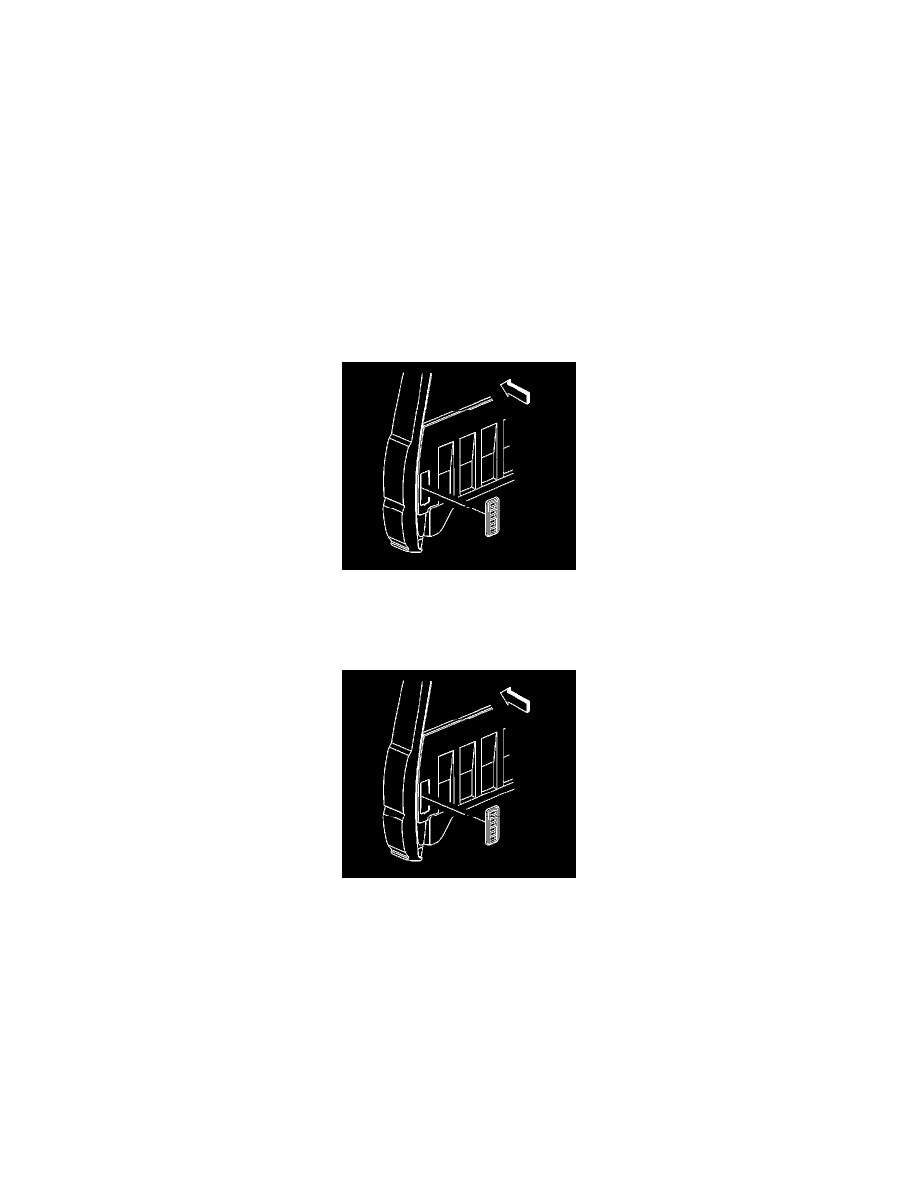
3. Pull back carpeting on the rear wall of the cab exposing the pressure relief valve.
4. Press on the retaining tab on the top downward to release the valve from the cab back panel.
5. Remove the pressure relief valve from the vehicle.
Installation Procedure
1. Align the pressure relief valve into the opening of the rear cab.
2. Press the pressure relief valve into the cab back panel until the locking tabs are fully seated.
3. Realign carpeting on the rear wall of the cab to lay flat.
4. Install the body lock pillar trim. Refer to Body Lock Pillar Trim Replacement (Crew Cab) (See: Body and Frame/Interior Moulding / Trim/Trim
Panel/Service and Repair/Body Lock Pillar Trim Replacement (Crew Cab))Body Lock Pillar Trim Replacement (Extended Cab) (See: Body and
Frame/Interior Moulding / Trim/Trim Panel/Service and Repair/Body Lock Pillar Trim Replacement (Extended Cab))Body Lock Pillar Trim
Replacement (Regular Cab) (See: Body and Frame/Interior Moulding / Trim/Trim Panel/Service and Repair/Body Lock Pillar Trim Replacement
(Regular Cab))
5. Install the rear window lower garnish molding. Refer to Rear Window Lower Garnish Molding Replacement (Ext Cab/Crew Cab w/A48) (See:
Body and Frame/Interior Moulding / Trim/Trim Panel/Service and Repair/Rear Window Lower Garnish Molding Replacement (Ext Cab/Crew
Cab w/A48))Rear Window Lower Garnish Molding Replacement (Ext Cab/Crew Cab w/o A48) (See: Body and Frame/Interior Moulding /
Trim/Trim Panel/Service and Repair/Rear Window Lower Garnish Molding Replacement (Ext Cab/Crew Cab w/o A48))Rear Window Lower
Garnish Molding Replacement (Regular Cab) (See: Body and Frame/Interior Moulding / Trim/Trim Panel/Service and Repair/Rear Window
Lower Garnish Molding Replacement (Regular Cab))