
Silverado 1500 2WD V8-6.0L (2010)
Caution: Refer to Fastener Caution (See: Service Precautions/Vehicle Damage Warnings/Fastener Caution).
Note:
*
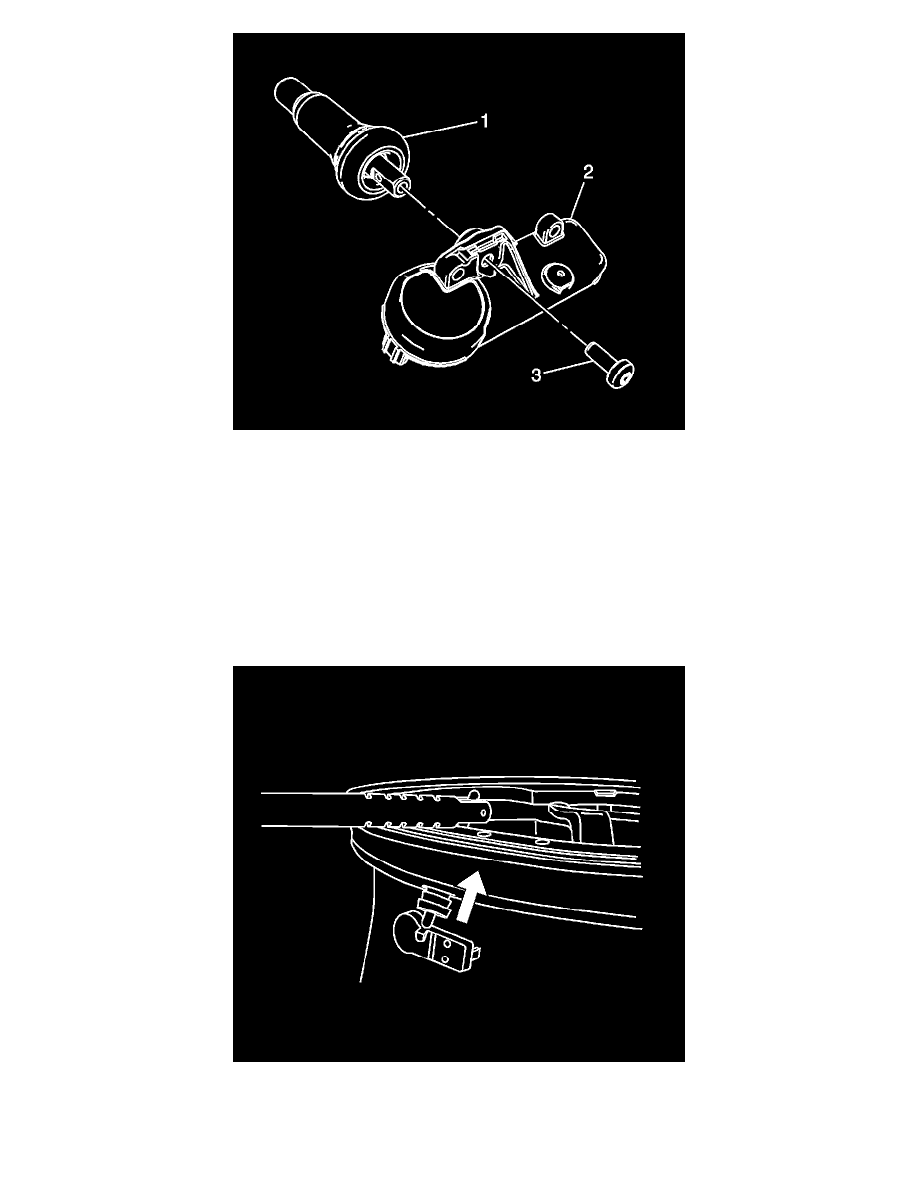
Ensure the flat of the valve, lines up with the flats of the snap in the enclosure.
*
TPM valves and TORX screws are one-time use only.
1. Assemble the tire pressure sensor (2) to the valve stem and install the new TORX screw (3) and tighten to 1.3 Nm (11.5 lb in).
Note: Use and approved tire mounting lubricant. DO NOT use silicon or corrosive base compounds to lubricate the tire bead and the wheel rim.
A corrosive type compound can cause tire or rim deterioration.
2. Apply tire soap to the rubber portion of the valve stem (1).
3. Using a tire valve stem mounting tool, pull the valve stem through in a direction parallel to the valve hole on the rim.
Note: Snap Fit TPM sensors are still shipped in the OFF mode. However, the TPM no longer needs to be spun to remove it from the OFF mode.
The sensor will exit its OFF state when the tire is inflated. The technician can then program the vehicle as normal.