
Silverado 1500 2WD V8-6.2L (2010)
Wheel Fastener: Service and Repair
Rear Suspension
Wheel Stud Replacement
Special Tools
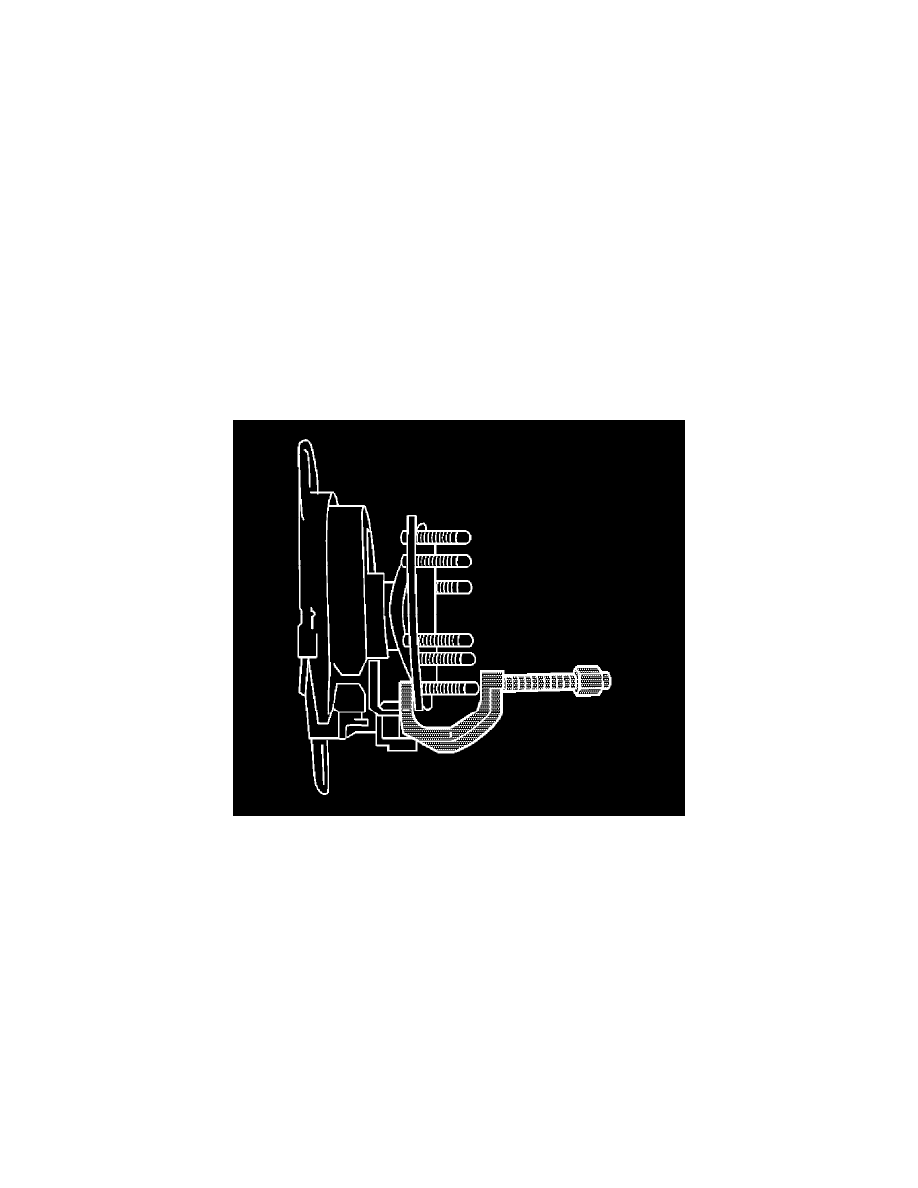
J 43631 - Ball Joint Remover
For equivalent regional tools, refer to Special Tools (See: Steering and Suspension/Suspension/Tools and Equipment/Rear Suspension)
Removal Procedure
1. Raise and support the vehicle. Refer to Lifting and Jacking the Vehicle (See: Vehicle Lifting/Service and Repair).
2. Remove the tire and wheel. Refer to Tire and Wheel Removal and Installation (See: Service and Repair).
3. Remove the rear brake drum, if equipped. Refer to Brake Drum Replacement (See: Brakes and Traction Control/Drum Brake System/Brake
Drum/Service and Repair/Removal and Replacement).
4. Remove the rear brake rotor, if equipped. Refer to Rear Brake Rotor Replacement (JD9) (See: Brakes and Traction Control/Disc Brake
System/Brake Rotor/Disc/Service and Repair/Rear Brake Rotor Replacement (JD9))Rear Brake Rotor Replacement (JH6) (See: Brakes and
Traction Control/Disc Brake System/Brake Rotor/Disc/Service and Repair/Rear Brake Rotor Replacement (JH6))Rear Brake Rotor Replacement
(JH7) (See: Brakes and Traction Control/Disc Brake System/Brake Rotor/Disc/Service and Repair/Rear Brake Rotor Replacement (JH7)).
5. Using the J 43631 - remover , remove wheel stud from the rear axle shaft.
6. For those vehicles equipped with RPO codes JH6 or JH7, remove the rear axle hub assembly. Refer to Rear Axle Hub, Bearing, Cup, and/or Seal
Replacement (See: Transmission and Drivetrain/Drive Axles, Bearings and Joints/Axle Bearing/Service and Repair/Rear Axle Hub, Bearing,
Cup, and/or Seal Replacement).
Installation Procedure