
Silverado 1500 4WD V8-6.0L (2010)
7. Remove the auxiliary battery positive cable terminal from the underhood junction block stud.
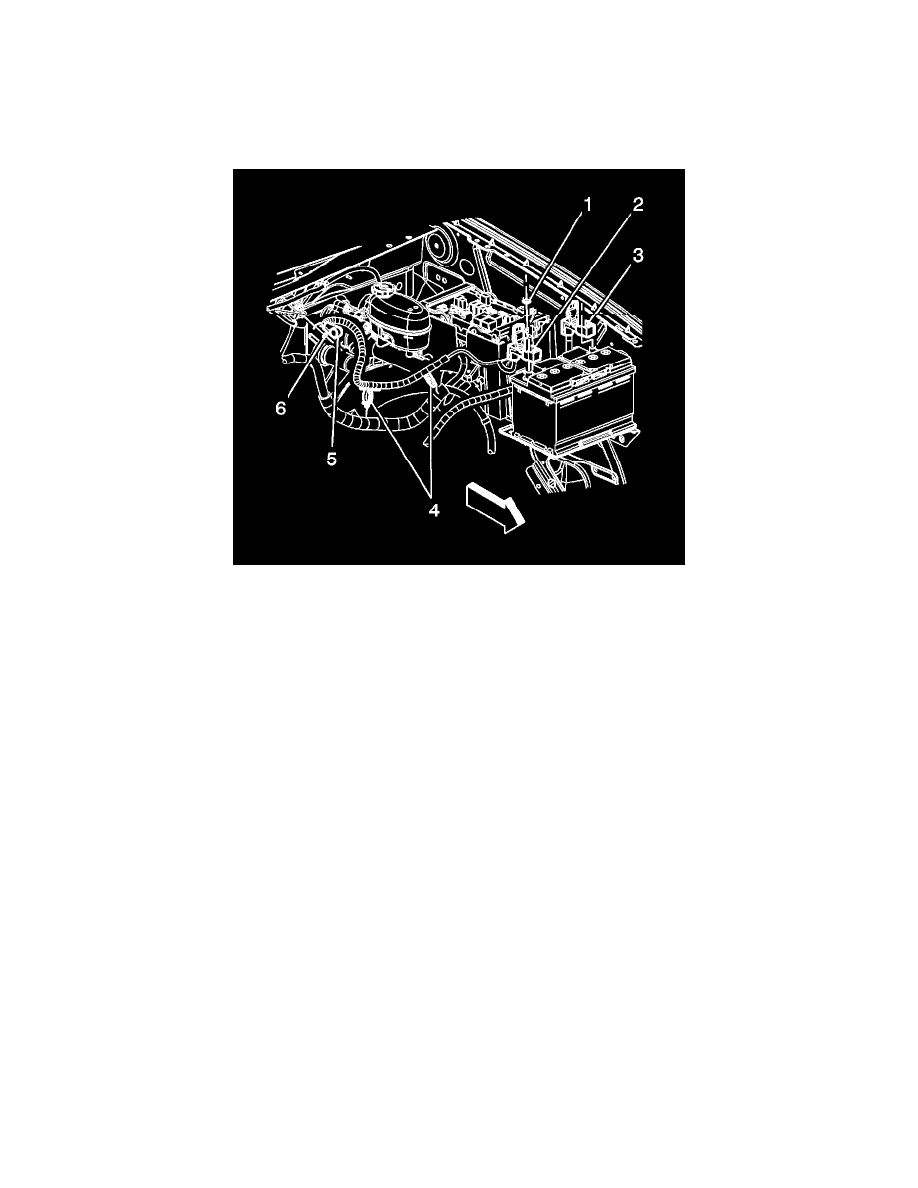
8. Reposition the auxiliary battery positive cable boot (5) at the auxiliary battery relay.
9. Remove the auxiliary battery positive cable nut (6) from the rely stud.
10. Remove the auxiliary battery positive cable terminal from the relay stud.
11. Remove the auxiliary battery positive cable clips (4) from the engine wiring harness and remove the cable from the vehicle.
Installation Procedure
1. Install the auxiliary battery positive cable to the vehicle.
2. Install the auxiliary battery positive cable terminal to the relay stud.
Caution: Refer to Fastener Caution (See: Service Precautions/Vehicle Damage Warnings/Fastener Caution).
3. Install the auxiliary battery positive cable nut (6) to the rely stud and tighten to 7.5 Nm (66 lb in).
4. Position the auxiliary battery positive cable boot (5) at the auxiliary battery relay.
5. Install the auxiliary battery positive cable to the battery positive post.
6. Tighten the auxiliary battery positive cable nut (2) and tighten to 7.5 Nm (66 lb in).
7. Install the auxiliary battery positive cable terminal to the underhood junction block stud.
8. Install the auxiliary battery positive cable nut (1) to the underhood junction block stud and tighten to 5 Nm (44 lb in).
9. Install the auxiliary battery positive cable clips (4) to the engine wiring harness.
10. Close the auxiliary battery positive cable post cover.