
Silverado 1500 4WD V8-6.0L (2010)
Accumulator: Service and Repair
Accumulator Assembly, Spacer Plate, and Gaskets
Special Tools
*
J 25025-B Pump and Valve Body Alignment Pin Set
*
J 36850 Transjel Lubricant
Removal Procedure
1. Raise and support the vehicle. Refer to Lifting and Jacking the Vehicle (See: Maintenance/Vehicle Lifting/Service and Repair).
2. Remove the transmission oil pan and filter. Refer to Automatic Transmission Fluid and Filter Replacement ().
Note: The 1-2 accumulator can be removed without removing the control valve assembly.
3. Remove the control valve body. Refer to Control Valve Body Replacement (See: Valve Body/Service and Repair/4L60-E/4L65-E/4L70-E -
Automatic Transmission).
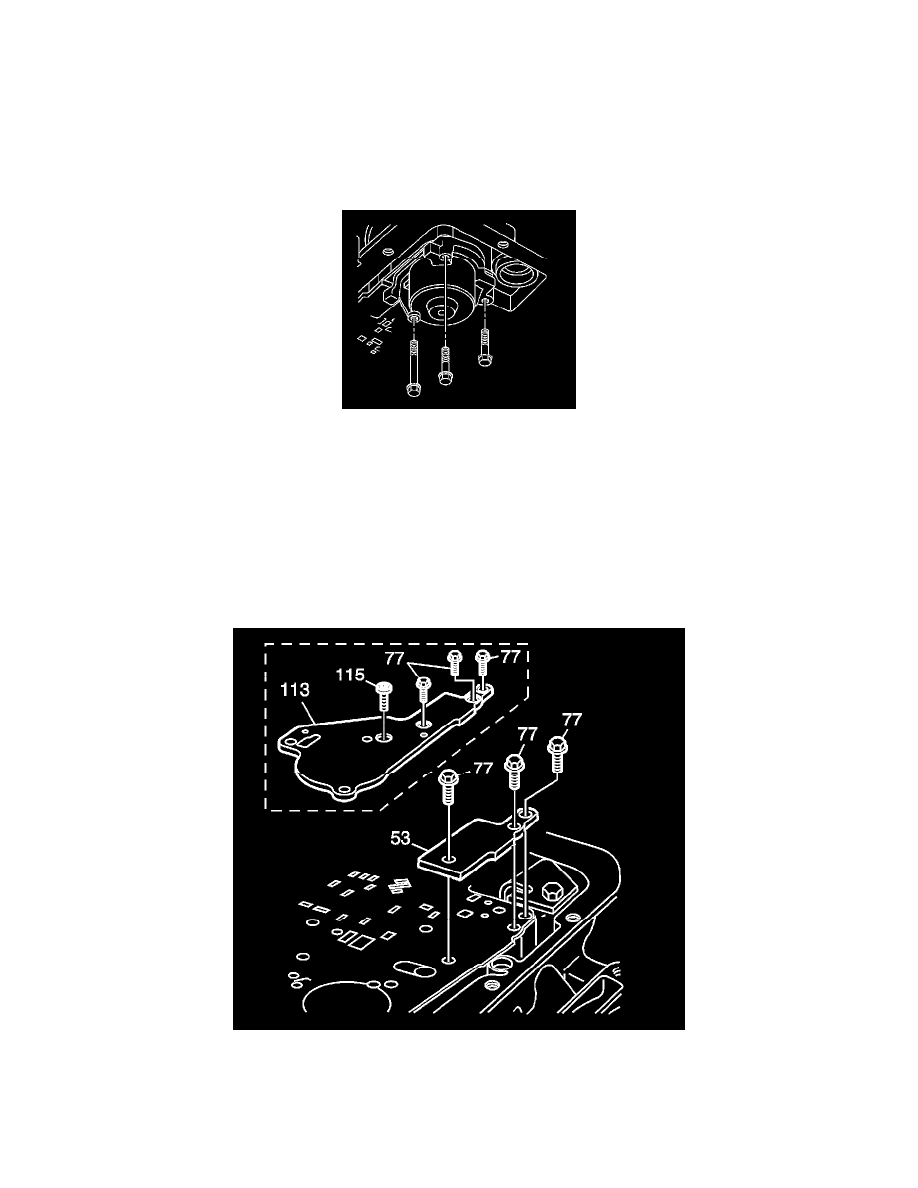
4. Remove the accumulator cover retaining bolts.
5. Remove the 1-2 accumulator cover assembly.
6. Disassemble the 1-2 accumulator. Refer to 1-2 Accumulator Disassemble (See: Service and Repair/Overhaul/4L60-E/4L65-E/4L70-E -
Automatic Transmission/76. 1-2 Accumulator Disassemble).
7. Remove the spacer plate support retaining bolts (77).
Note: Use care not to drop the following items that will be removed along with the spacer plate:
*
The number 1 checkball
*
The 3-4 accumulator spring