
Silverado 1500 4WD V8-6.0L (2010)
Clamp only on the mounting flange of the differential carrier assembly case.
3. Remove the inner axle shaft using a hammer and a brass drift.
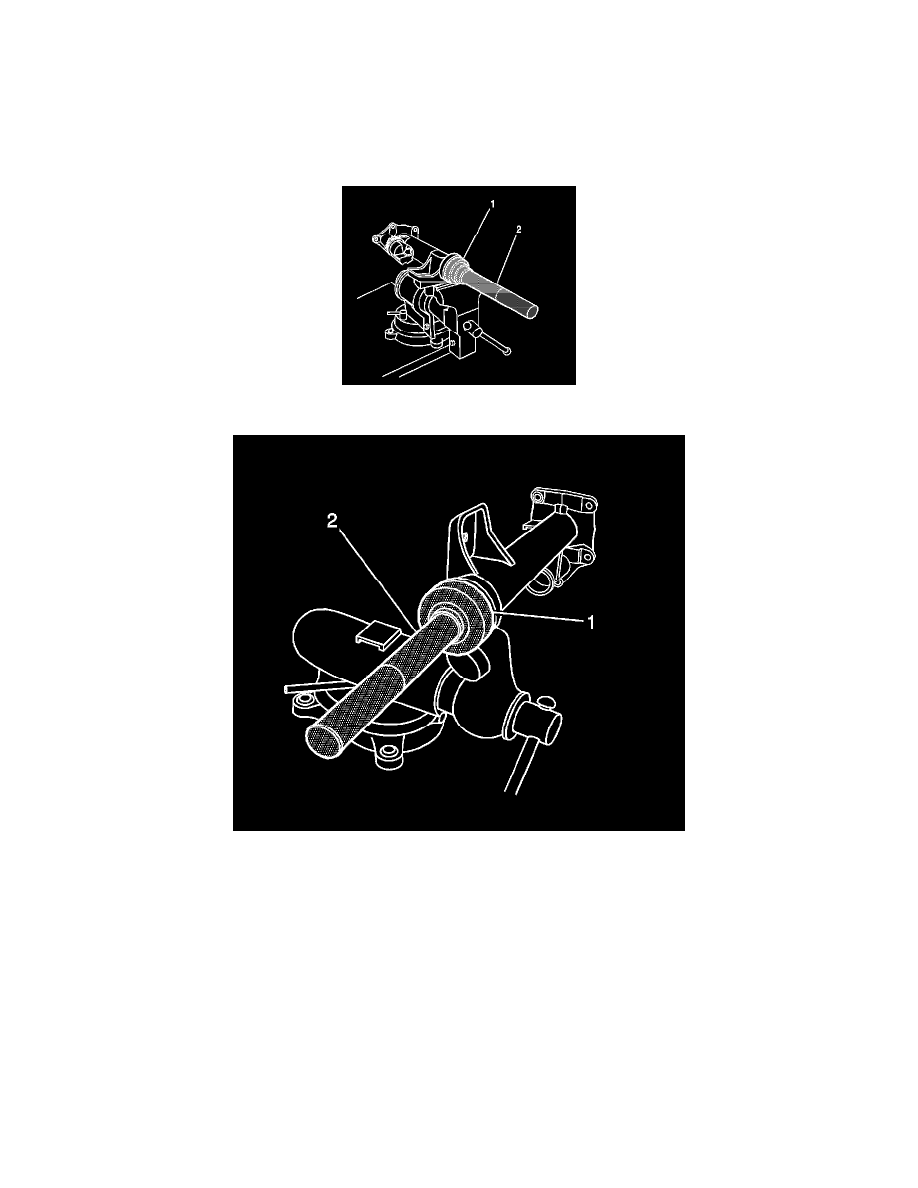
4. Install the J 29369-1 , 8.25 inch axle, or the J 29369-2 , 9.25 inch axle (1), behind the inner axle shaft seal or the inner axle shaft bearing as
necessary.
5. Install the J 2619-01 (2) to the J 29369-1 or the J 29369-2 .
6. Remove the inner axle shaft seal and/or the inner axle shaft bearing using the J 2619-01 .
Installation Procedure
1. Install the right side bearing with the square shoulder in using the J 36609 (1) and the J 8092 (2).
2. Install the new axle shaft seal using the J 45225 (1) and the J 8092 (2).
3. Install the inner axle shaft into the inner axle shaft housing.
Carefully tap the inner axle shaft into place with a soft-faced mallet.
4. Install the inner axle shaft and clutch fork assembly components into the inner shaft housing. Refer to Front Drive Axle Inner Shaft and Inner Shaft
Housing Replacement (8.25 F4WD Axle) (See: Service and Repair)Front Drive Axle Inner Shaft and Inner Shaft Housing Replacement (8.25
S4WD and 9.25 Axles) (See: Service and Repair).
5. Install the inner axle shaft and housing assembly to the differential carrier case assembly. Refer to Front Drive Axle Inner Shaft and Inner Shaft
Housing Replacement (8.25 F4WD Axle) (See: Service and Repair)Front Drive Axle Inner Shaft and Inner Shaft Housing Replacement (8.25
S4WD and 9.25 Axles) (See: Service and Repair).