
Silverado 1500 4WD V8-6.0L Hybrid (2009)
Front Door Weatherstrip: Service and Repair
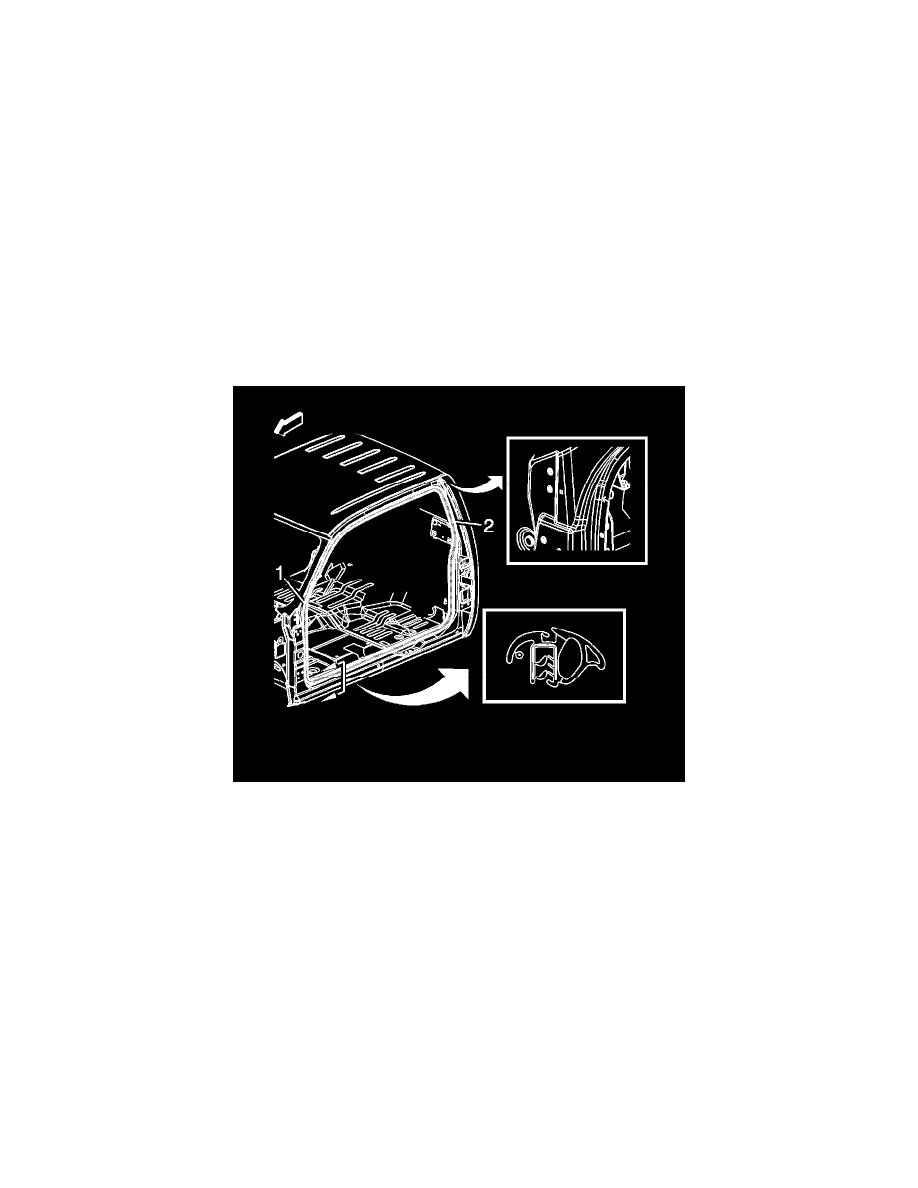
Front Door Opening Weatherstrip Replacement (Extended Cab)
Front Door Opening Weatherstrip Replacement (Extended Cab)
Removal Procedure
1. Open both doors.
2. Remove the front and rear door sill plate. Refer to Front Side Door Sill Trim Plate Replacement (Extended Cab) (See: Interior Moulding /
Trim/Scuff Plate/Service and Repair)Front Side Door Sill Trim Plate Replacement (Regular Cab/Crew Cab) (See: Interior Moulding / Trim/Scuff
Plate/Service and Repair) orRear Side Door Sill Trim Plate Replacement (Crew Cab) (See: Interior Moulding / Trim/Scuff Plate/Service and
Repair)Rear Side Door Sill Trim Plate Replacement (Extended Cab) (See: Interior Moulding / Trim/Scuff Plate/Service and Repair) .
3. Remove the hinge pillar trim. Refer to Body Hinge Pillar Trim Panel Replacement (See: Interior Moulding / Trim/Trim Panel/Service and Repair
)
4. Remove the body lock pillar trim. Refer to Body Lock Pillar Trim Replacement (Crew Cab) (See: Interior Moulding / Trim/Trim Panel/Service
and Repair)Body Lock Pillar Trim Replacement (Extended Cab) (See: Interior Moulding / Trim/Trim Panel/Service and Repair)Body Lock Pillar
Trim Replacement (Regular Cab) (See: Interior Moulding / Trim/Trim Panel/Service and Repair)
5. Remove the windshield pillar molding. Refer to Windshield Pillar Garnish Molding Replacement (See: Interior Moulding / Trim/Trim
Panel/Service and Repair) .
6. Remove the weatherstrip (1) from the pinch-weld flange (2).
Installation Procedure