
Silverado 1500 4WD V8-6.0L Hybrid (2009)
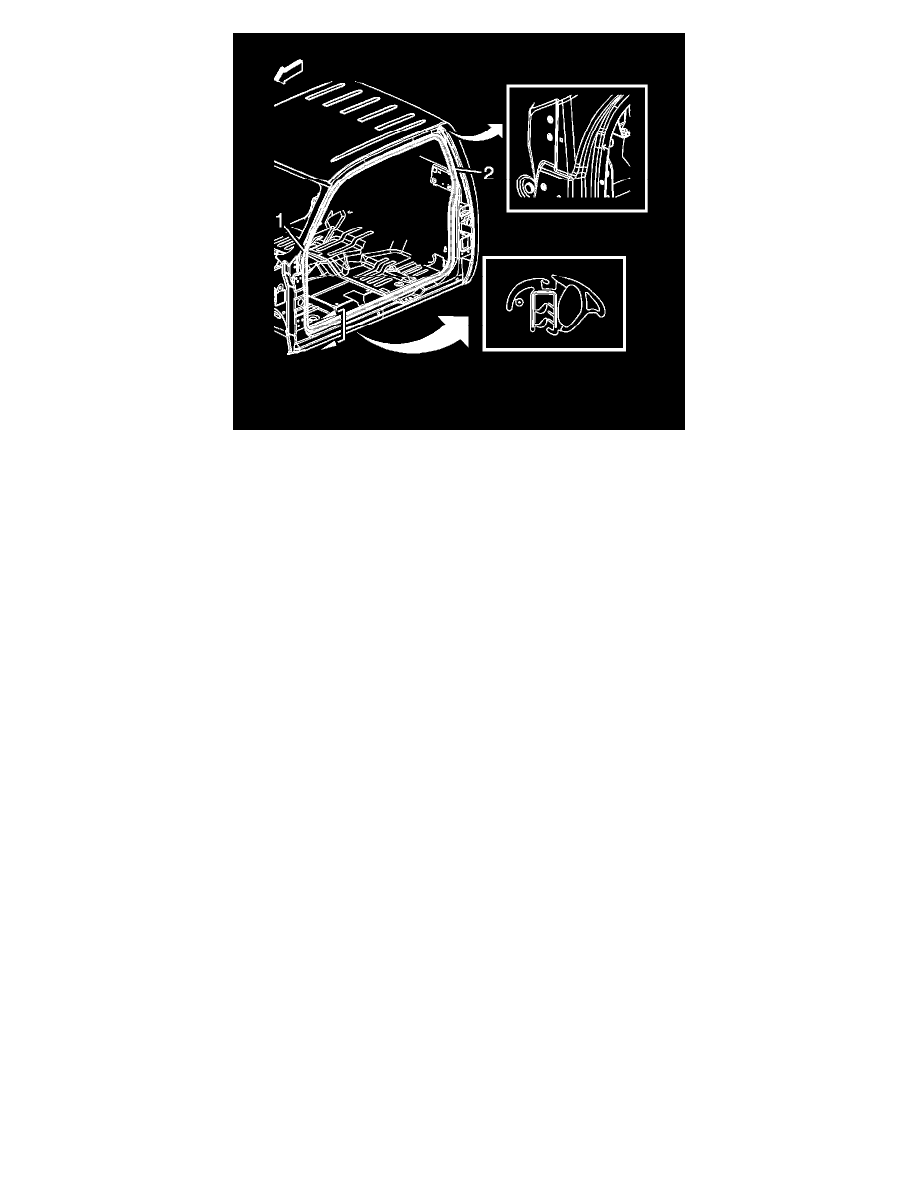
1. Align the weatherstrip to the door opening with the 2 dots positioned on the upper right and left side.
2. Install the weatherstrip (1) to the pinch-weld flange (2). Ensure that the weatherstrip is fully seated around the door opening.
3. Install the windshield pillar molding. Refer to Windshield Pillar Garnish Molding Replacement (See: Interior Moulding / Trim/Trim
Panel/Service and Repair) .
4. Install the body lock pillar trim. Refer to Body Lock Pillar Trim Replacement (Crew Cab) (See: Interior Moulding / Trim/Trim Panel/Service and
Repair)Body Lock Pillar Trim Replacement (Extended Cab) (See: Interior Moulding / Trim/Trim Panel/Service and Repair)Body Lock Pillar
Trim Replacement (Regular Cab) (See: Interior Moulding / Trim/Trim Panel/Service and Repair)
5. Install the hinge pillar trim. Refer to Body Hinge Pillar Trim Panel Replacement (See: Interior Moulding / Trim/Trim Panel/Service and Repair) .
6. Install the sill plate. Refer to Front Side Door Sill Trim Plate Replacement (Extended Cab) (See: Interior Moulding / Trim/Scuff Plate/Service
and Repair)Front Side Door Sill Trim Plate Replacement (Regular Cab/Crew Cab) (See: Interior Moulding / Trim/Scuff Plate/Service and Repair
) orRear Side Door Sill Trim Plate Replacement (Crew Cab) (See: Interior Moulding / Trim/Scuff Plate/Service and Repair)Rear Side Door Sill
Trim Plate Replacement (Extended Cab) (See: Interior Moulding / Trim/Scuff Plate/Service and Repair) .
7. Inspect the door closing effort and seal to door fit.