
Silverado 1500 4WD V8-6.2L (2010)
Caution: Refer to Fastener Caution (See: Service Precautions/Vehicle Damage Warnings/Fastener Caution).
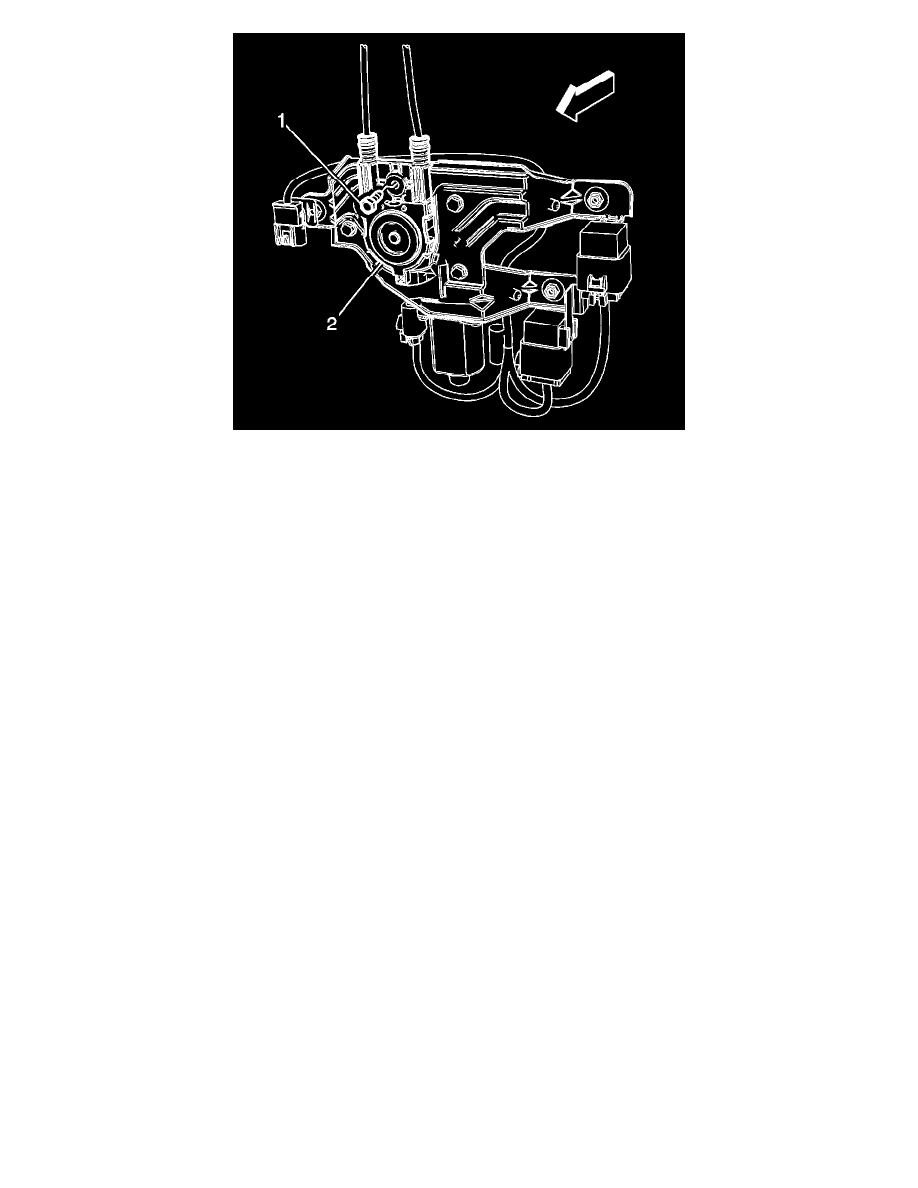
3. Install the rear sliding window motor/module nuts (2).
Tighten nut to 10 Nm (89 lb in).
4. Install the rear sliding window regulator and cables (2) to the motor/module.
5. Install the bolt (1) to the rear sliding window regulator and cables (2).
Tighten bolt to 11 Nm (97 lb in).
6. Install the rear sliding window lower garnish molding. Refer to Rear Window Lower Garnish Molding Replacement (Ext Cab/Crew Cab w/A48)
(See: Body and Frame/Interior Moulding / Trim/Trim Panel/Service and Repair/Rear Window Lower Garnish Molding Replacement (Ext
Cab/Crew Cab w/A48))Rear Window Lower Garnish Molding Replacement (Ext Cab/Crew Cab w/o A48) (See: Body and Frame/Interior
Moulding / Trim/Trim Panel/Service and Repair/Rear Window Lower Garnish Molding Replacement (Ext Cab/Crew Cab w/o A48))Rear Window
Lower Garnish Molding Replacement (Regular Cab) (See: Body and Frame/Interior Moulding / Trim/Trim Panel/Service and Repair/Rear
Window Lower Garnish Molding Replacement (Regular Cab)).
7. Inspect the rear sliding window for proper operation.