
Silverado 2500 2WD V8-8.1L VIN G (2005)
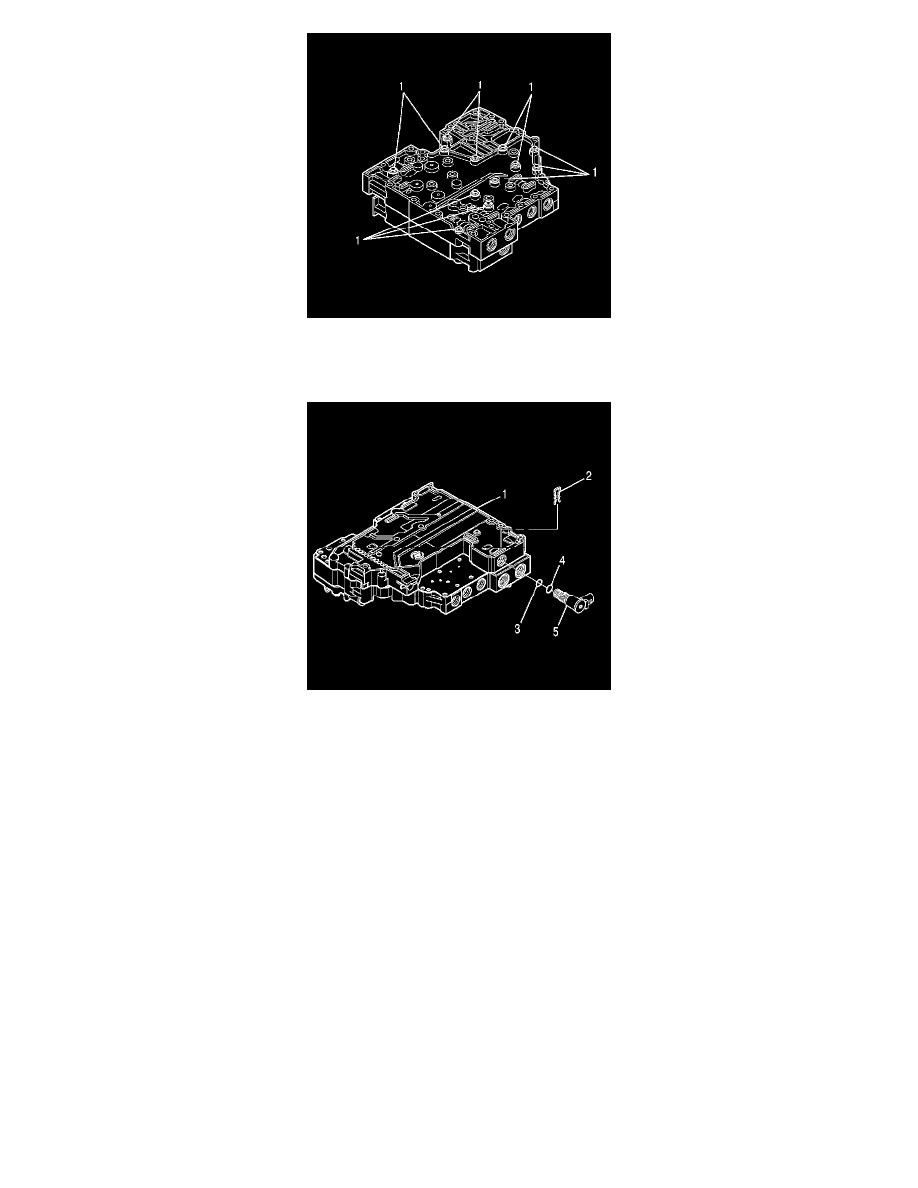
6. Position the control valve assembly on the work table so that the main valve body is facing up.
7. Install fourteen bolts (1) retaining the valve bodies together.
^
Tighten the bolts to 12 Nm (108 inch lbs.).
8. Position the control valve assembly on the work table so that the shift valve body is up.
9. Important:
^
O-ring (4) is slightly larger than O-ring (3).
^
P/N 29536833 is printed on C ON/OFF shift solenoid (5).
10. Install solenoid O-ring (4) onto C ON/OFF shift solenoid (5).
11. Install solenoid O-ring (3) onto C ON/OFF shift solenoid (5).
Align C ON/OFF shift solenoid (5) so that the electrical connector points away from the nearest dowel pin and is parallel to the separator plate as
shown.