
Silverado 2500 4WD V8-6.6L DSL Turbo (2010)
Coolant Line/Hose: Service and Repair
Thermostat Housing Crossover Replacement
Thermostat Housing Crossover Replacement (LMM)
Removal Procedure
1. Remove the air cleaner. Refer to Air Cleaner Assembly Replacement (See: Engine/Tune-up and Engine Performance Checks/Air Cleaner
Housing/Service and Repair).
2. Drain the cooling system. Refer to Cooling System Draining and Filling (Vac-N-Fill) (See: Service and Repair)Cooling System Draining and
Filling (Static Fill) (See: Service and Repair).
3. Disconnect the negative battery cables. Refer to Battery Negative Cable Disconnection and Connection (Single Battery) (See: Starting and
Charging/Battery/Battery Cable/Negative/Service and Repair)Battery Negative Cable Disconnection and Connection (Dual Batteries) (See:
Starting and Charging/Battery/Battery Cable/Negative/Service and Repair)Battery Negative Cable Disconnection and Connection (Auxiliary
Battery) (See: Starting and Charging/Battery/Battery Cable/Negative/Service and Repair).
4. Remove the drive belt. Refer to Drive Belt Replacement (See: Engine/Drive Belts, Mounts, Brackets and Accessories/Drive Belt/Service and
Repair).
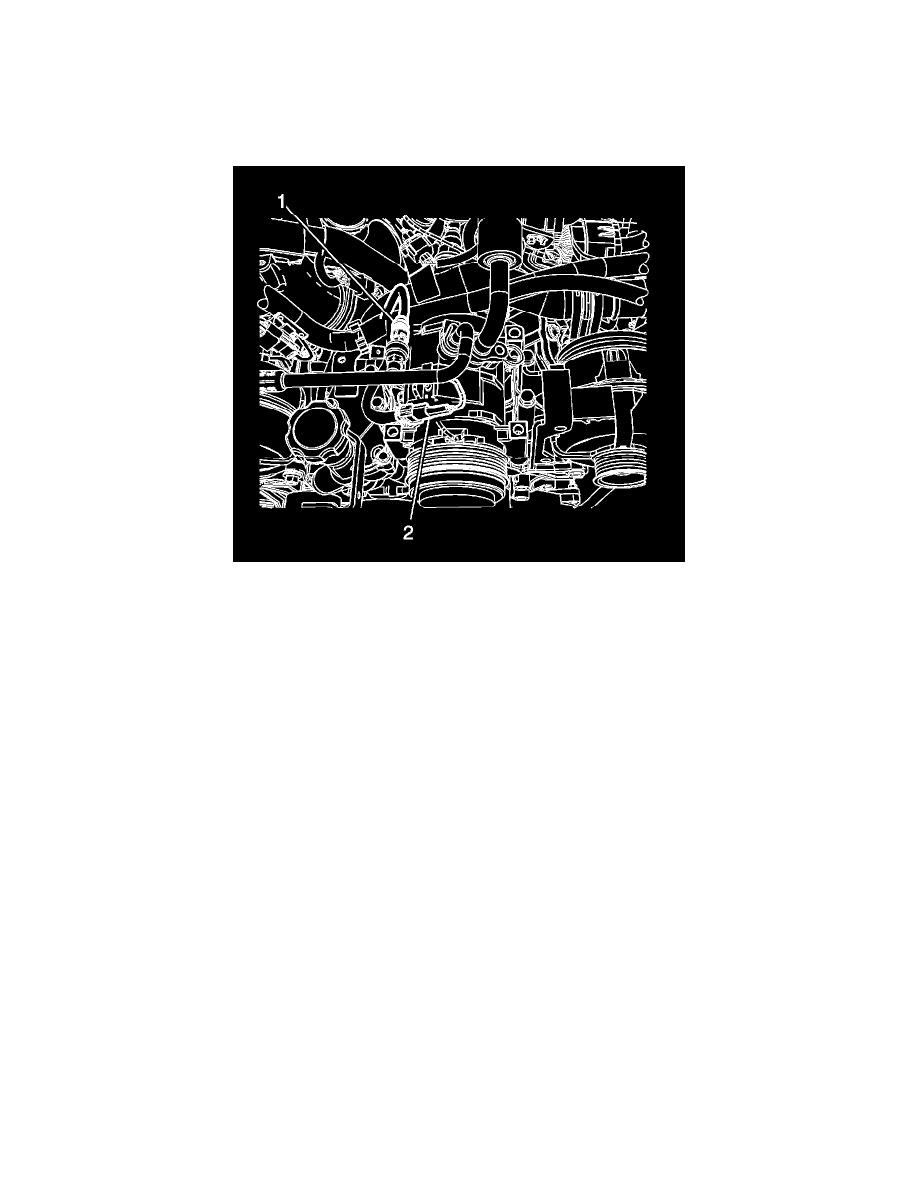
5. Disconnect the air conditioning (A/C) pressure switch electrical connector (1).
6. Disconnect the A/C compressor clutch electrical connector (2).
7. Remove the generator bracket. Refer to Generator Bracket Replacement (V6) (See: Starting and Charging/Charging System/Alternator/Service
and Repair)Generator Bracket Replacement (6.6L) (See: Starting and Charging/Charging System/Alternator/Service and Repair)Generator
Bracket Replacement (V8) (See: Starting and Charging/Charging System/Alternator/Service and Repair).
8. Remove the front oil fill tube. Refer to Oil Filler Tube Replacement (See: Engine/Engine Lubrication/Engine Oil Dip Stick - Dip Stick
Tube/Service and Repair/Oil Filler Tube Replacement).