
Silverado 2500 4WD V8-6.6L DSL Turbo (2010)
10. Remove the upper oil pan bolts and any brackets. Mark the bolt location of the bracket.
11. Separate the upper oil pan from the engine block using J 37228 .
12. Remove the upper oil pan. The oil level indicator tube needs to be removed while lowering the upper oil pan.
13. If required, clean and inspect the upper oil pan. Refer to Upper Oil Pan Cleaning and Inspection (See: Service and Repair/Overhaul/81. Upper
Oil Pan Cleaning and Inspection).
Installation Procedure
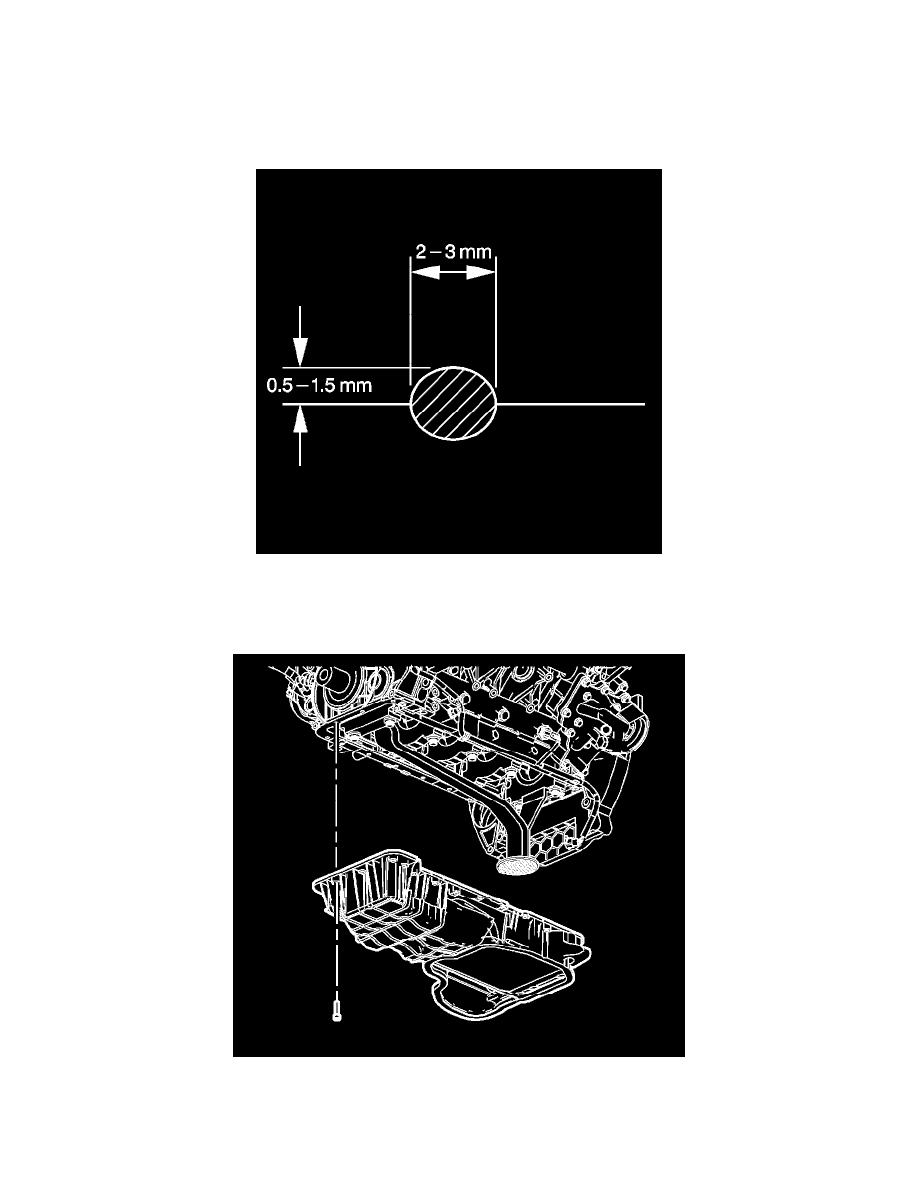
1. Apply a 2-3 mm (0.79-0.118 in) wide by 0.5-1.5 mm (0.02-0.06 in) bead of sealant to the upper oil pan mating surfaces. Refer to Adhesives,
Fluids, Lubricants, and Sealers (See: Specifications/Adhesives, Fluids, Lubricants, and Sealers) for the correct part number.
2. Apply a 2-3 mm (0.79-0.118 in) wide by 0.5-1.5 mm (0.02-0.06 in) bead of sealant to the flywheel housing sealing surface. Refer to Adhesives,
Fluids, Lubricants, and Sealers (See: Specifications/Adhesives, Fluids, Lubricants, and Sealers) for the correct part number.
3. Install the upper oil pan to the engine block. Ensure the oil level indicator tube is installed into the upper oil pan.