
Silverado 2500 4WD V8-6.6L DSL Turbo (2010)
Right
Caution: Refer to Fastener Caution (See: Service Precautions/Vehicle Damage Warnings/Fastener Caution).
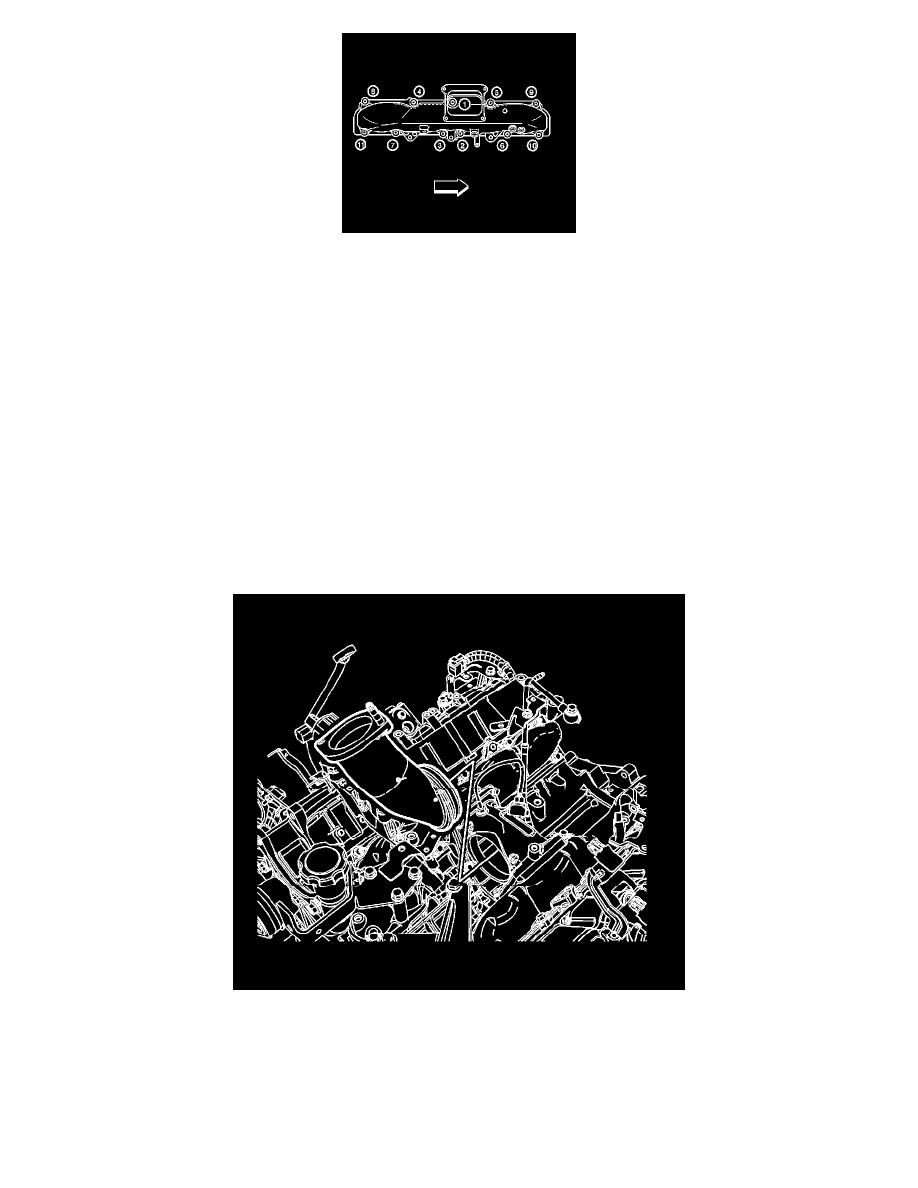
4. Tighten the intake manifold bolts/nuts in the sequence shown.
Tighten the bolts/nuts to 21 Nm (15 lb ft).
5. Install the fuel return junction block. Refer to Fuel Injection Fuel Feed Manifold Replacement (See: Powertrain Management/Fuel Delivery and
Air Induction/Fuel Supply Line/Service and Repair/Fuel Injection Fuel Feed/Fuel Injection Fuel Feed Manifold Replacement).
6. Install the right fuel rail. Refer to Fuel Injection Fuel Feed Front Pipe Replacement - Right Side (See: Powertrain Management/Fuel Delivery and
Air Induction/Fuel Supply Line/Service and Repair/Fuel Injection Fuel Feed/Fuel Injection Fuel Feed Front Pipe Replacement - Right Side).
7. Install the center intake manifold. Refer to Center Intake Manifold Replacement (See: ).
Center Intake Manifold Replacement
Center Intake Manifold Replacement
Removal Procedure
1. Remove the exhaust gas recirculation (EGR) valve cooler tube. Refer to Exhaust Gas Recirculation Valve Cooler Replacement (See: Powertrain
Management/Emission Control Systems/Exhaust Gas Recirculation/EGR Cooler/Service and Repair/Exhaust Gas Recirculation Valve Cooler
Replacement).
2. Remove the water outlet tube. Refer to Water Outlet Tube Replacement (LU3) (See: Cooling System/Coolant Outlet/Service and Repair)Water
Outlet Tube Replacement (LMM) (See: Cooling System/Coolant Outlet/Service and Repair).
3. Remove the intake manifold tube.
4. Remove and discard the 2 intake manifold tube gaskets.
5. Remove the turbocharger. Refer to Turbocharger Replacement (See: Powertrain Management/Fuel Delivery and Air