
Silverado 2500 4WD V8-6.6L DSL Turbo (2010)
When removing, handling or installing this component wear protective gloves. The sharp edges on the component may be very sharp and may cause
injury.
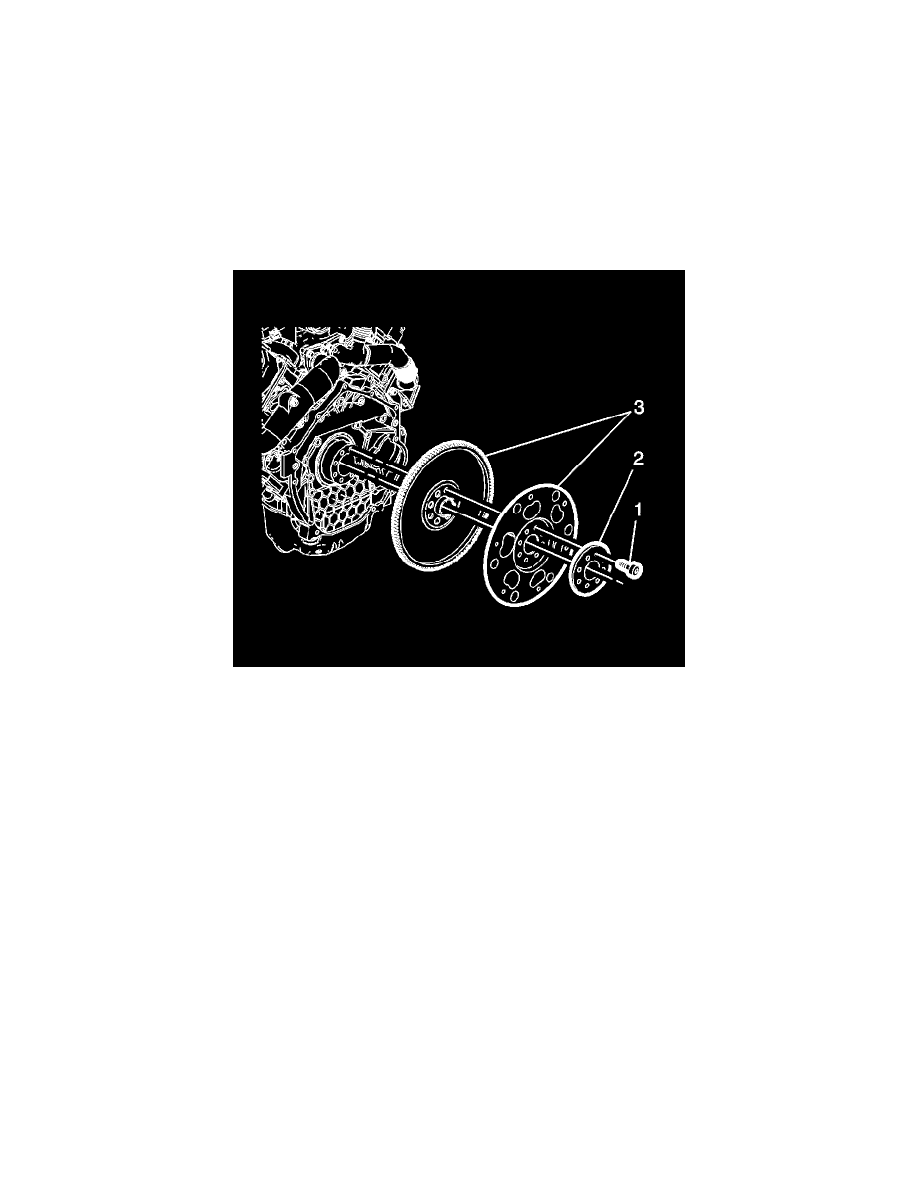
3. Remove and discard the flywheel bolts.
4. Remove the flywheel washer and flywheel.
Installation Procedure
Warning
When removing, handling or installing this component wear protective gloves. The sharp edges on the component may be very sharp and may cause
injury.
Note: When installing the flywheel, ensure that the tapered side of the teeth are facing the starter.
1. Install the flywheel.
2. Install the flywheel washer with the beveled side facing the engine.
Caution: Refer to Fastener Caution (See: Service Precautions/Vehicle Damage Warnings/Fastener Caution).
Caution: This component uses bolts with a preapplied molybdenum disulfide coating for thread lubrication. Do not remove the coating or use any
additional lubricant. Improperly lubricated threads will adversely affect the bolt torque and clamp load. Improper bolt torque and clamp load can
lead to engine damage.
3. Install NEW flywheel bolts.