
Silverado 3500 2WD V8-6.6L DSL Turbo VIN 2 (2004)
Fluid Filter - A/T: Service and Repair
Allison
Automatic Transmission Fluid/Filter
Automatic Transmission Fluid/Filter Replacement
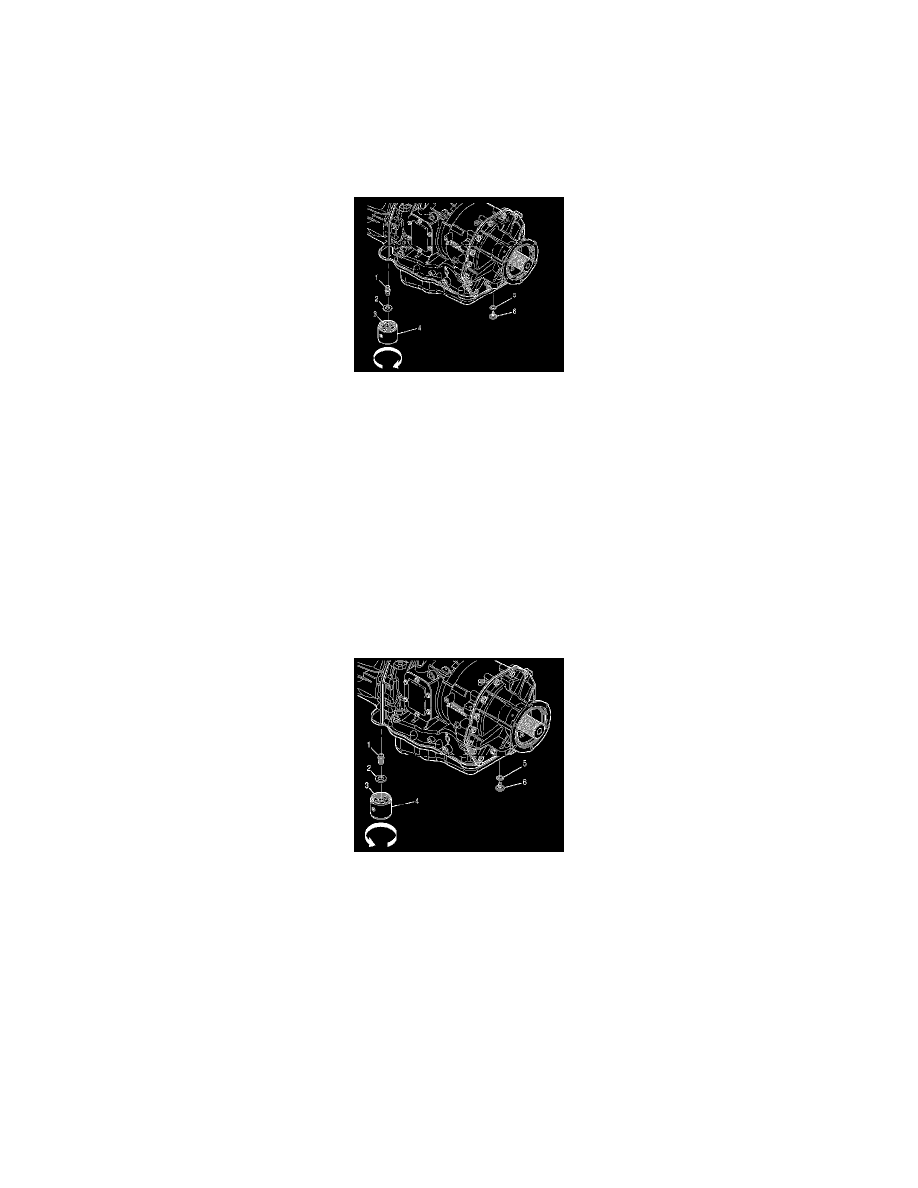
Removal Procedure
1. Important:
DO NOT drain the fluid if only the control main filter is being replaced.
Remove drain plug (6) and drain plug seal (5). Drain the transmission fluid into a suitable container.
2. Inspect the drained fluid.
3. Important:
Use a standard strap-type filter wrench to remove the control main filter.
Remove filter (4) by rotating it in the counterclockwise direction.
4. Remove the magnet (2) from the filter attachment tube (1) in the converter housing or from the top of the control main filter (3).
5. Clean any metal debris from the magnet. Presence of any metal pieces larger than dust may indicate that transmission replacement or overhaul is
required.
Installation Procedure
1. Reinstall the magnet (2) onto the filter attachment tube (1) which is in the converter housing.
2. Lubricate the gasket (3) on the control main filter with transmission fluid.
3. Install, by hand, the control main filter (4) until the gasket on the control main filter touches the converter housing.
4. Notice:
Turning the control-main filter more than ONE FULL TURN after gasket contact will damage the filter and may cause fluid leakage.
Turn the filter ONE FULL TURN ONLY after gasket contact.
5. Notice:
Refer to Fastener Notice in Service Precautions.
Reinstall the drain plug (6) and drain plug seal (5).
^
Tighten the drain plug to 35 Nm (26 ft. lbs.).
6. Refill Transmission with DEXRON®III Automatic Transmission Fluid. Refer to Fluid Capacity Specifications.