
Silverado 3500 2WD V8-81L VIN G (2005) Transmission: Shift Solenoid Repair
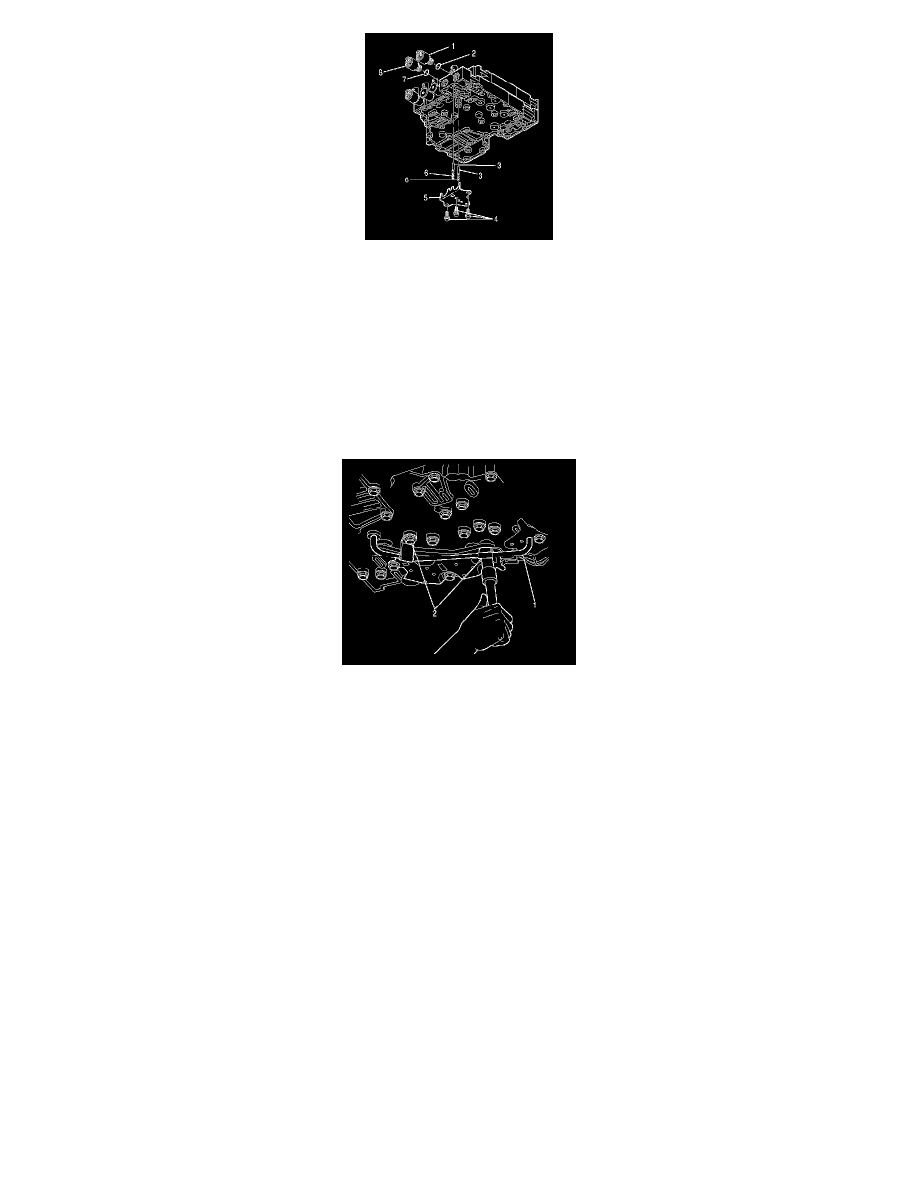
1. Obtain the new solenoid (1) or (8). Lubricate new O-ring (2) or (7) with clean transmission fluid. Install the O-ring and push the new solenoid into
the control valve body bore with the wiring harness connector in the correct position.
2. Reinstall the 2 accumulators (3) and springs (6) before installing the pressure control valve retaining bracket (5). The valve (3) goes in the bore
first with the hollow end facing outward, followed by the spring (6) which goes inside the hollow portion of the valve.
Notice: Use the correct fastener in the correct location. Replacement fasteners must be the correct part number for that application. Fasteners requiring
replacement or fasteners requiring the use of thread locking compound or sealant are identified in the service procedure. Do not use paints, lubricants,
or corrosion inhibitors on fasteners or fastener joint surfaces unless specified. These coatings affect fastener torque and joint clamping force and may
damage the fastener. Use the correct tightening sequence and specifications when installing fasteners in order to avoid damage to parts and systems.
3. Install the pressure control valve retaining bracket (5), and install the 3 bolts (4). Tighten the bolts to 12 Nm (108 lb in).
4. Install the reverse signal pipe. Install the 2 bolts (2) that fasten reverse signal pipe (1) to the control valve assembly. Tighten the bolts to 12 Nm
(108 lb in).
5. Reconnect the internal wiring harness to the solenoid.
6. Install the oil pan and transmission internal oil filter. Refer to Oil Pan Replacement, See: Fluid Pan/Service and Repair
Control Valve Solenoid Replacement (Solenoid C, D, E, F)
Control Valve Solenoid Replacement (Solenoid C, D, E, F, G)
Removal Procedure