
Silverado 3500 4WD V8-6.0L VIN U (2004)
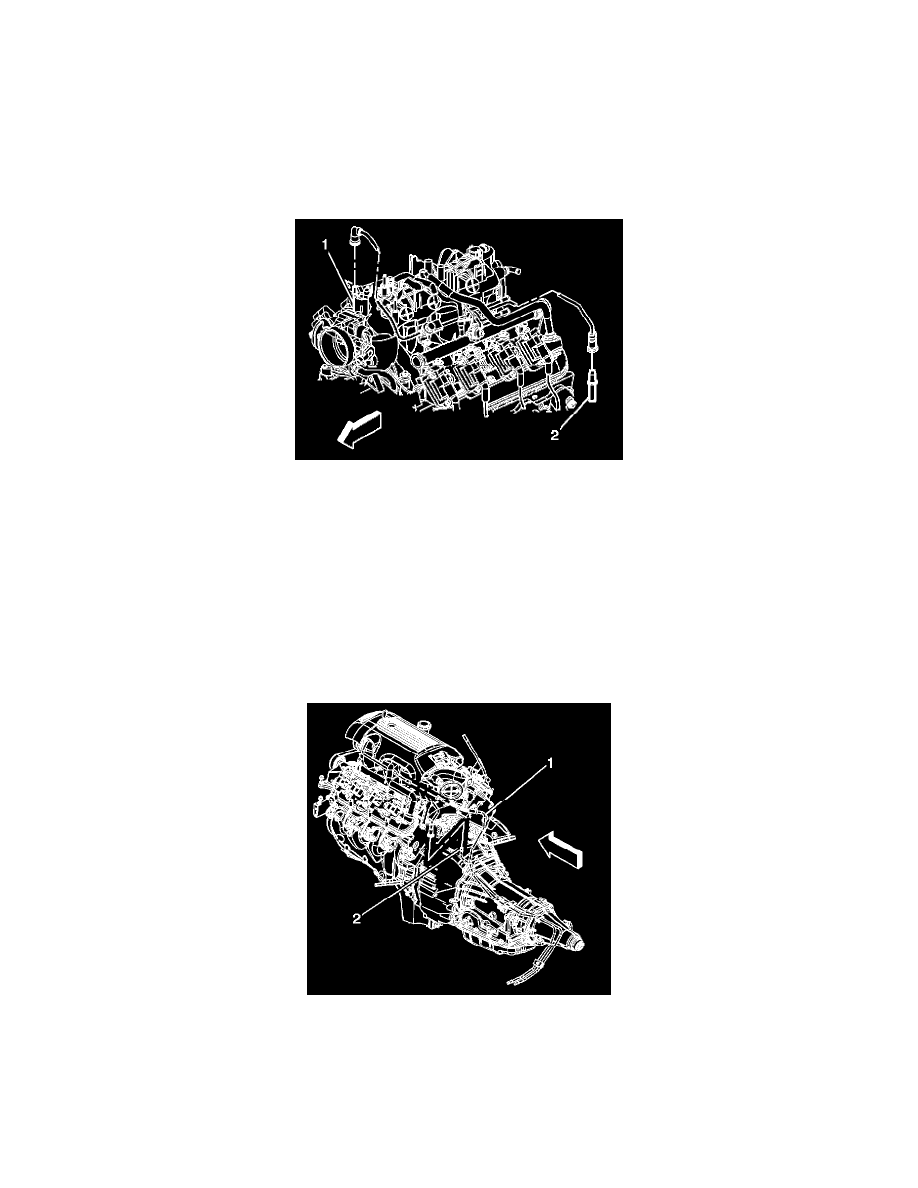
2. Disconnect the EVAP tube from the EVAP canister purge solenoid (1).
2.1.
Push the large side white retainer portion in.
2.2.
Push down, while pulling up slightly in order to disengage the tube.
3. Disconnect the EVAP tube from the chassis EVAP pipe (2).
3.1.
Push the large side white retainer portion in.
3.2.
Push down, while pulling up slightly in order to disengage the tube.
4. Remove the EVAP tube.
5. Cap the EVAP canister purge solenoid and EVAP chassis pipe in order to prevent possible EVAP system contamination.
INSTALLATION PROCEDURE
1. Remove the caps from the EVAP canister purge solenoid and EVAP chassis pipe.
2. Install the EVAP tube.
3. Connect the EVAP tube to the EVAP chassis pipe (2).
4. Connect the EVAP tube to the EVAP purge solenoid (1).
5. Install the engine sight shield.
Evaporative Emission (EVAP) Hoses/Pipes Replacement - Chassis 1
EVAPORATIVE EMISSION (EVAP) HOSES/PIPES REPLACEMENT - CHASSIS (PICKUP)
REMOVAL PROCEDURE
IMPORTANT: Clean the fuel and evaporative emission (EVAP) connections and surrounding areas prior to disconnecting the lines in order to avoid
possible system contamination.
1. Relieve the fuel system pressure. Refer to Fuel Pressure Relief Procedure.
2. Disconnect the fuel feed line (1) at the engine.
3. Disconnect the EVAP canister purge tube line (2).
4. Cap the fuel rail in order to avoid possible system contamination.
5. Raise and suitably support the vehicle. Refer to Vehicle Lifting.