
Silverado Classic 1500 2WD V6-4.3L (2007)
Installation Procedure
Notice: Apply the proper amount of the sealant when assembling this component. Excessive use of the sealant can prohibit the component from
sealing properly. A component that is not sealed properly can leak leading to extensive engine damage.
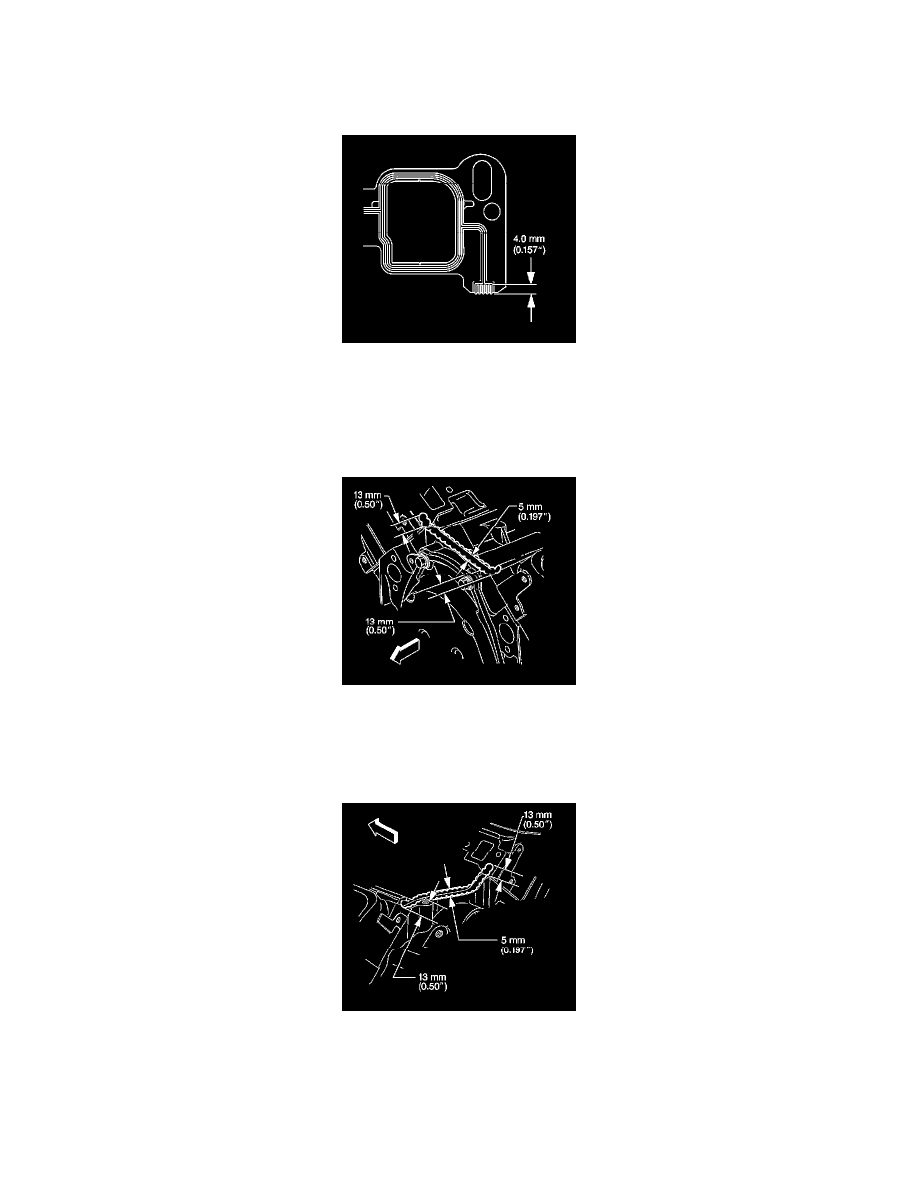
1. Apply a 4.0 mm (0.157 inch) patch of adhesive to the cylinder head side of the intake manifold gasket at each end. Refer to Sealers, Adhesives,
and Lubricants for the correct part number.
Important: The intake manifold gasket must be installed while the adhesive is still wet to the touch.
2. Install the intake manifold gasket onto the cylinder head. Use the gasket locating pins in order to properly seat the gasket.
3. Important: The intake manifold must be installed and the fasteners tightened while the adhesive is still wet to the touch.
Apply a 5 mm (0.197 inch) bead of adhesive to the front top of the engine block. Refer to Sealers, Adhesives, and Lubricants for the correct part
number.
4. Extend the adhesive bead 13 mm (0.50 inch) up onto each intake manifold gasket.
5. Apply a 5 mm (0.197 inch) bead of adhesive to the rear top of the engine block. Refer to Sealers, Adhesives, and Lubricants for the correct part
number.
6. Extend the adhesive bead 13 mm (0.50 inch) up onto each intake manifold gasket.