
Silverado Classic 1500 2WD V8-5.3L (2007)
Installation Procedure
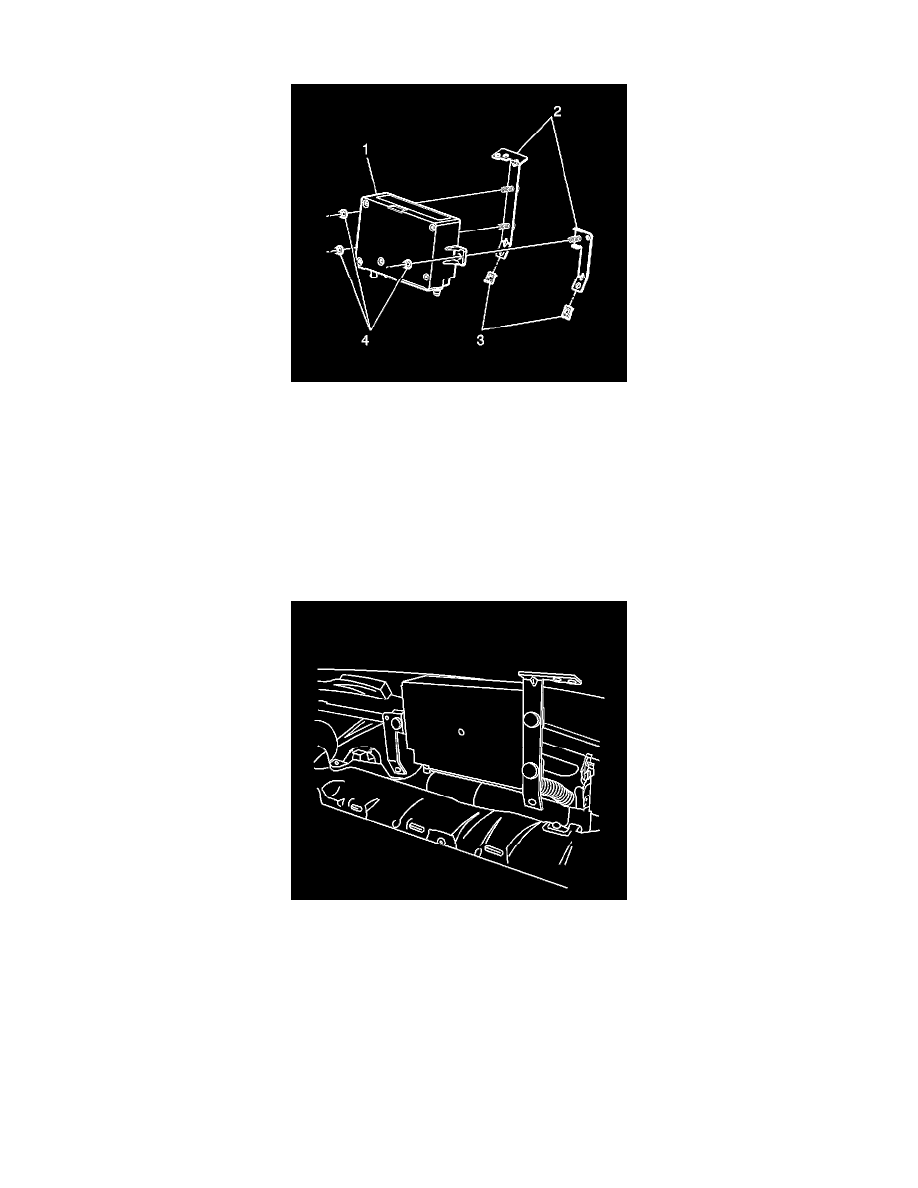
1. If replacing the VCIM, record the 10-digit STID number, and the 11-digit ESN number from the labels on the new module.
2. Ensure the nuts (3) are installed on the module mounting brackets (3).
3. Install the mounting brackets (2) to the VCIM (1).
Notice: Refer to Fastener Notice.
4. Install the nuts (4).
Tighten the nuts to 2 N.m (18 lb in).
5. If necessary, move the cross-car duct forward slightly in order to make room for the installation of the module.
6. Install the VCIM and bracket assembly to the I/P.
7. Install the push in retainer.