
Silverado Classic 2500 2WD V8-8.1L (2007)
Fuel Rail: Service and Repair
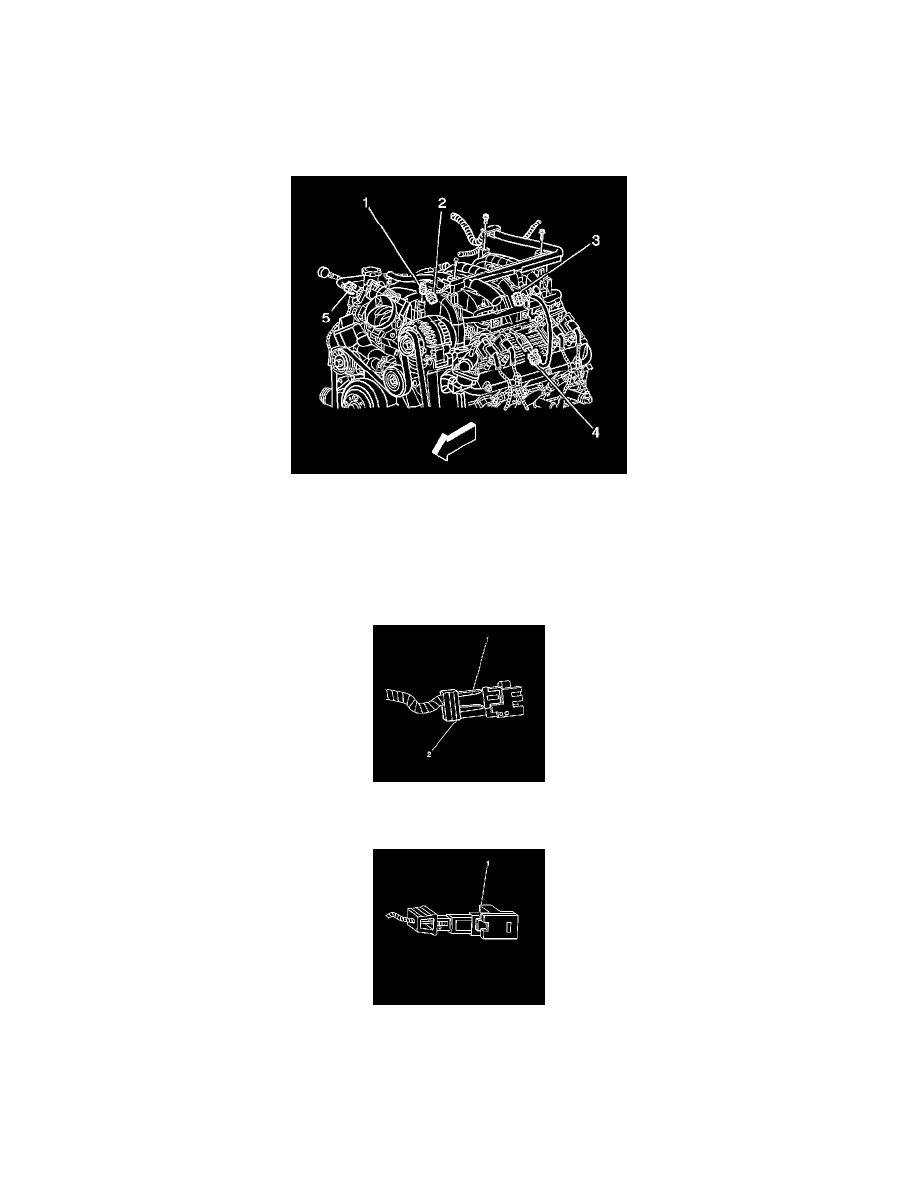
FUEL INJECTION FUEL RAIL ASSEMBLY REPLACEMENT
REMOVAL PROCEDURE
IMPORTANT: An 8-digit identification number is located on the fuel rail. Refer to this number if servicing, or part replacement is required.
1. Relieve the fuel system pressure. Refer to Fuel Pressure Relief (With CH 48027) Fuel Pressure Relief (Without CH 48027).
2. Remove the engine sight shield.
3. Disconnect the generator electrical connector (2).
4. Disconnect the evaporative emission (EVAP) canister purge valve electrical connector.
5. Disconnect the electronic throttle control (ETC) electrical connector (5).
6. Remove the engine harness bolt and studs.
7. Reposition the engine harness to the drivers side of the engine compartment.
8. Identify the fuel injector connectors to their corresponding injectors in order to ensure correct sequential injector firing order after reassembly.
9. Pull the top portion (2) of the connector up. Do not pull the top portion of the connector past the top of the white portion (1).
10. Push the tab (1) on the lower side of the connector in order to release the connector from the injector.
11. Repeat step 12 and step 13 for each injector connector.
NOTE:
-
Remove the fuel rail assembly carefully in order to prevent damage to the injector electrical connector terminals and the injector spray tips.
Support the fuel rail after the fuel rail is removed in order to avoid damaging the fuel rail components.
-
Cap the fittings and plug the holes when servicing the fuel system in order to prevent dirt and other contaminants from entering open pipes and