
Silverado Classic 3500 2WD V8-6.0L (2007)
Hose/Line HVAC: Service and Repair
Discharge Hose Replacement (LB7)
Discharge Hose Replacement (LB7)
Tools Required
J 39400-A Halogen Leak Detector
Removal Procedure
1. Recover the refrigerant. Refer to Refrigerant Recovery and Recharging. See: Heating and Air Conditioning/Service and Repair/Removal and
Replacement/Refrigerant Recovery and Recharging
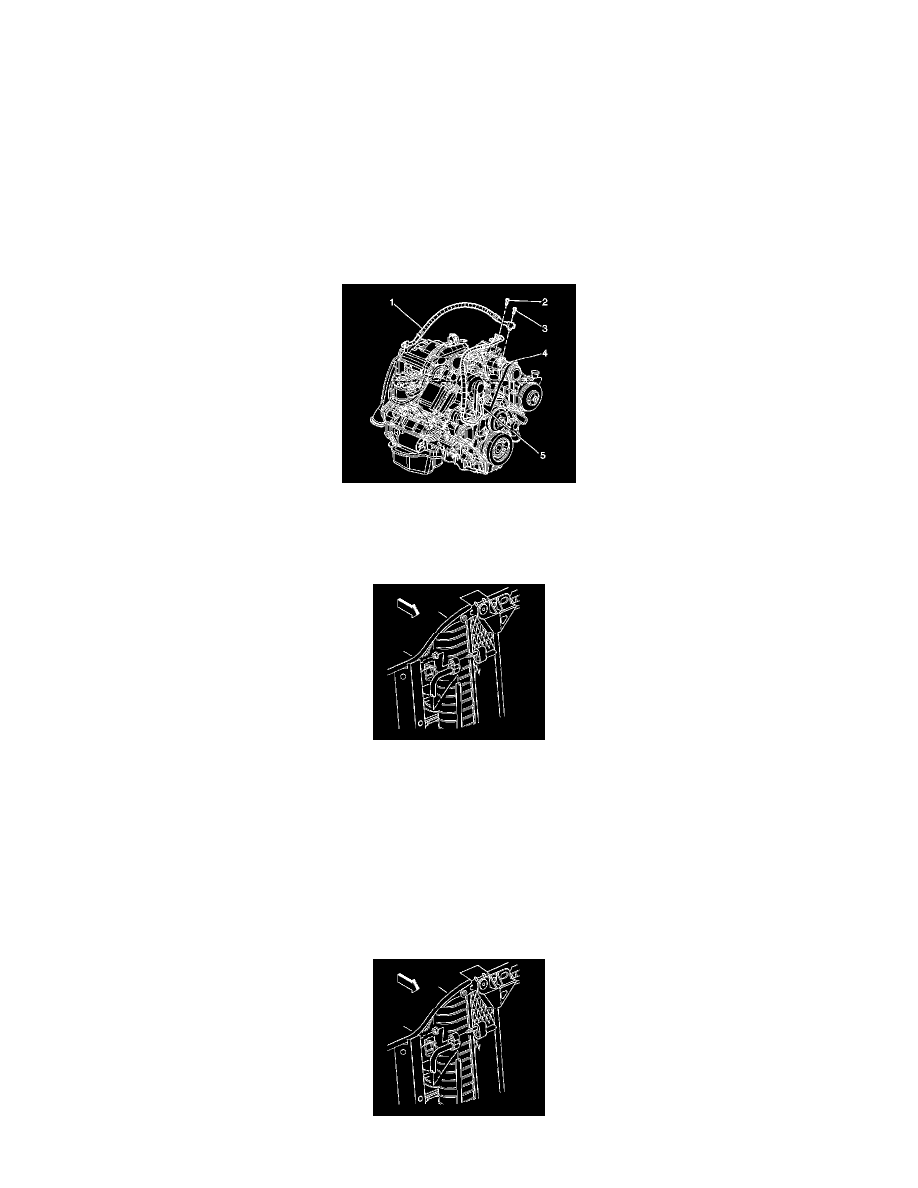
2. Remove the discharge hose mounting bolt (2) from the A/C compressor.
Discard the bolt.
3. Remove the discharge hose (5) from the A/C compressor.
4. Remove the upper radiator air baffle.
5. Remove the discharge hose nut from the condenser.
Discard the nut.
6. Remove the discharge hose from the condenser.
7. Disconnect the A/C recirculation switch from the discharge hose.
8. Remove the discharge hose from the vehicle.
9. Discard all of the used sealing washers. Cap the system openings.
Installation Procedure
1. Install the discharge hose to the vehicle.
2. Connect the A/C recirculation switch to the discharge hose.
3. Install the discharge hose to the condenser using new sealing washers.