
Spectrum L4-91.5 1.5L (1985)
Rocker Arm Assembly: Service and Repair
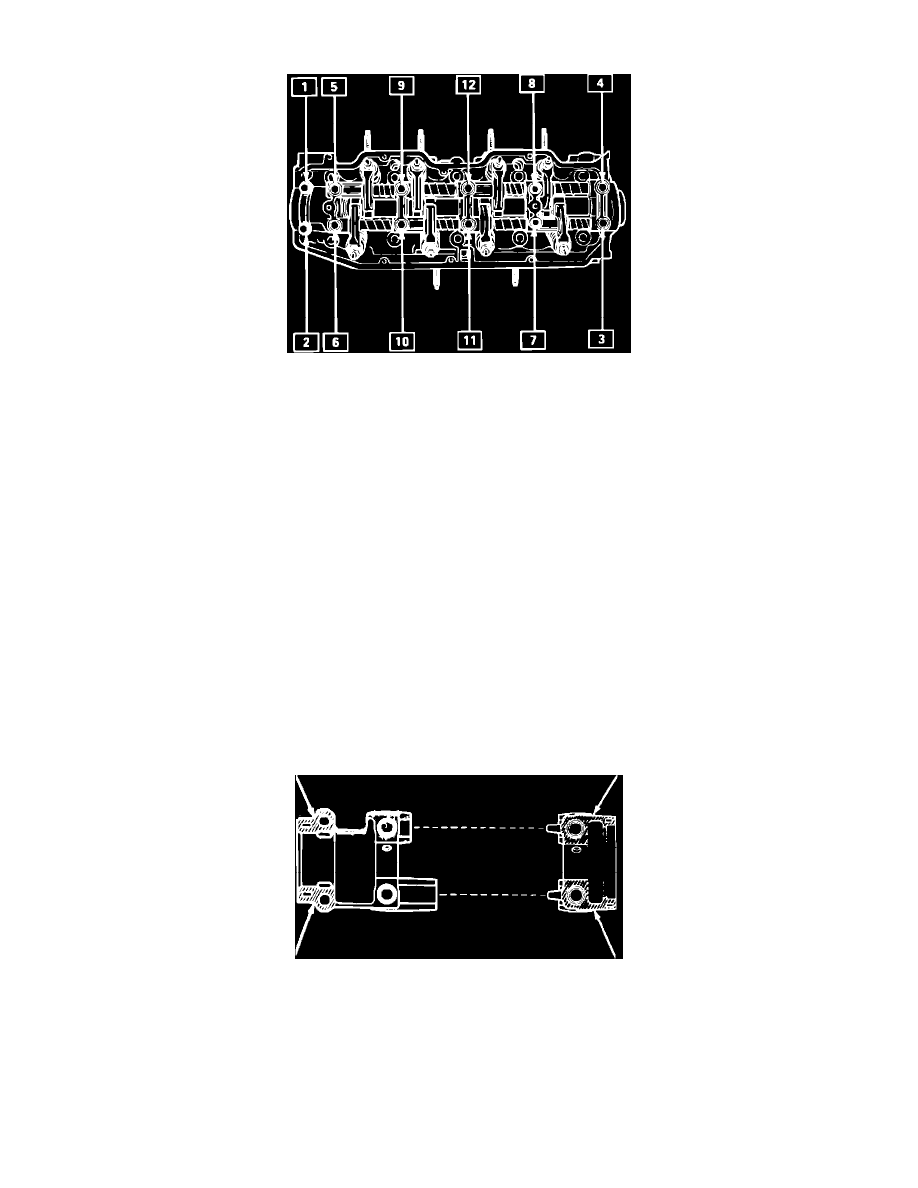
Fig. 8 Rocker arm shaft removal & installation sequence
REMOVAL
1.
Disconnect battery ground cable.
2.
Disconnect CPV hoses and unclip spark plug wires from valve cover.
3.
Disconnect ground wire from valve cover.
4.
Remove right side engine mounting rubber.
5.
Support engine with a suitable jack.
6.
Remove bolts and plate from side of engine.
7.
Remove bracket from front cover.
8.
Remove 4 front cover attaching bolts.
9.
Remove valve cover attaching bolts.
10.
Loosen front cover, then remove valve cover.
11.
Remove rocker arm bracket bolts in sequence, Fig. 8.
12.
Remove rocker arm shaft and rocker arms.
INSTALLATION
1.
Lightly lubricate rocker arms and shafts with clean engine oil.
2.
Install rocker shafts with identification marks to the front of engine.
3.
Remove residual oil from contact surfaces of Nos. 1 and 5 rocker brackets on cylinder head.
Fig. 9 Applying sealant to rocker brackets
4.
Apply suitable sealant to contact surfaces of Nos. 1 and 5 rocker brackets, Fig. 9.