
Suburban 1/2 Ton 2WD V8-5.3L VIN T (2004)
1. Remove the overhead console screw.
2. Remove the overhead console from the headliner.
3. Disconnect the electrical connectors from the auxiliary HVAC control assembly.
4. Remove the overhead console from the vehicle.
5. Remove the auxiliary HVAC control assembly from the overhead console.
INSTALLATION PROCEDURE
1. Install the auxiliary HVAC control assembly to the overhead console.
2. Connect the electrical connectors to the auxiliary HVAC control assembly.
3. Install the overhead console to the headliner.
4. Install the overhead console screw.
NOTE: Refer to Fastener Notice in Service Precautions.
Tighten the screw to 2 N.m (18 lb in).
HVAC Control Assembly Replacement - Rear Auxiliary
HVAC CONTROL ASSEMBLY REPLACEMENT - REAR AUXILIARY
REMOVAL PROCEDURE
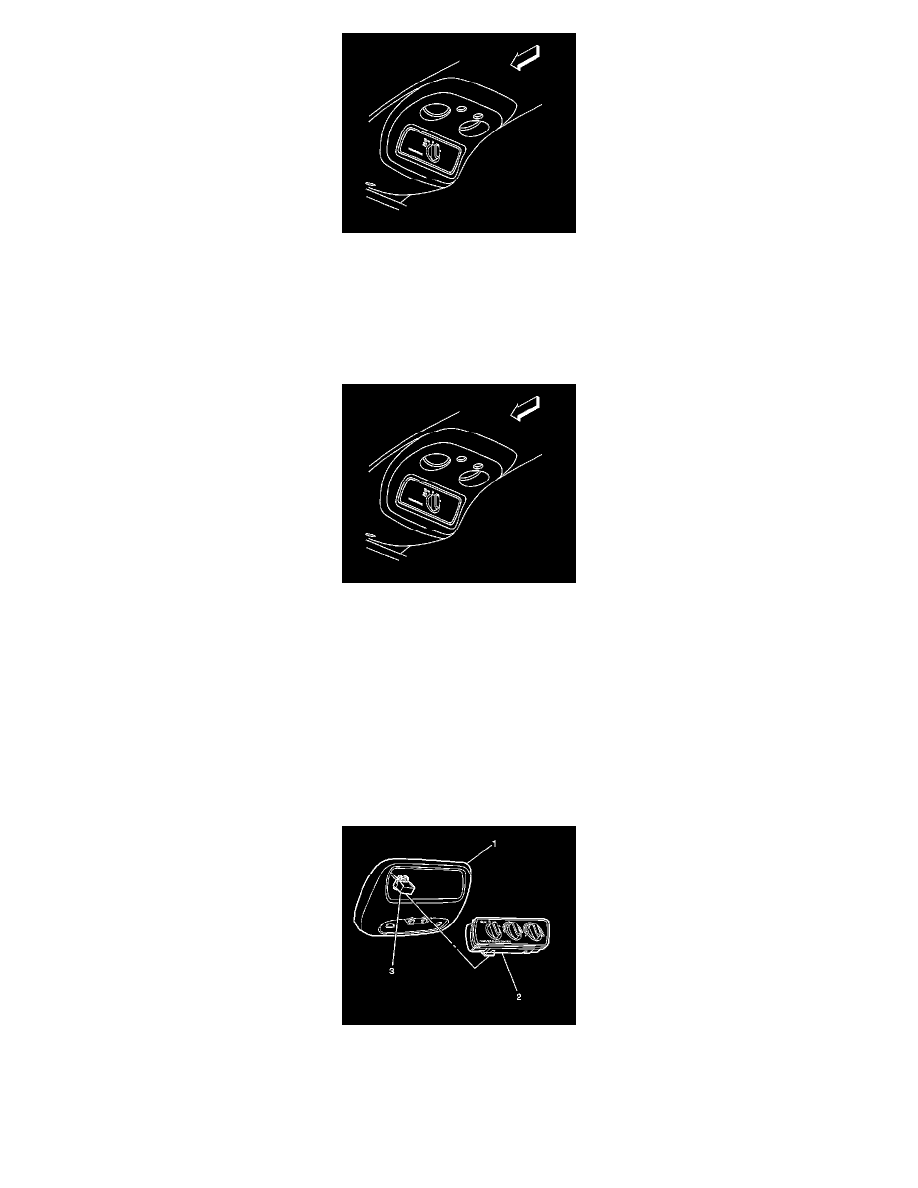
1. Separate the front of the overhead console (1) from the headliner.
2. Push the assembly rearward and pull down in order to access the retaining tabs.
3. Remove the auxiliary HVAC control assembly (2) by releasing the tabs at the rear of the control and push out from the rear.
4. Disconnect the electrical connector (3).
INSTALLATION PROCEDURE