
Suburban 3/4 Ton 4WD V8-393 6.5L DSL Turbo (1993)
2.
Hinge pin retainers and the hinge pins.
3.
End gate window assembly from the vehicle.
4.
End gate window garnish molding.
5.
Hinge to end gate window assembly nuts.
6.
Hinge from the end gate window.
INSTALL OR CONNECT (Figure 3)
1.
Hinge to the end gate window.
NOTICE:
Refer to "Notice" on page 1OA5-1.
2.
Hinge to end gate window assembly nuts.
TIGHTEN
Hinge to end gate window assembly nuts to 23 N.m (17 lbs. ft.).
3.
End gate window garnish molding.
4.
End gate window assembly to the vehicle.
5.
Hinge pins and the hinge pin retainers.
6.
End gate window supports. Refer to "End Gate Window Support Replacement."
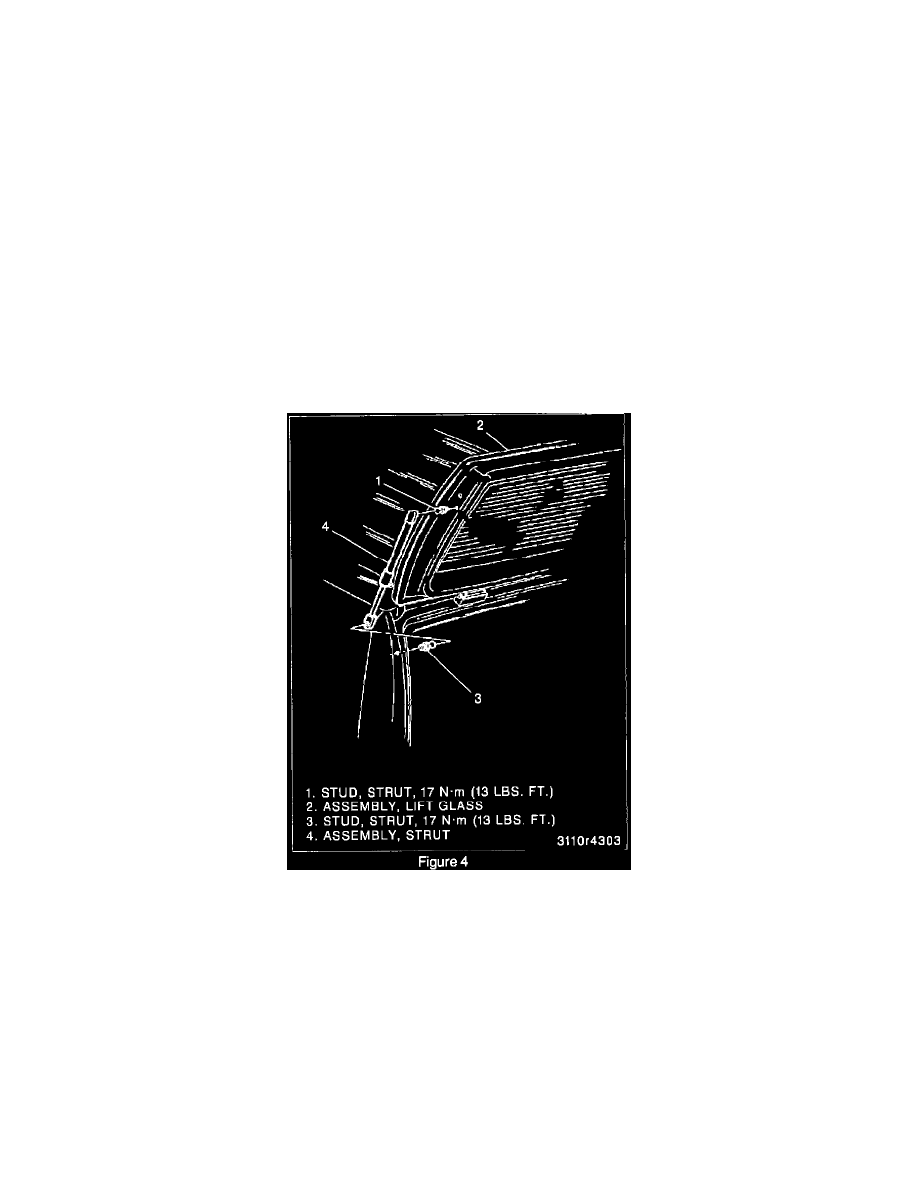
End Gate Window Support Replacement
Figure 4-Window Support
CAUTION:
Do not attempt to remove or loosen gas support assembly attachments with glass in any position other than fully open as personal injury may result.
Do not intermix original quality gas supports with other quality supports, since not all supports have the same output level.
REMOVE OR DISCONNECT (Figure 4)
1.
Rear window defogger wires attached to the gas supports (if equipped).
2.
Ball sockets from the glass side.
a
Carefully pry the gas support ball socket from the ball. Insert a small screwdriver between the ball and the ball socket and pull the gas support
from the window.
b
Support the rear window glass.
3.
Ball sockets from the body side.