
Suburban 3/4 Ton 4WD V8-6.0L VIN U (2004)
Important: Do not reuse the EBCM mounting bolts. Always install new bolts.
9. Clean the EBCM to BPMV mounting surfaces with a clean cloth.
Installation Procedure
Important: Do not use RTV or any other type of sealant on the EBCM gasket or mating surfaces.
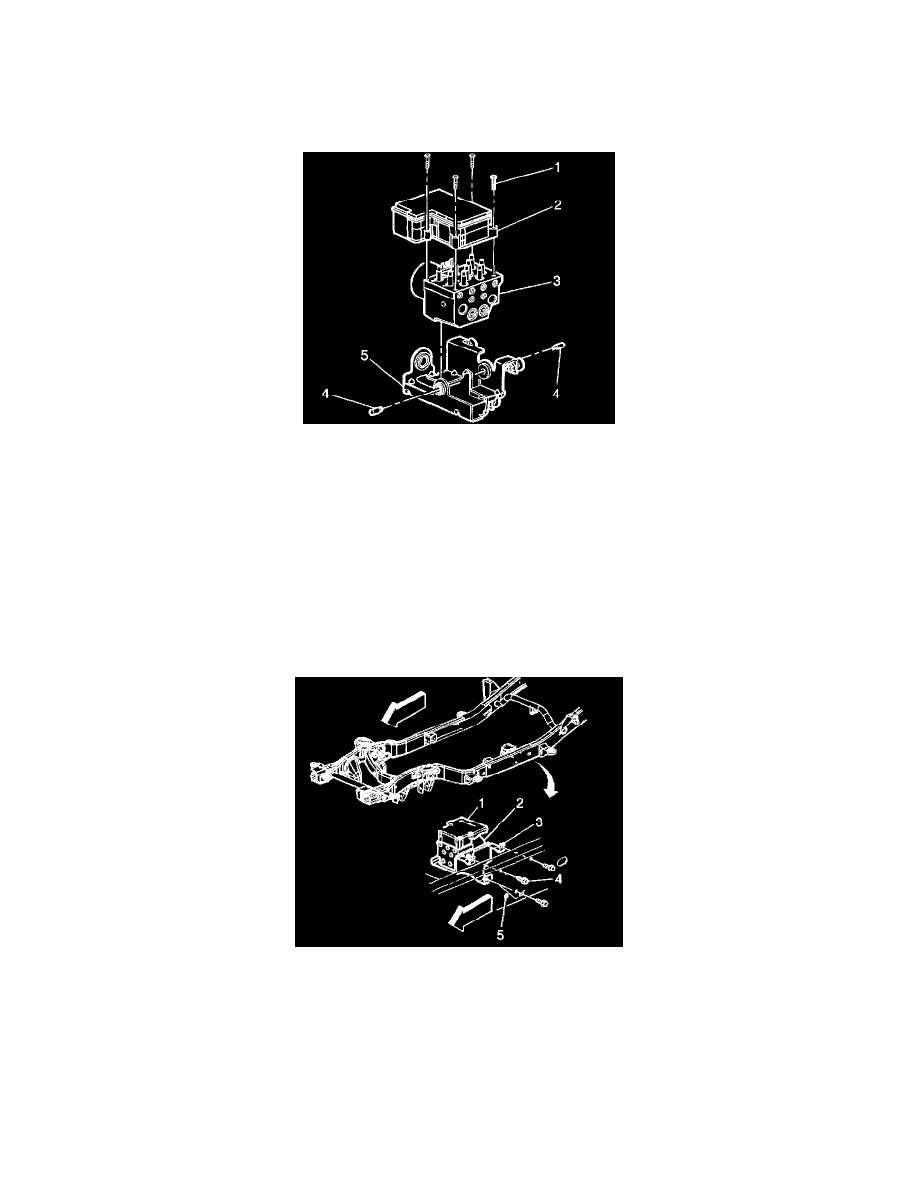
1. Install the EBCM (2) onto BPMV (3).
Notice: Refer to Fastener Notice in Service Precautions.
Important: Do not reuse the old mounting bolts. Always install new EBCM bolts with the new BPMV.
2. Install the EBCM bolts (1).
Tighten the bolts to 5 Nm (39 inch lbs.) in an X-pattern.
3. Install the BPMV (3) to EHCU bracket (5).
4. Install the BPMV to bracket retaining bolts (4).
Tighten the bolts to 9 Nm (7 ft. lbs.).
5. Install the EHCU to the vehicle frame (5).
6. Install the EHCU bracket bolts.
Tighten the EHCU bracket baits (4) to 25 Nm (18 ft. lbs.).
7. Connect the electrical connectors to the EBCM (1).
Important: The brake pipes are held in place by a plastic bracket mounted to the frame. Make sure that the brake pipes stay in the correct place for
proper reassembly.
8. Install the brake pipes to the BPMV (2).
Tighten the brake pipe fittings to 25 Nm (18 ft. lbs.).
9. Bleed the brake system using the ABS Automated Bleed Procedure (W/JL4). Refer to ABS Automated Bleed Procedure (W/O JL4) or ABS