Tahoe 2WD V8-4.8L VIN V (2004)

Suspension Control ( Automatic - Electronic ): Service and Repair
Automatic Level Control
Automatic Level Control Air Dryer/Pressure Sensor Replacement
Automatic Level Control Air Dryer and Pressure Sensor Replacement
Removal Procedure
1. Remove the automatic level control air compressor from the vehicle.
2. Clean the area around the connection of the automatic level control air dryer to the automatic level control air compressor body.
3. Disconnect the electrical connector from the pressure sensor.
4. Remove the air dryer/pressure sensor assembly retaining screw.
5. Push the air dryer/pressure sensor assembly in while rotating the air dryer pressure sensor assembly clockwise until the assembly detaches from the
automatic level control air compressor body.
6. Remove the automatic level control air dryer from the automatic level control air compressor.
Installation Procedure
1. Install the automatic level control air dryer to the automatic level control air compressor.
2. Push the air dryer/pressure sensor assembly in while rotating the air dryer/pressure sensor assembly counterclockwise until the assembly attaches
to the automatic level control air compressor body.
3. Install the air dryer/pressure sensor assembly retaining screw.
4. Connect the electrical connector to the pressure sensor.
5. Install the automatic level control air compressor to the vehicle.
Air Line Tubing Repair
Air Line Tubing Repair
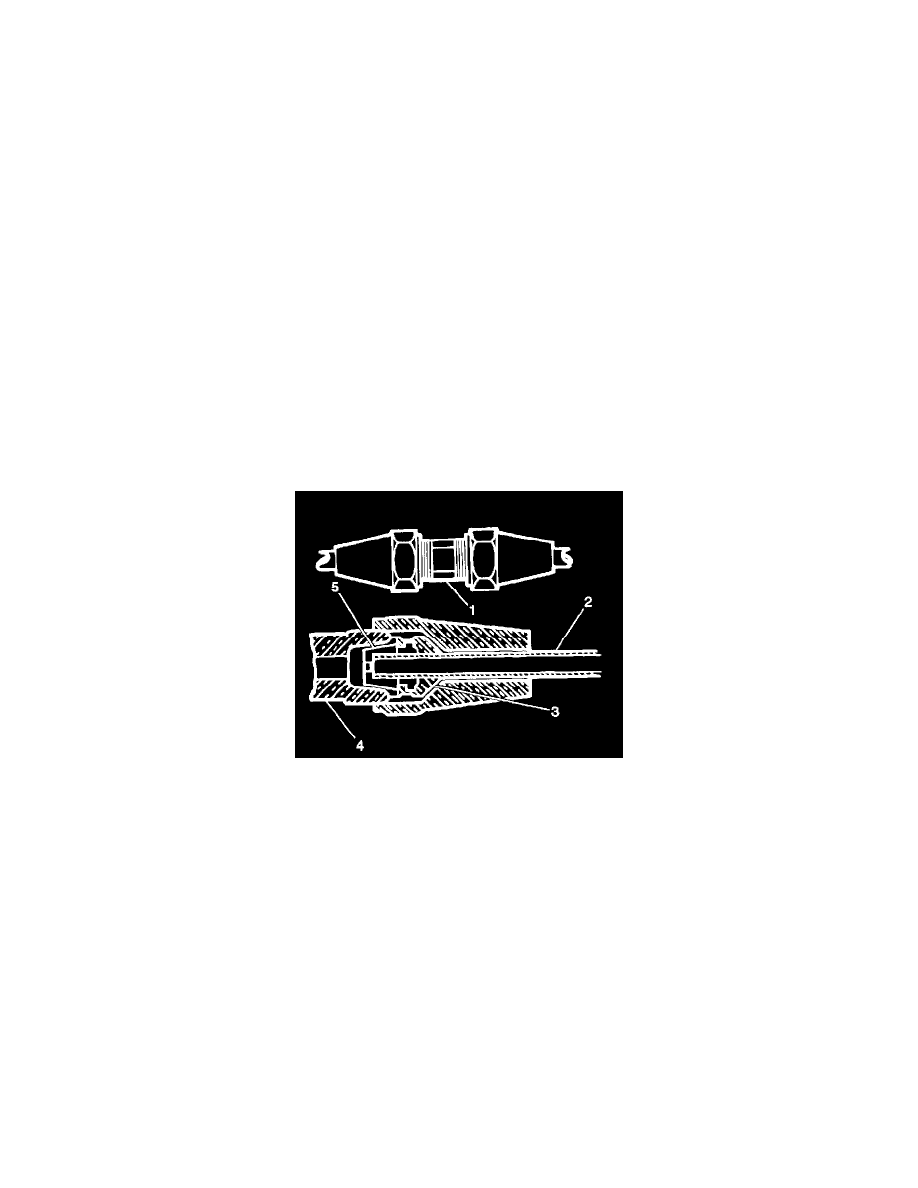
1. Locate the leaking area with soap and water or a stethoscope.
2. Cut and remove the leaking line (2) section.
3. Remove the plastic retainer pin from one of the nuts.
4. Slide the air line tube onto the nut until the line bottoms in the rubber seal (5).
Notice: Refer to Fastener Notice in Cautions and Notices.
5. Hold the air line tube in position.
^
Tighten the air line tube repair nut to 8 Nm (70 inch lbs.).
6. Install the air line tube to the other end of the coupling.
7. Repeat Steps 3 through 5.
Important: Ensure that the repaired air line tube is secured in a location where the line is not pinched, or kinked, and will not contact the exhaust
system.
8. Install the air line tube to the vehicle.
9. Inflate the real time damping level control system and inspect for leaks.
Air Compressor Replacement
Air Compressor Replacement
Removal Procedure
