
Tahoe 2WD V8-6.0L Hybrid (2008)
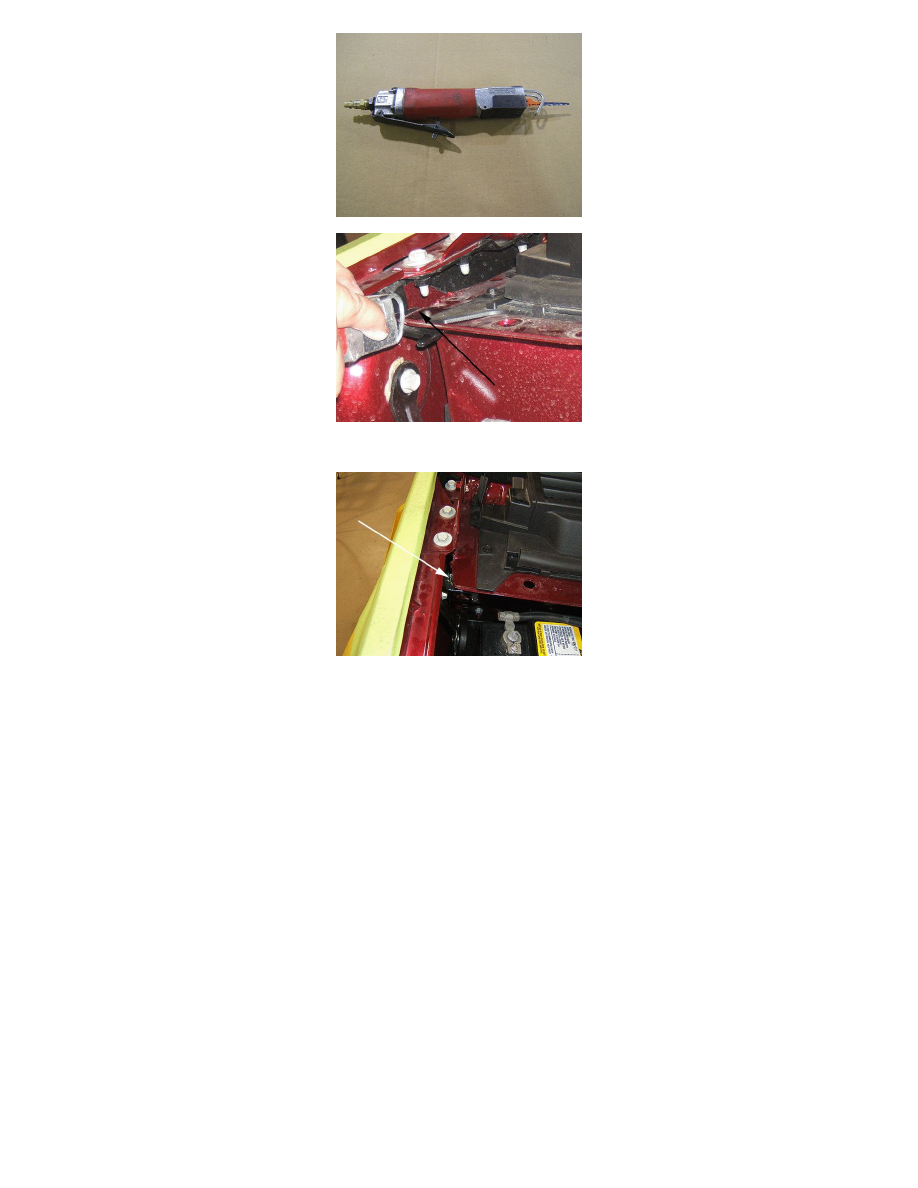
5. Trim the upper plenum flange as shown. Use an air powered saw with a metal cutting blade as illustrated.
6. A minimum clearance of 5.0 mm ( 7/32 in) needs to be created between the flange and the fender bracket.
7. After the cut has been made, use a vacuum cleaner to remove the metal shavings from the work area.
8. Restore the corrosion protection to the repair area. Refer to Anti-Corrosion Treatment and Repair in SI.
9. Touch up the paint on the repair area. For the proper refinish materials to use, refer to the GMWI5406 GM Globally Approved Refinish Materials
Information. The refinish materials information is now online at the GMGOODWRENCH WEB SITE*. Painted books have been discontinued.
To access the site, follow these steps:
-
Go to GM web site.
-
Click on GM Technical Repair Information.
-
Click on For Body Shop & Service link at the bottom of the page.
-
Click on Paint Shop tab.
-
* In Canada, the GM Approved Refinish Materials Booklet is also available in GM GlobalConnect by choosing LIBRARY, SERVICE and
then PAINT SHOP.
10. Reinstall the bolt connecting the hood open assist spring to the hood hinge.
Tighten
Tighten the bolt to 22 Nm (16 lb ft).
11. Reinstall the four bolts retaining the rear upper fender bracket to the body.
Tighten
Tighten the bolts to 9 Nm (80 lb in).
Warranty Information