Tahoe 2WD V8-6.0L Hybrid (2008)

4. Install the pressure control solenoid (377).
5. Install the pressure control solenoid retainer (378) and retainer bolt (364A) .
Tighten the bolt to 11 N.m (97 lb in).
6. Install the TCC PWM solenoid to the control valve body.
7. Install the TCC PWM solenoid retainer.
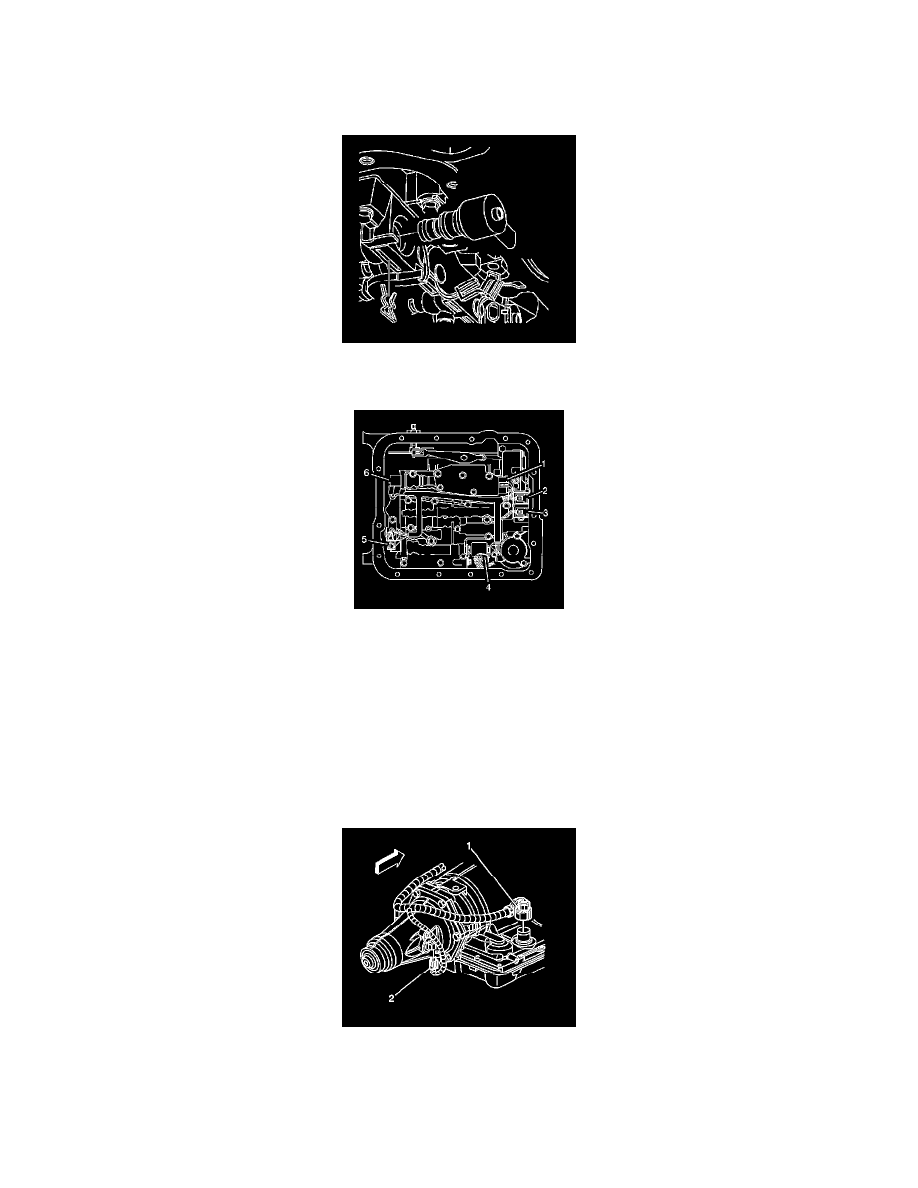
8. Connect the internal wiring harness electrical connectors to the following components:
*
Transmission fluid pressure switch (1)
*
1-2 shift control solenoid (2)
*
2-3 shift control solenoid (3)
*
Pressure control solenoid (4)
*
TCC PWM solenoid (5)
*
3-2 control solenoid (6)
9. Install the 1-2 accumulator. Refer to Accumulator Assembly, Spacer Plate, and Gaskets (See: Transmission and Drivetrain/Automatic
Transmission/Transaxle/Accumulator/Service and Repair) .
10. Connect the transmission harness 20-way connector (1) to the transmission pass-through connector.
Align the arrows on each half of the connector and insert straight down.
11. Install the transmission filter. Refer to Automatic Transmission Fluid and Filter Replacement (See: Transmission and Drivetrain/Automatic
Transmission/Transaxle/Service and Repair/Removal and Replacement) .
Important: It is recommended that transmission adaptive pressure (TAP) information be reset.
