
Tahoe 2WD V8-6.0L Hybrid (2008)
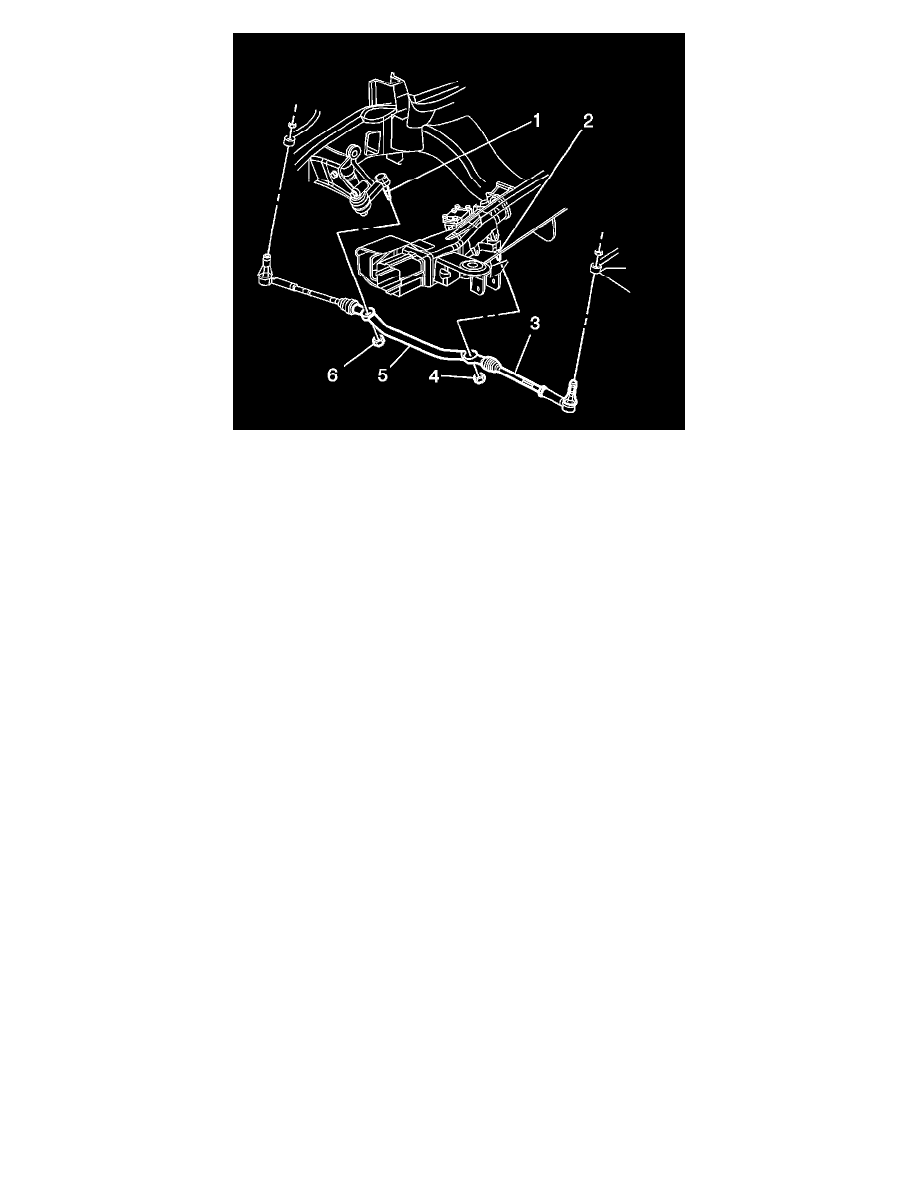
1. Install the relay rod (5) to the vehicle.
2. Install the pitman arm (2) to the relay rod (5).
3. Install the idler arm (1) to the relay rod (5).
Notice: Refer to Fastener Notice .
Important: Use a new pitman arm nut.
4. Install the pitman arm nut (4).
Tighten the nut to 62 N.m (46 lb ft).
Important: Use a new idler arm nut.
5. Install the idler arm nut (6).
Tighten the nut to 62 N.m (46 lb ft).
6. Install the steering linkage inner tie rods (3). Refer to Steering Linkage Inner Tie Rod Replacement (See: Tie Rod/Service and Repair/Steering
Linkage (Non-Rack & Pinion)) .
7. Install the steering linkage shock absorber to the relay rod, if equipped. Refer to Steering Linkage Shock Absorber Replacement (See: Steering
Damper/Service and Repair) .
8. Install the engine shield, if equipped. Refer to Engine Shield Replacement .
9. Adjust the front toe. Refer to Front Toe Adjustment (See: Alignment/Service and Repair/Front Toe Adjustment) .