
Tahoe 2WD V8-6.0L Hybrid (2008)
2. Install the 2-3 shift solenoid (367A) and the 2-3 shift solenoid retainer (395).
3. Install the 1-2 shift solenoid (367A) and the 1-2 shift solenoid retainer (395).
Notice: Be sure all solenoids are installed with the electrical connectors facing the non-machined (cast) side of the valve body; otherwise, the
solenoids will bind against the transmission case as the valve body bolts are tightened and damage may occur.
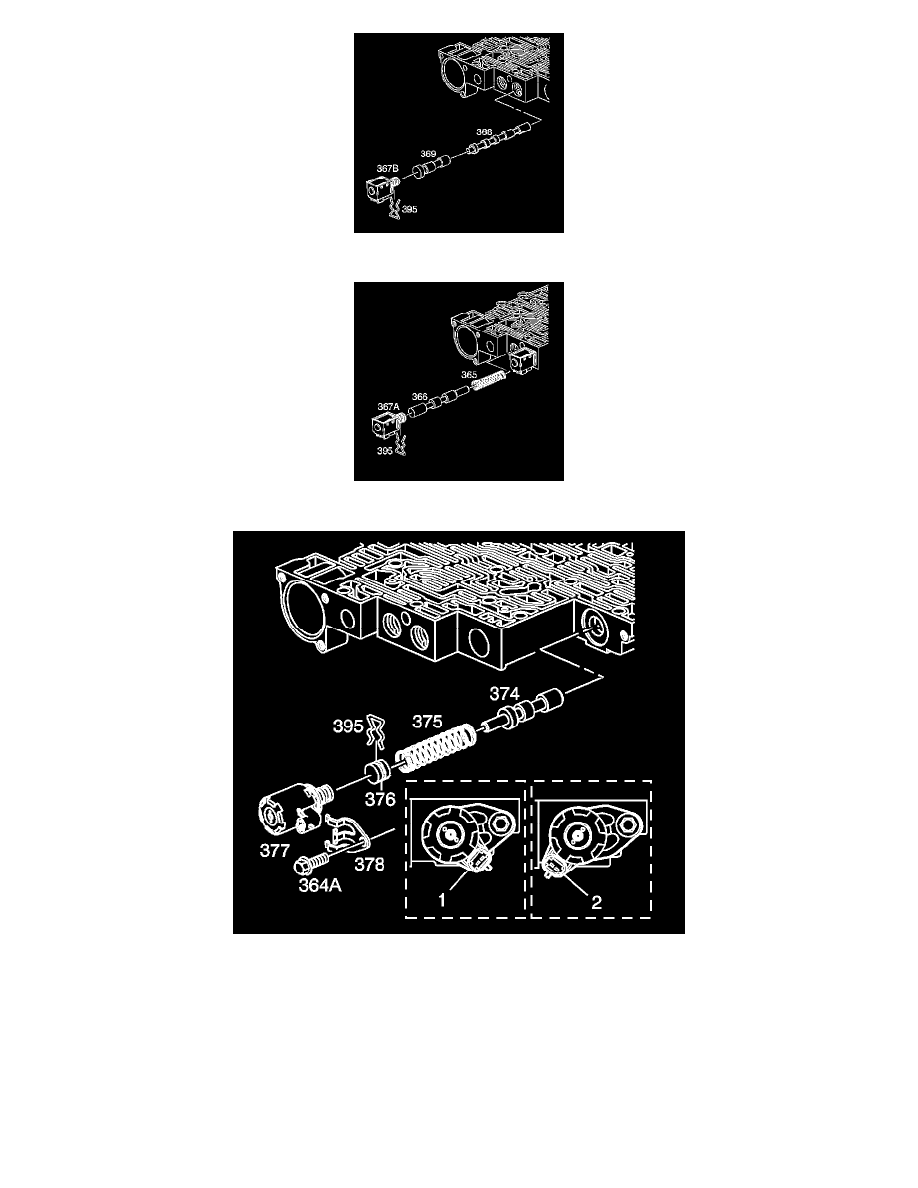
Important: When installing the pressure control solenoid, the electrical connector must be in the position 1 shown. Do not use position 2.
4. Install the pressure control solenoid (377).
Notice: Refer to Fastener Notice .
5. Install the pressure control solenoid retainer (378) and retainer bolt (364A) .