
Tahoe 4WD V8-393 6.5L DSL Turbo VIN S (1995)
Installing Oil Cooler Line Clip Into Connector
-
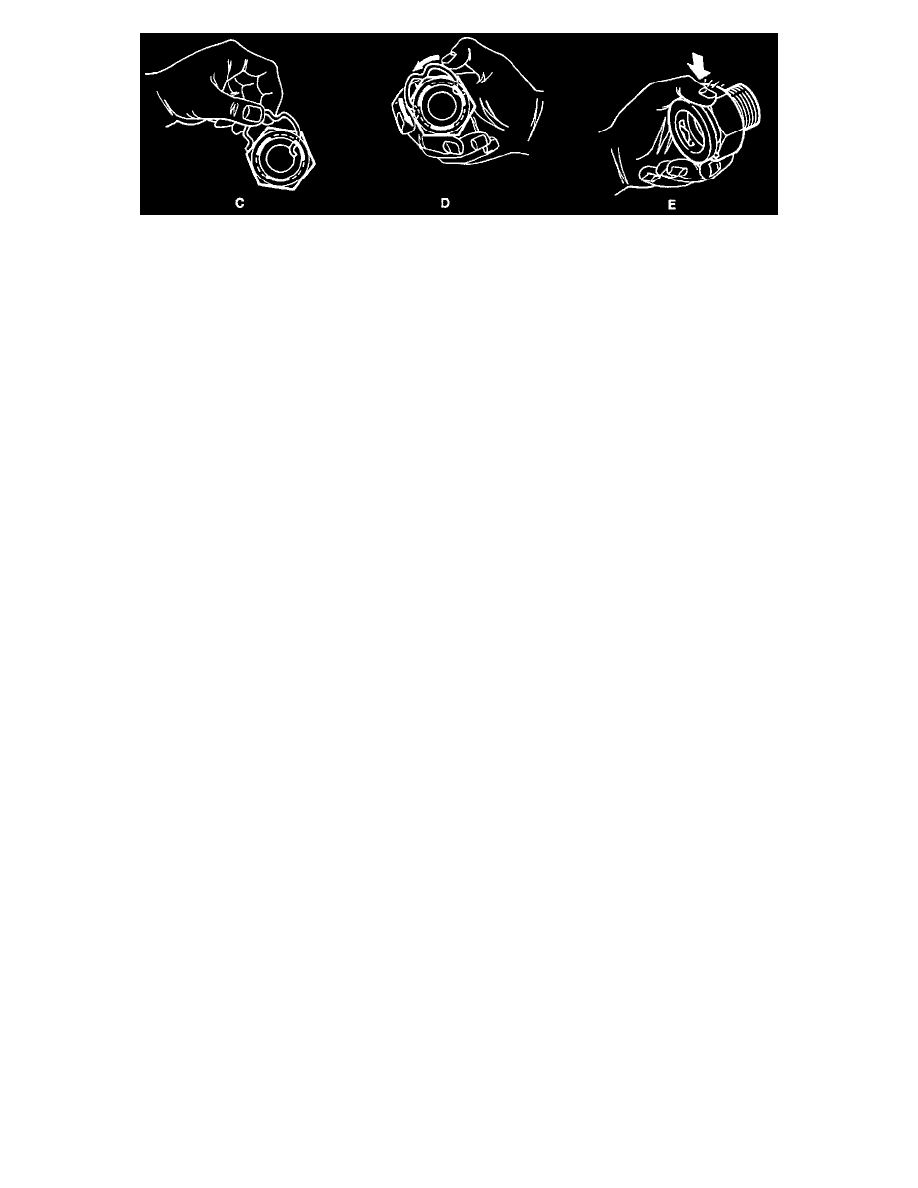
Using your thumb and forefinger, insert the connector clip into one of the three recesses in the connector (C in image). With one end of the clip
engaged in the connector slot, use your thumb and rotate the clip around the connector until it snaps into place (D and E in image).
NOTICE: Make sure the connector clip engages all three slots in the connector. Failure to properly install the connector clip could cause the oil
cooler line to come loose and cause damage to the engine.
1. Install fittings into the block and use teflon sealer GM P/N 1052080 on the threads of the oil cooler lines.
TIGHTEN
-
Oil cooler line fittings to 23 Nm (17 lbs. ft.).
2. Oil cooler lines to the clip or strap.
3. Bolt and clip to its bracket.
TIGHTEN
-
Bolt to 6 Nm (53 lbs. in.).
4. Bolt or nut to bracket or clamp.
TIGHTEN
-
Bolt to 9 Nm (80 lbs. in.).
-
Nut to 13 Nm (115 lbs. in.).
5. New oil filter.
-
Test the flow of oil through the cooler before connecting the lines.
-
If the flow is not restricted, connect the oil lines to the connector.
-
A distinct "snap" should be heard when assembling the oil cooler line to the quick connector. The oil cooler line must be fully inserted into the
quick connector. Check this by applying a forceful pull to the fitting.
-
If the flow is restricted, replace the radiator.
6. Run the engine and check for leaks.