Tahoe 4WD V8-393 6.5L DSL Turbo VIN S (1995)

^
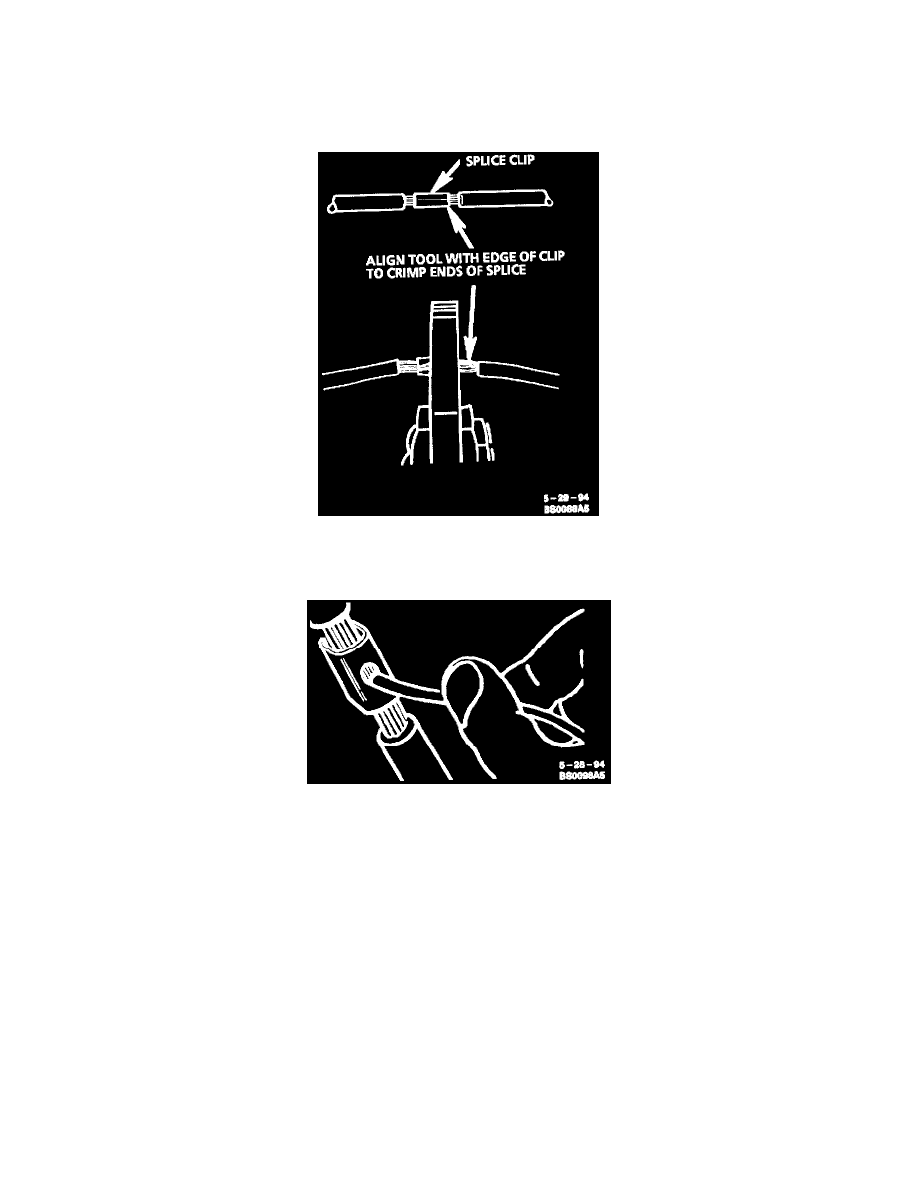
Make sure that the clip and wires are still in the correct position. Then, apply steady pressure until the crimping tool closes.
^
Before crimping the ends of the clip, be sure that:
-
The wires extend beyond the clip in each direction.
-
No strands of wire are cut loose.
-
No insulation is caught under the clip.
Completing The Crimp
Crimp the splice again, once on each end. Do not let the crimping tool extend beyond the edge of the clip or you may damage or nick the wires.
Applying The Solder
Step 5: Solder
Apply 60/40 rosin core solder to the opening in the back of the clip. Follow the manufacturer's instruction for the solder equipment you are using.
