
Tahoe 4WD V8-393 6.5L DSL Turbo VIN S (1995)
Valve Body: Service and Repair
In-Vehicle Service
Control Valve Assembly
1. Disconnect battery ground cable.
2. Disconnect TV cable at throttle lever, then raise and support vehicle.
3. Drain transmission fluid, then remove transmission oil pan, filter and gasket.
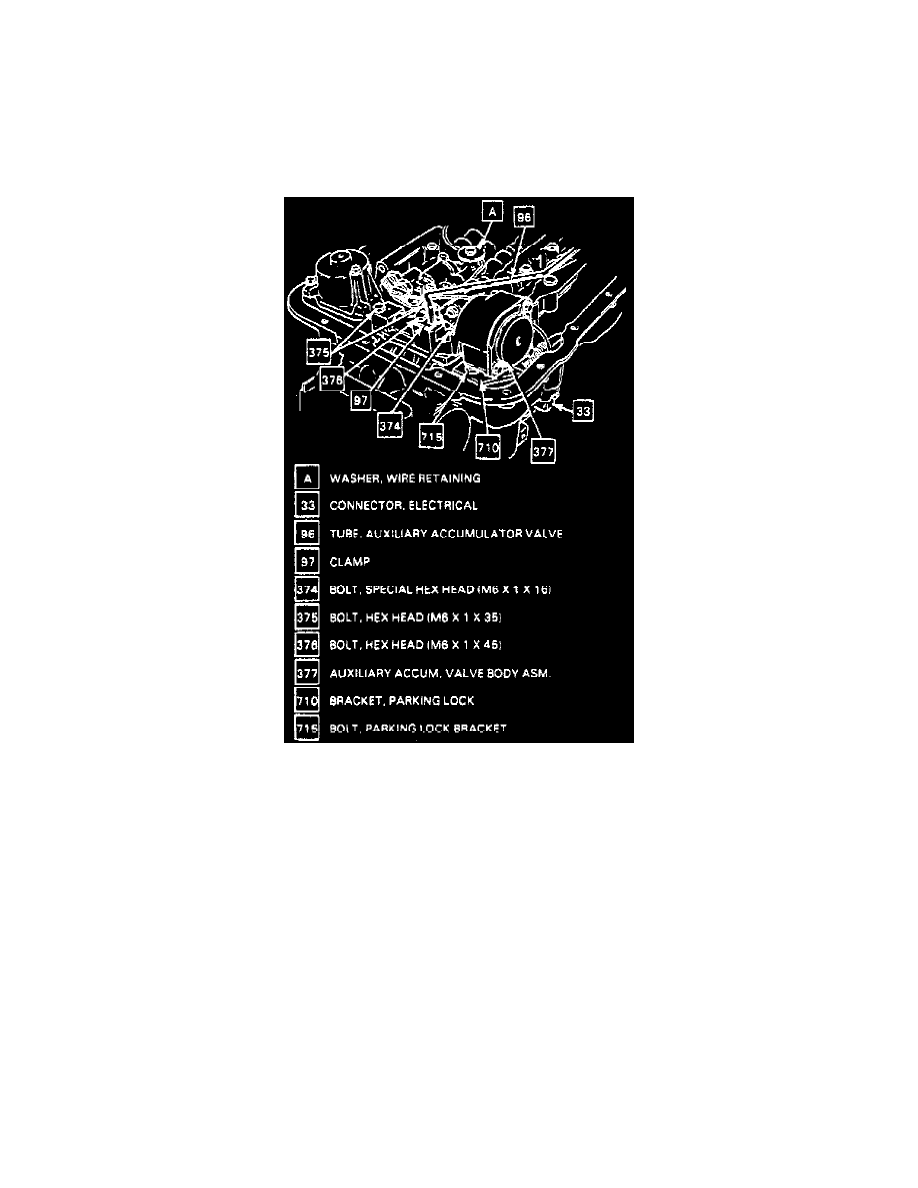
Fig.12 Auxiliary Valve Body Replacement
4. Remove two bolts that attach auxiliary accumulator valve tube to control valve assembly and accumulator valve body assembly, Fig. 12.
5. Remove two tube clamps, gently pry tube loose from oil pump assembly, then the auxiliary accumulator valve body assembly.
6. Disconnect electrical connectors at valve body.
7. Remove detent spring and roller assembly from valve body and remove valve body to case bolts.
8. Remove valve body assembly while disconnecting manual control valve link from range selector inner lever and removing throttle lever bracket
from TV link.
9. Reverse procedure to install.
Auxiliary Valve Body
1. Raise and support vehicle, then drain transmission fluid.
2. Remove transmission oil pan and filter.