
Tahoe 4WD V8-393 6.5L DSL Turbo VIN S (1995)
Differential Axle Housing: Service and Repair
Semi-Floating Rear Axle
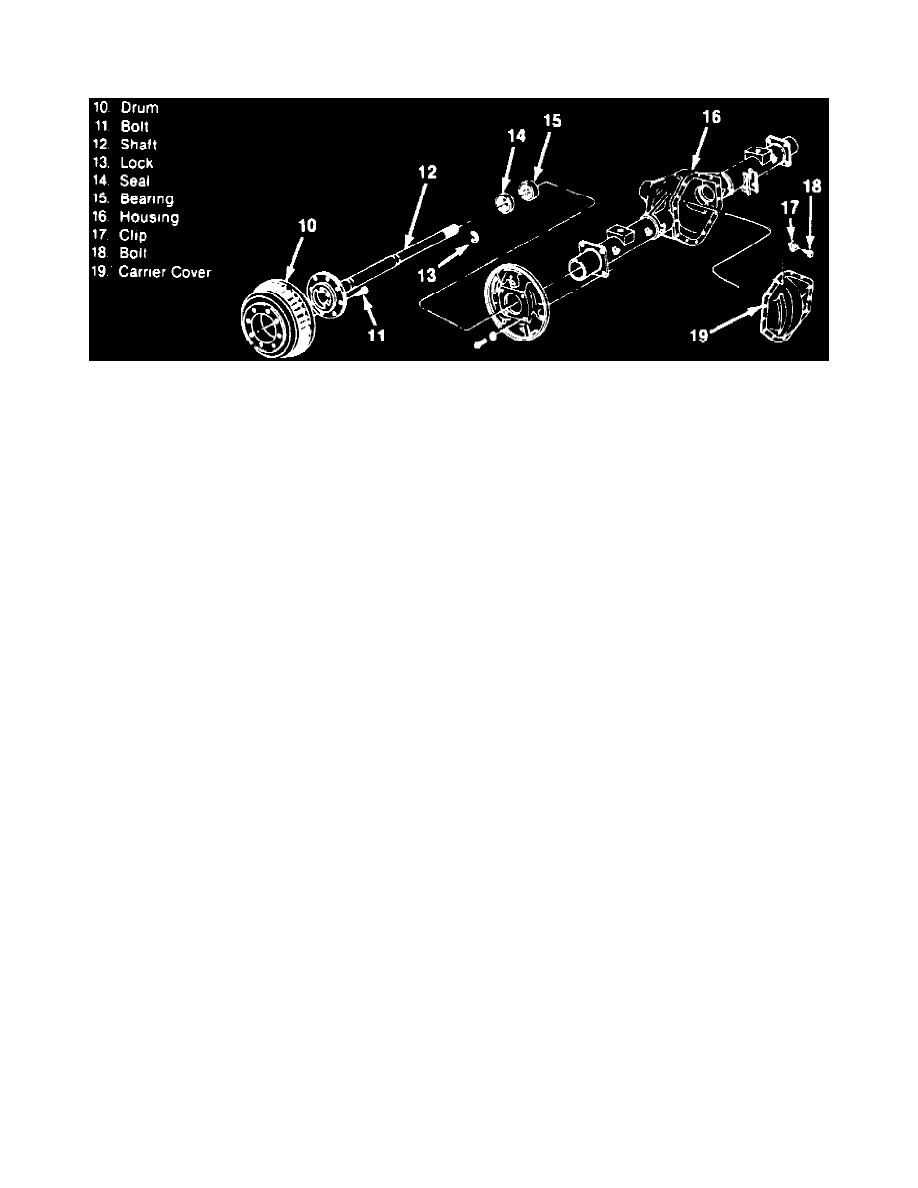
Fig. 1 Exploded View Of Axle Shaft & Housing Components
In this rear axle, Fig. 1, the rear axle housing and differential carrier are cast into an integral assembly. The drive pinion assembly is mounted in two
opposed tapered roller bearings. The pinion bearings are preloaded by a spacer behind the front bearing. The pinion is positioned by a washer between
the head of the pinion and the
rear bearing.
The differential is supported in the carrier by two tapered roller side bearings. These bearings are preloaded by spacers located between the bearings and
carrier housing. The differential assembly is positioned for proper ring gear and pinion backlash by varying these spacers. The differential case houses
two side gears in mesh with two pinions mounted on a pinion shaft which is held in place by a lockpin. The side gears and pinions are backed by thrust
washers.
1. Raise and support vehicle. Using a suitable jack, support rear axle assembly.
2. Drain fluid from axle assembly.
3. Mark driveshaft to flange, then disconnect driveshaft and tie driveshaft to side rail or crossmember.
4. Tape bearing cups to prevent loss of the rollers.
5. Remove wheel and brake drum or hub and drum assembly.
6. Disconnect parking brake cable from lever and brake flange plate.
7. Disconnect and cap hydraulic brake lines from connectors.
8. Remove shock absorbers from axle brackets.
9. Disconnect vent line from vent fitting.
10. Remove height sensing and brake proportional valve brackets.
11. Remove nuts and washers from U-bolts.
12. Carefully remove U-bolts, spring plates and spacers from axle assembly.
13. Lower axle assembly from vehicle.
14. Reverse procedure to install.