
Tahoe 4WD V8-393 6.5L DSL Turbo VIN S (1995)
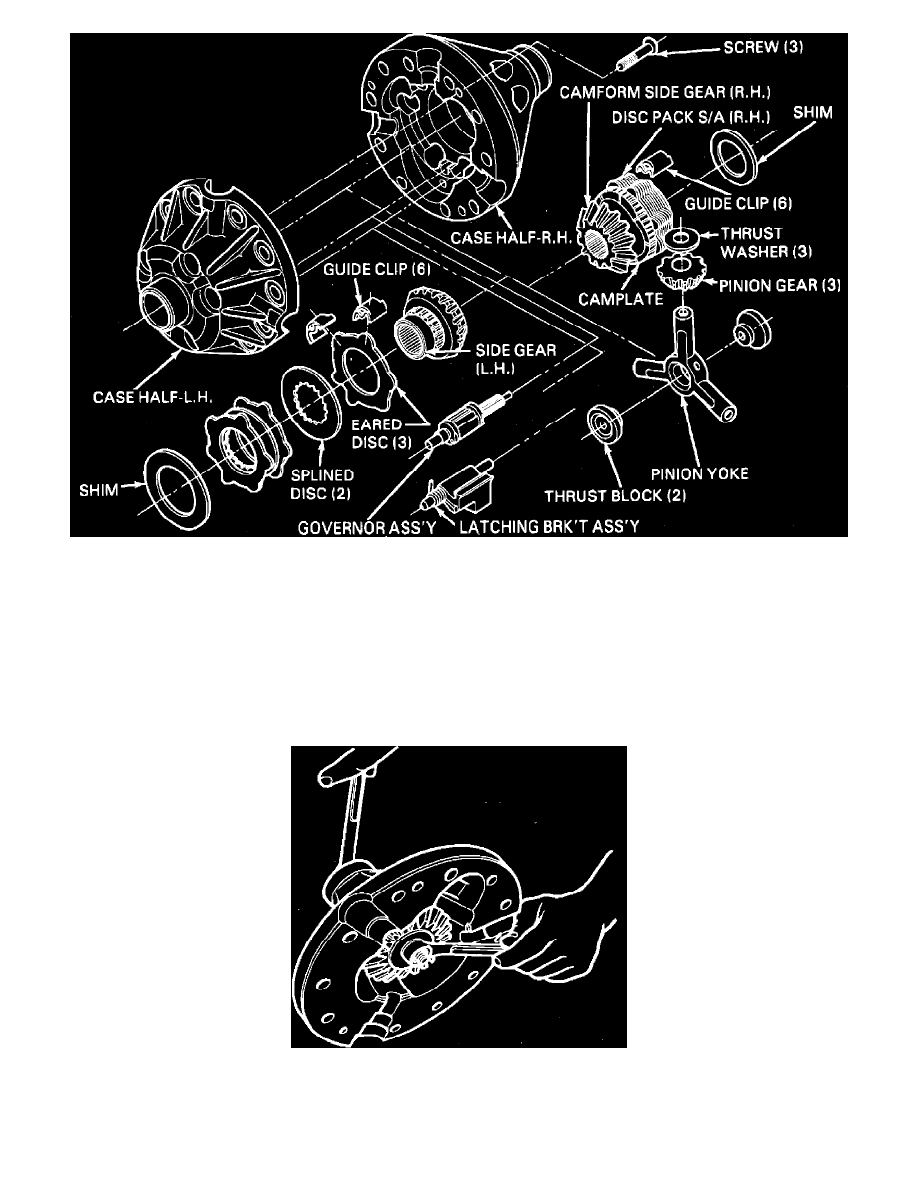
Fig. 2 Eaton locking differential exploded view
3.
Install eared and splined clutch discs on side gear, starting with eared disc as shown in
Fig. 2. If components are reused, they must be installed in
original position.
4.
Install selected shim on side gear.
Cam Gear Shim Selection
If cam gear is replaced, or if original cam gear shim thickness cannot be determined, shim must be selected to maintain proper backlash with
differential pinions using following procedure.
1.
Install 6 guide clips on cam gear clutch ears, then insert cam gear assembly into right case half.
Fig. 5 Cam/side gear installation for assembly clearance measurement. Eaton locking differential
2.
Clamp cam gear assembly securely in case pocket using suitable bolt, nut and washers as shown in
Fig. 5.
3.
Install all 3 differential pinions and thrust washers on yoke and firmly seat pinion and yoke assembly in case, tapping assembly with suitable
hammer.